Maintaining Your Mountain House is about what you need to be doing to help your house perform better and be in better condition year-round, as well as last longer and be more comfortable.

Most people who build or buy mountain houses have this idea that they are going to save a lot of money by turning their HVAC thermostat way down, or even turning off power to their house when they don’t intend to be there for several weeks or months.
Bad idea.
Why? Let’s put it this way: look out the windows of your mountain house and look closely at the trees surrounding it. Look at the bark on the trees. What do you see? Moss? Mold? You better believe it. Now then, if the inside of your house is the same general temperature and humidity as the Great Outdoors, why would you think that the inside of your house is going to remain pristine with your heat and air shut off? And no dehumidification whatsoever? Yes, some people actually turn off their dehumidifiers when they leave! Not good. Do you think the dehumidifier is there to make you feel good? Not really. It’s there to help control the ambient humidity level in the house, basement and/or crawlspace. Never, ever turn that off.
Okay, so it is a very bad idea to turn off your Heating, Ventilation and Air Conditioning system. Ever. Don’t do that. And keep the dehumidifier always on.
Because, if you don’t keep them running, even at some lesser level, the interior of your house is going to get severe mold infestation that can lead to fruiting body fungi that can literally eat the wood structure of your house and cause it to rot and possibly fall down. Very bad things that can damage your health and the health of your loved ones, not too mention destroy the huge investment you have in your house. Silly to focus on saving a few pennies a month on an electrical utility bill, when you could be ruining your big investment (the house itself) because of your misguided idea that you are “saving money.” No you’re not.
You’re creating horrible conditions for the interior of your house that can aggravate COPD, rot your house and possibly make it fail structurally, as well as lead to bad smells that ruin your enjoyment of your house, as well as significantly destroy the house’s sales value, when you choose to sell it (note: most houses are sold about every 7 years, regardless of the intent of the new buyers/builders).
According to Merry Soellner, RSPS, Real Estate Broker, Cashiers, NC: “When I walk a potential house buyer into a house that has had its heating and air-conditioning and dehumidifiers turned off, or turned at too low of an operating level, the house smells bad. Obviously mold is growing, and most buyers take one whiff and turn around almost immediately and say ‘NOT INTERESTED’.”
In other words, the $50 or so you think you are saving in power bills each month is not only ruining your mountain house, you are also directly damaging your chances of selling your house. Don’t blame your Real Estate Broker. That’s on you. No one wants a moldy mess of a house. Human physiology is hard-wired to recognize harmful things and mold is one of those bad smells that tell anyone that this house is damaged.
All this preamble so far is so that you will listen and comply with this first recommendation for mountain house maintenance:
(continued below):
1. KEEP YOUR HVAC SYSTEM & DEHUMIDIFIERS ALWAYS ON
Sure, it’s okay to turn them back a little, but don’t overdo that. In winter, don’t set your thermostat any lower than perhaps around 65 degrees or so. In the summer, don’t set the temperature any higher than around 78 degrees. And keep dehumidifiers always on in basements, crawlspaces and other locations that you have recognized would otherwise be chronically damp. Set the dehumidifier at around 45%. That will probably mean it will always be running. Its not the end of the world. It doesn’t use that much power. And in basements and crawlspaces, have another fan on the other side of the space, at least 3′ or so away from walls, firmly set into position (so it can’t fall over) and pointed toward the direction of the dehumidifier (which should be closer to the crawlspace entrance for maintenance). It wouldn’t hurt to have a 24 hour timer in the receptacle for the fan. Set it so that the fan comes on for 1/2 hour every hour. That should be adequate to push the air around. A 20″ box fan should work well (for a normal size house, not a castle). Those sell for about $19 at WalMart. Make sure your receptacles in such a location are GFCI (Ground Fault Circuit Interrupter).
Regarding comments in this online post about “always on”, it is intended that you use automatic thermostats that allow you to program temperature settings that will automatically turn on the AHUs and Heat Pump(s). It is not intended that you override the automatic settings and actually force the system to constantly be pumping air.
MAINTENANCE NOTE: check your HVAC return grilles perhaps once a month. Look at the filters. If they’re dirty, replace them. Have at least 2 replacement filters on hand in your house for each filter section in the HVAC system.
(continued below):
Use the newer kind of filters that have allergen resistance and that are electrostatically charged to catch more dust particles. Before you replace the filters, take some white paper towels or clean washcloths, dampen them, then rinse out the water, then wipe the surfaces of the inner duct (which are usually metal) as far as you can reach into the RA (Return Air) duct. This keeps dust in your HVAC system to a minimum and keeps it fresher smelling, too. Also, consider paying an HVAC subcontractor perhaps once a year to come to your home and check, clean and lubricate your AHU (Air Handler Unit) and outdoor Heat Pump (or condenser).
The condensate line for your AHU should be insulated with some sort of synthetic rubber insulation completely. From where it exits the condensate drainpan to where it hits the foundation wall. Otherwise, the super-cooled water in the drainline will condense atmospheric moisture on its surface and drip down onto your floors and other surfaces below it, putting moisture back into the space from which you are trying to remove it. And this insulated condensate drainline should have a top access cap (also insulated) that you can easily remove. Perhaps once or twice a year, you should pour maybe a cup of 50% water/ 50% household bleach down this drainline, to keep mold from growing and clogging the pipe. Make sure this and all condensate lines only slope down and away from HVAC equipment and toward the outside wall to the exterior.
2. CRAWLSPACE ENCAPSULATION & DEHUMIDIFICATION
This firm has several online posts about the benefits of encapsulating your crawlspace. Highly recommended. That stops most of the moisture in and under the soil in your crawlspace from migrating up into your house, along with all sorts of creepy-crawlies, like ants, termites, cockroaches, lizards, snakes, chipmunks, squirrels and raccoons. You’d be amazed what creatures can slide through gaps in construction and then dig up through raw, unprotected earth to get into your house. Encapsulation is the application of a polyethylene or vinyl sheet, taped together using special adhesive backed tape, over the earth and up the interior crawlspace walls. The upper edge near the top of the walls are typically sealed with construction adhesive. No outdoor ventilation. The crawlspace is conditioned (by Code, it has to be conditioned when sealed) by dehumidifiers and a fan(s). Nothing else in the house does more to keep your house at the proper dehumidified level and to keep bugs and other monsters out of your house than encapsulation of your crawlspace.
Note: the dehumidifiers’ condensate line(s) should be hard-piped through the foundation wall to the exterior. That way you don’t have to manually go downstairs every few hours and go through the hassle of removing and emptying a condensate bucket. That gets old in about a day. And you can’t do that when you’re not there, anyway. Keep the dehumidifier on. It has an automatic setting that will cycle it off and on, after it reaches the set point.
MAINTENANCE NOTE: you need to have a top access cap into the condensate drainline. Plumbers tell homeowners to typically pull off the cap and pour a 50% water/50% household bleach down that condensate line perhaps once or twice a year, to keep mold from growing and clogging that line. And make that line perhaps 3/4″ in diameter. Use Schedule 40 PVC, not a garden hose, which is smaller, softer and tends to clog much easier. Make sure the condensate line is downward flowing. Don’t attach anything else to it and don’t allow it to drain into the crawlspace or basement (that would be counter-productive, wouldn’t it? Merry has seen that). Also, perhaps once a month get to your dehumidifier and clean the filter. Take it outside and shake it off. You may need to go to a sink and rinse it off and shake it out before inserting it into the dehumidifier.
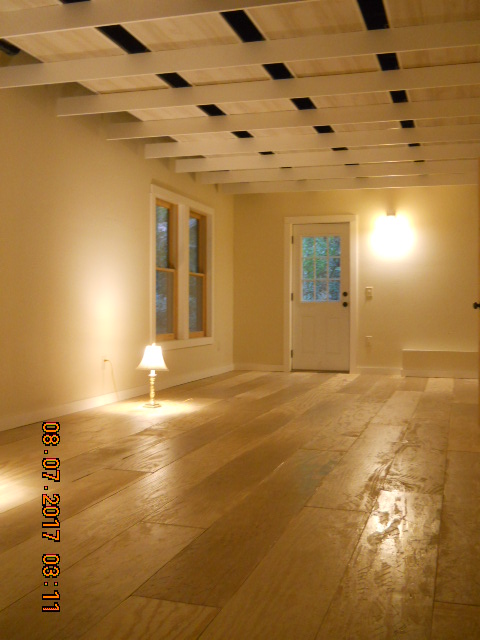
3. WOOD FLOORING
All of the items above directly impact the condition of your wood flooring. If, for instance, you turn off your heat and air for months at a time either in the summer or winter, for example, your wood flooring will loose and add moisture from the ambient humidity in your house, causing it to shrink and swell. This can lead to unexpected consequences. Too much swelling and the wood flooring can push into the surrounding walls and then warp and buckle, ruining the functionality and appearance, which could be quite costly to repair or replace. Also, mold spores (which are everywhere) would be encourage to grow in hot, humid situations, which, given enough dampness could lead to undesirable growths which could possibly rot the floors and the structure on which they lay.
In other words, the dehumidification and HVAC constancy that you are seeking in Items 1 & 2 above also benefit the condition of your wood flooring. And once again: look at the trees outside your house. Do you really want that mold and moss that is on them growing on your interior wood floors?
MAINTENANCE NOTE: this really depends on the finish of your wood flooring. #1, keep the humidity level as constant as possible, per Items 1 & 2 above.
Regarding finish maintenance: some woodworking crews have indicated that varnish might be a more durable finish for wood flooring, as it is supposed to be up to 10x harder than polyurethane. But if you choose poly, consider using oil base for better protection and absorption. But make sure you have ample ventilation everywhere in the house or get a hotel room for the night to avoid inhaling the fumes.
Also, custom distressing of the wood surface before finishing is in vogue, because if you batter the flooring with a chain, for instance, all of the small dents left serve to conceal other dents it might receive from furniture, high-heeled shoes, pet claws and other damaging sources.
Regarding exterior wood flooring: it really depends, based on the species of wood, method of installation and initial coating. If it’s PT (Pressure Treated) wood, this doesn’t mean it will remain permanently resistant to rot. It’s outside. It’s still wood. The preservative treatments help it, sure, but after about a year (after installation), after the PT wood has dried out more, it is a good time to stain it. Either semi-transparent oil base or solid stain. That should help it last much longer than “going bare.”
4. WALL SIDING & CLADDING
The first and best line of defense for your walls is your roof overhang. Typically 2′ minimum, but the more the better. Some log home manufacturers ask for 6′ overhangs to protect the logs, which can easily rot from rain. Coordinate carefully with your Architect and Structural Engineer, as high mountain winds can damage overhangs that are not properly engineered to resist mountain force winds. The main thing to remember with walls in a mountain house: protect them as much as possible so you won’t have to paint and repair them as often. This architectural firm has seen average exterior painting for an average sized home cost $10,000 or more. That’s a chunk of change to be paying out. Better to protect walls as much as possible so that’s not required as often.
However, you will need to re-stain or repaint your exterior cladding at some point, with something to protect the surface from absorbing moisture. Even stone and brick benefit from special clear surface coatings to help reduce moisture absorption. Consult your Architect for guidance. For Hardie siding, use paint types recommended by the James Hardie company, after removing any mold. For wood, this firm has better luck using stains: either semi-transparent or solid stain, as with stains, you usually can stain over the old stain. With paint, you may need to first sand the surface. Adhere to precautions regarding friable materials that can damage your lungs and eyes before treating or preparing such surfaces. But some kind of stain, paint (or other liquid coating) is the probable maintenance treatment on wall cladding of most materials. Failure to protect and maintain your cladding will allow moisture to penetrate it, which can then get into your wall framing, contributing to mold and rot of your structural frame. Pay attention to intersections, using quality exterior SEALANTS (not “caulk” which is an interior material) at joints, to protect the wall substrates from moisture penetration.
5. HOT WATER HEATERS
We all like to forget about this thing. The HWH (Hot Water Heater). It sits complacently in your basement or crawlspace, churning out hot water faithfully until it dies.
MAINTENANCE NOTE: You can extend its life by periodically turning it off while you drain away sediments from the tank, using the garden hose threaded attachment at the base of the unit. Make sure the HWH is turned off while doing this, so you don’t burn out the elements (if it is electric). When in doubt, pay a State licensed Plumber to do this for you. That’ll be cheaper than replacing the entire unit. And don’t turn the valve to drain the tank until you have a garden hose connection the drain port all the way to the exterior of your house. Otherwise, you could flood the room.
There are other things to know about HWHs. Like having an insulation jacket around it, to conserve energy. Also, there is supposed to be an emergency Pressure Relief Valve (PRV) at the top, so if the internal pressure exceeds a certain point this valve trips, so the HWH doesn’t explode and kill you. And this PRV should have a drainline that goes down to the base of the unit on the outside of the unit. There should be a drainpan under the HWH. The PRV drainline should drain into this drainpan. The drainpan should have a drainline that take any water draining into it to the outside of the house (not into the crawlspace or basement). Nothing else should contribute and drainage into this drainline. It should drain down and away from the HWH drainpan.
6. ASPHALT DRIVEWAYS
We’ve all seen the steady degradation of outdoor asphaltic concrete surfaces in our streets and driveways. Usually about 1-1/2″ of asphaltic concrete is rolled over a 6″ thick substrate of crushed gravel (angular granites being among the best). You can seen the bituminous oils leeching out of freshly rolled asphalt, on the surface. This continues for perhaps 6 months or so. Then, depending on your climate, you will have the Sun’s brutal UV rays and winters harsh snow, ice and salt. When cracks open up the surface and the snow and ice melt into the cracks and get down into the body of paving, then it freezes, the ice expands to 110% of its initial volume and pushed the cracks wider, and that cycle keeps on until the cracks become ruts and the ruts become potholes and you need to repair or repave.
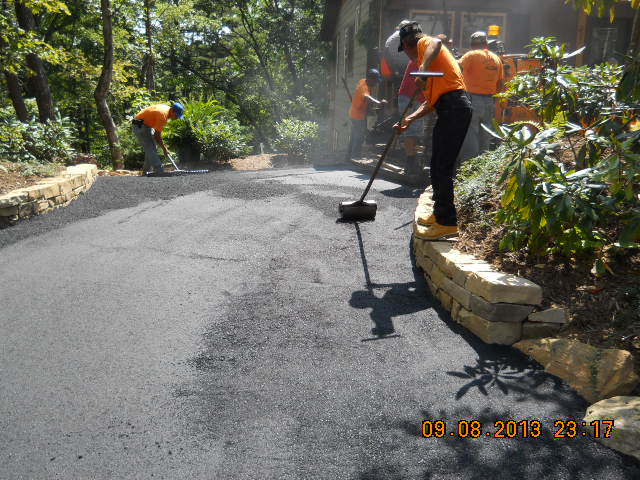
MAINTENANCE NOTE: it has almost become a joke: where traveling bands of Gypsy workers knock on doors, offering to recoat your driveway and it’s nothing more than black paint. However, the use of quality asphaltic sealers can help protect your driveway. First, a good quality asphaltic sealer (in a tube, usually, like caulk or sealant) is used to fill any cracks in the surface. Then, a quality bituminous seal coat is squeegeed (a thick, viscous bituminous sealer, not just paint), using perhaps a 3′ wide long-handled squeegee (not a paint roller) over the surface of the entire driveway, filling all cracks and crevices. The best time to do this is perhaps 3 years to 6 years after the driveway was first installed. BEFORE there are wide cracks. And in the fall before winter. You will see small, hairline cracks of less than 1/8″ to 1/16″ wide. That’s a good time to install a quality seal coat. That does 2 things: helps seal the surface from losing more bituminous oils, and also bridges cracks to help keep winter snow, water and ice out from the depth of your asphaltic concrete, to keep it from fracturing.
And that’s probably enough for this 1st edition of Mountain House Maintenance.