Mountain View Meadow House is the house of the Senior Staff Architect for Home Architects and his Real Estate Broker wife. These photos show in chronological order, the construction.
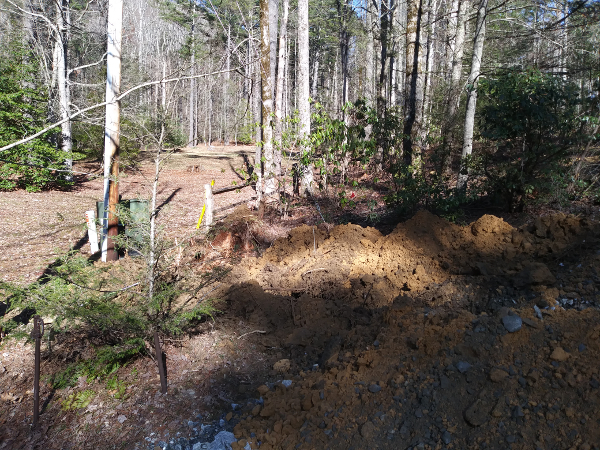
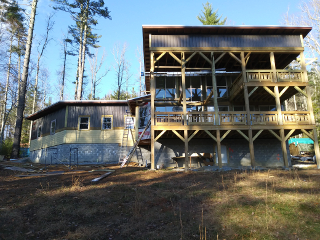
1 Clearing (on or about 2nd month, 2018)
![]()
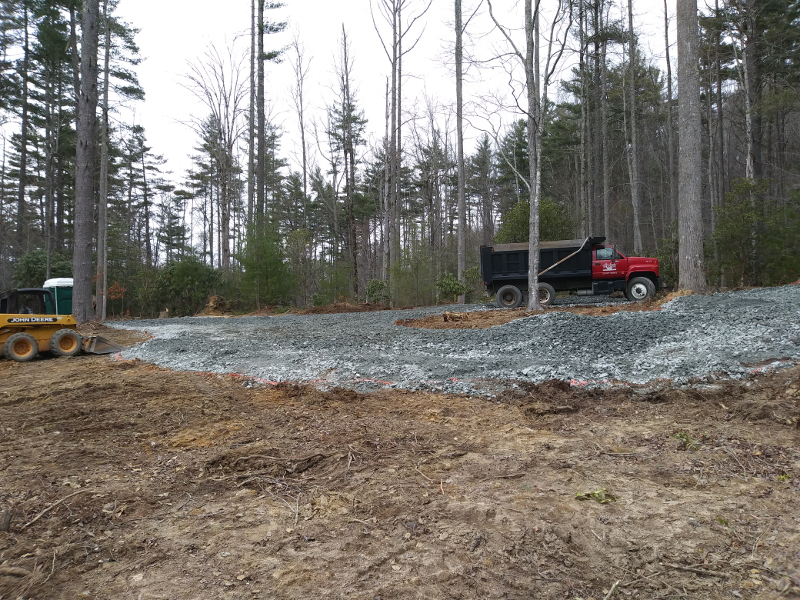
2 Gravel Drive Sub base and Silt Fence 3-7-2018
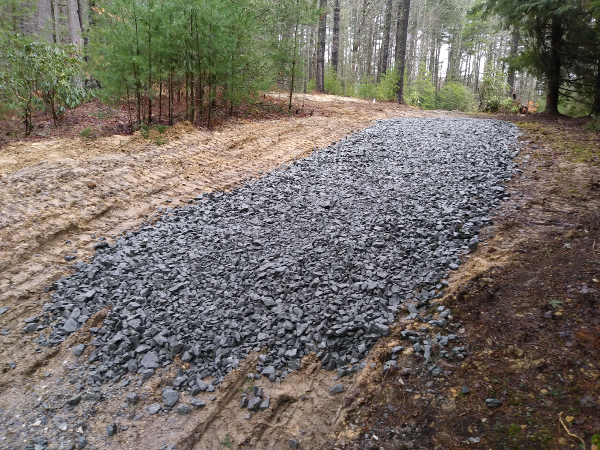
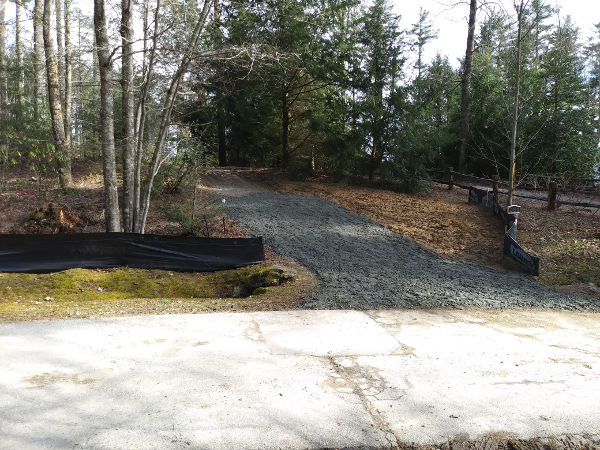
3 Gravel Road & Circle
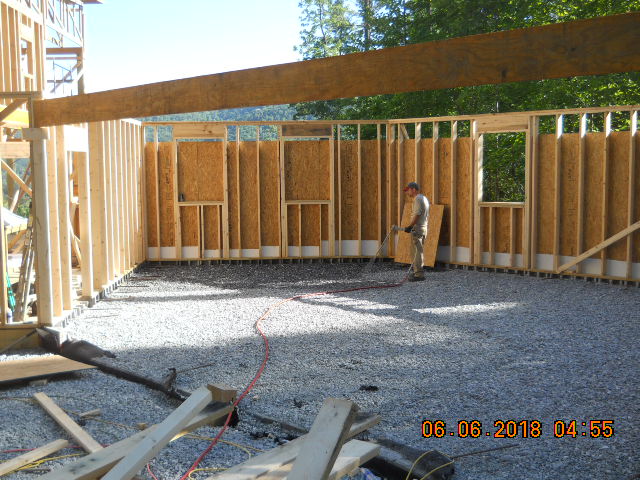
4 Electric Service Entrance 3-12-2018
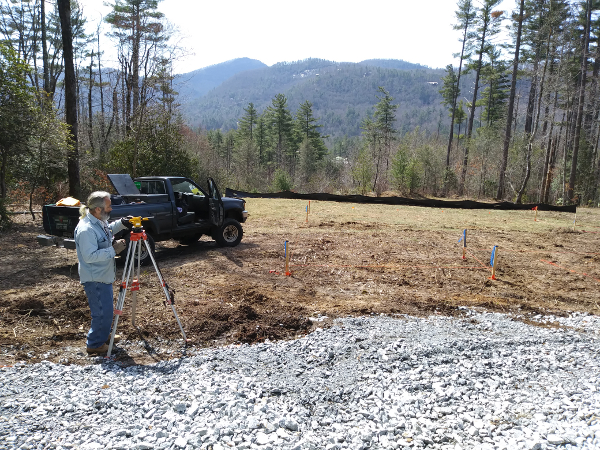
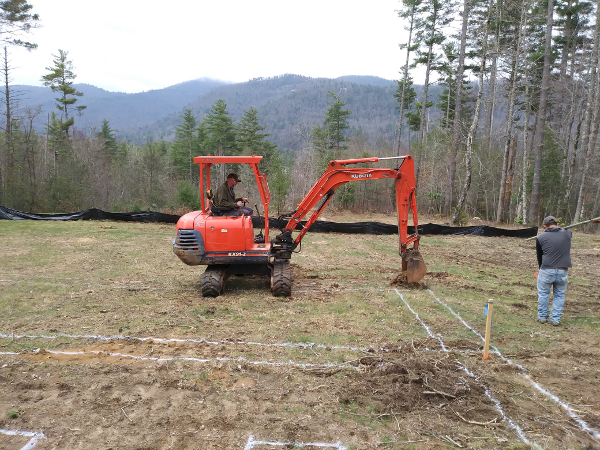
5 Survey of Foundation Footings 3-13-2018
Subcontractors begin.

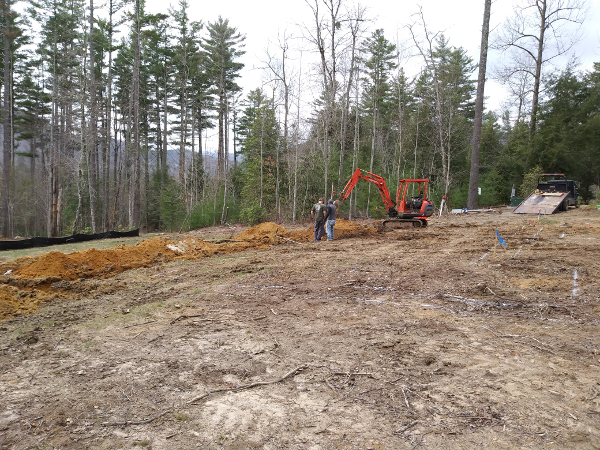
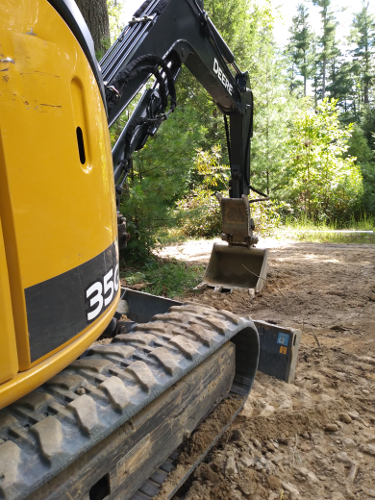
6 Footing Excavation 3-28-2018
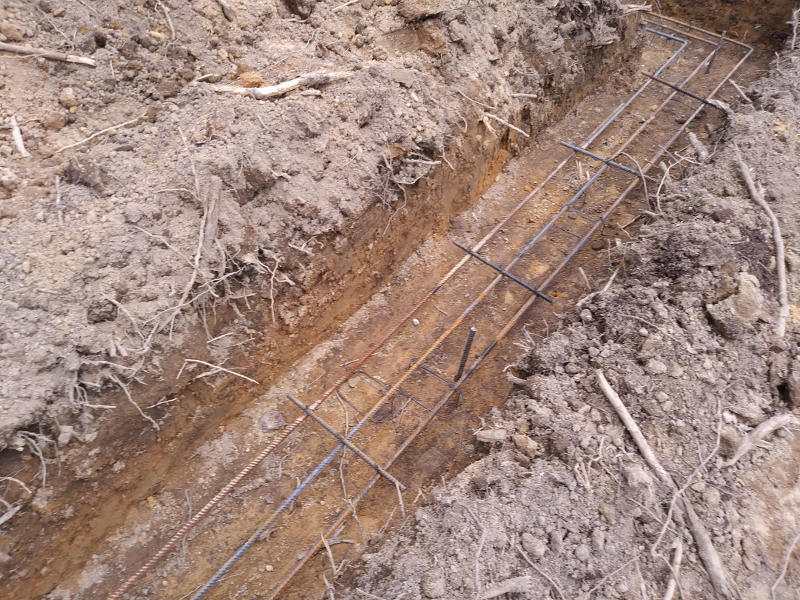
7 Footing Rebar Steel

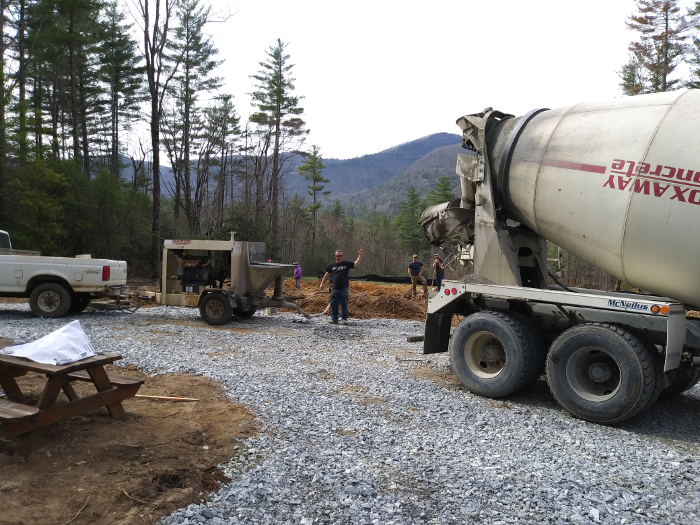
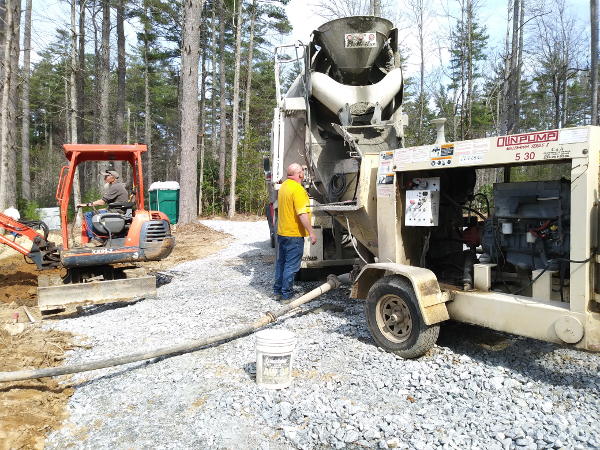
8 Pour Concrete Footings 4-2-2018


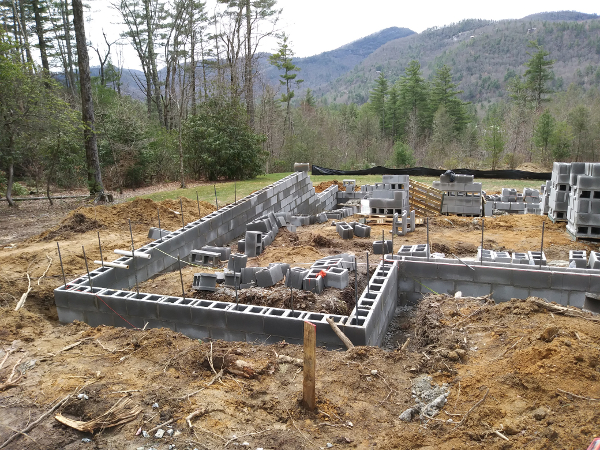
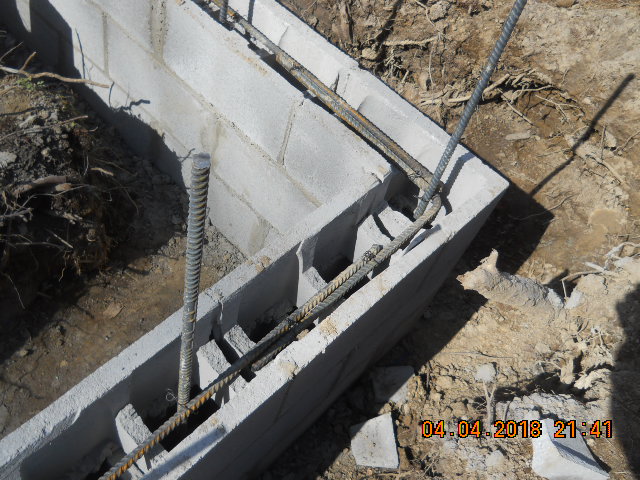
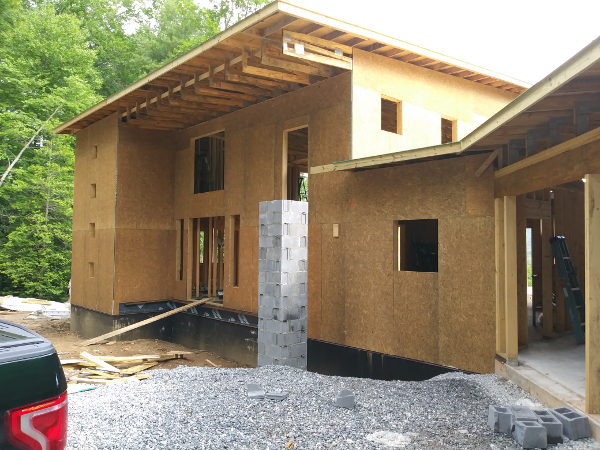
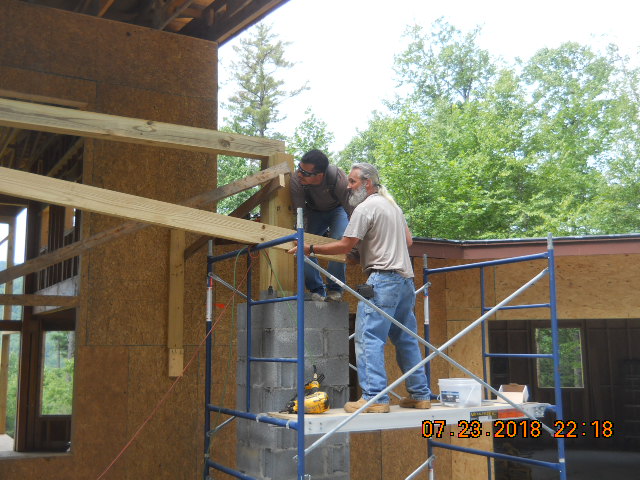
9 Concrete Block Foundation Walls 4-4-2018

digital GPS laser transit precision nailing of foundation wall corners into top of footings.

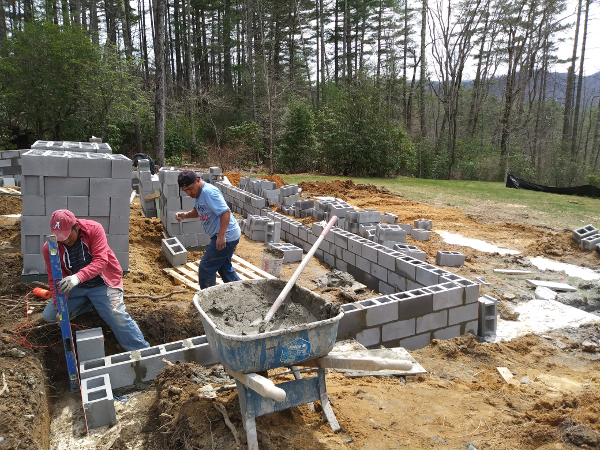
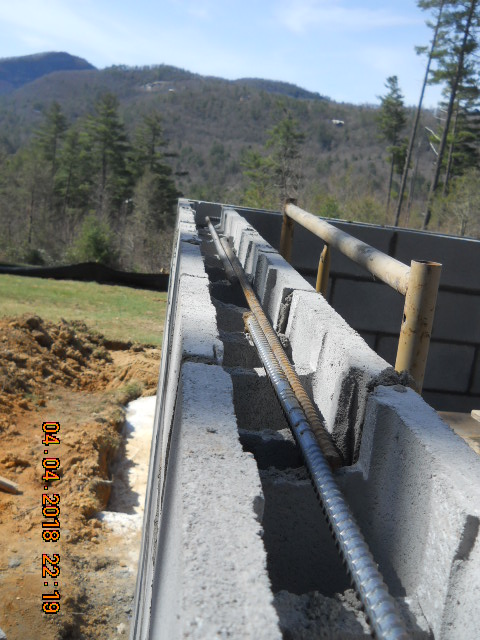
10 Grout CMU walls 4-12-2018
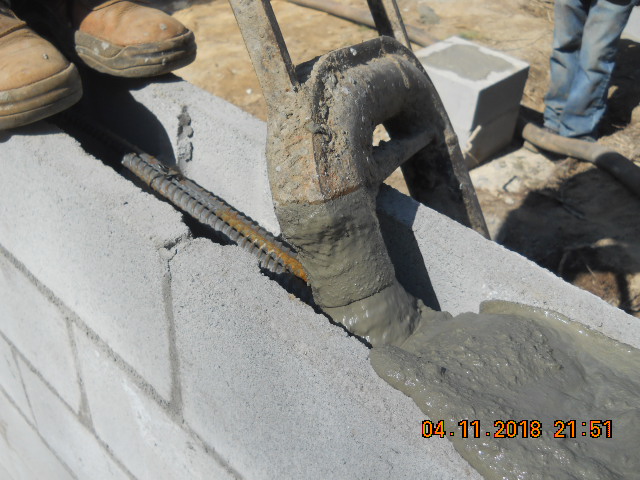

Note that the Architect had the concrete block crew cut the top blocks (header blocks) to be 5-1/2″ wide at the top, so that the 2×6 stud walls would have foundation wall exactly their thickness on which to sit. This simplifies the framing work.
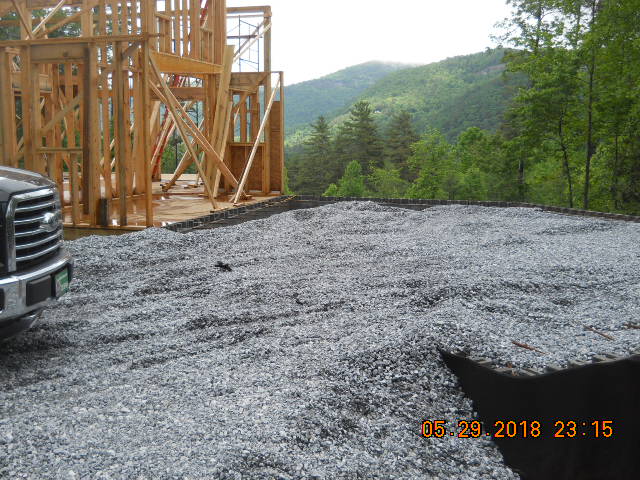
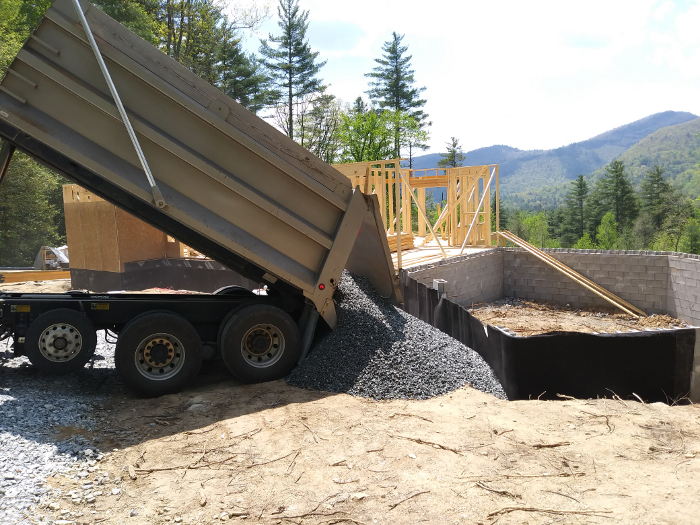
11a Garage Gravel Fill 5-12-30-2018
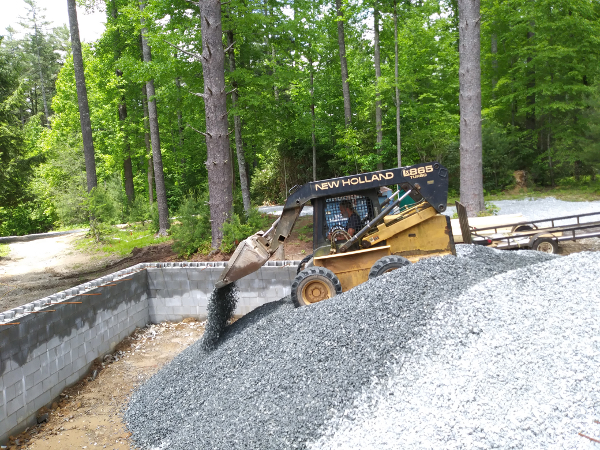
Bob the Builder doing a swell job with a skidsteer, filling in the garage foundation walls with #57 gravel, as specified by the Architect.
The Architect also required external bracing around the foundation walls (until the concrete garage slab cures and holds the foundation walls together).
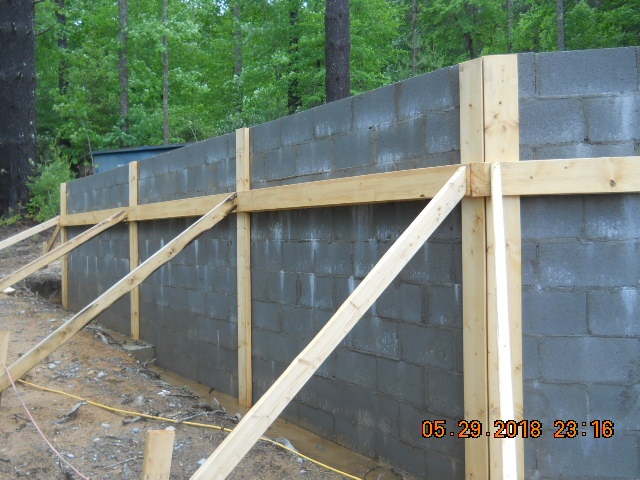
This insures that the 170 tons of gravel doesn’t push over the foundation walls.
This is the garage area finally filled with gravel. Look above in section 10 and you’ll see the rebar hooks specified by the Architect, protruding from the top of the foundation walls, to engage the to-be-poured concrete slab. 28 days after pouring, the concrete will have reached most of its strength and will successfully bond the foundation walls together. After that, the exterior angled bracing can be safely removed.
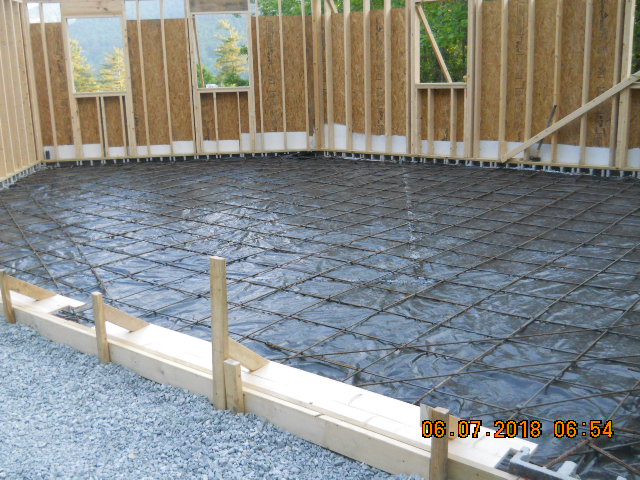
11b Garage Slab Pour
Note: while this was planned earlier, it happened later. See farther below…
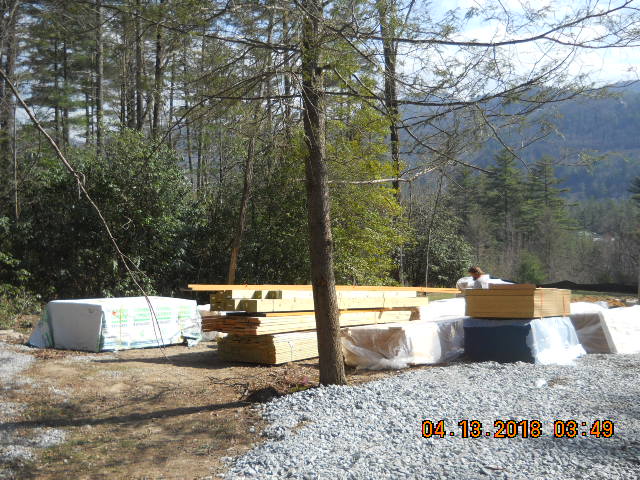
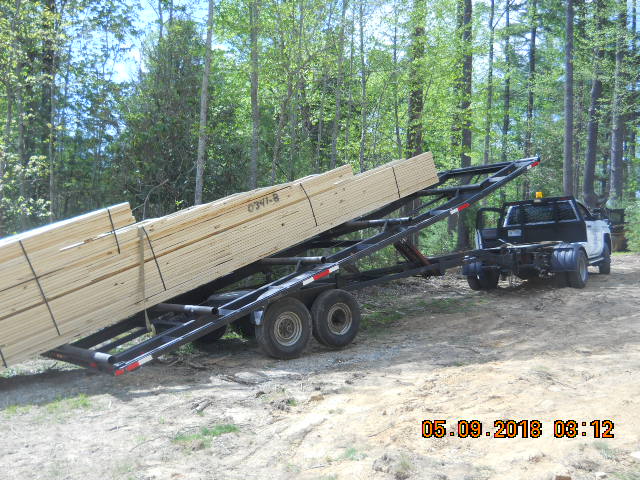
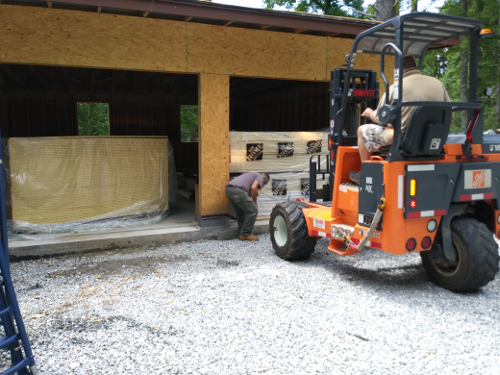
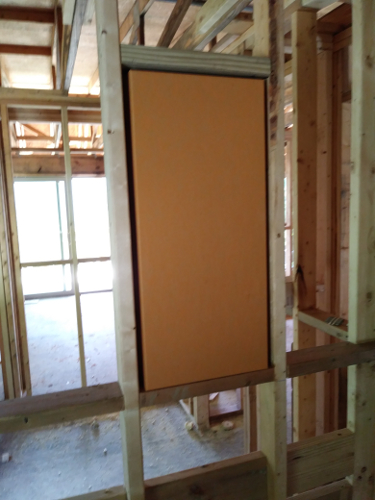
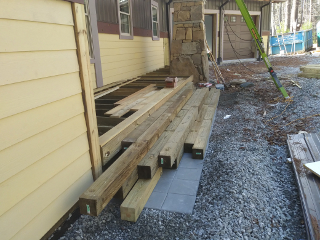
12 Framing Materials Delivery 4-13-2018


Builders First Source carefully unloaded and placed each bundle of lumber, using Moffet loaders, not dumped like most deliveries from other companies.
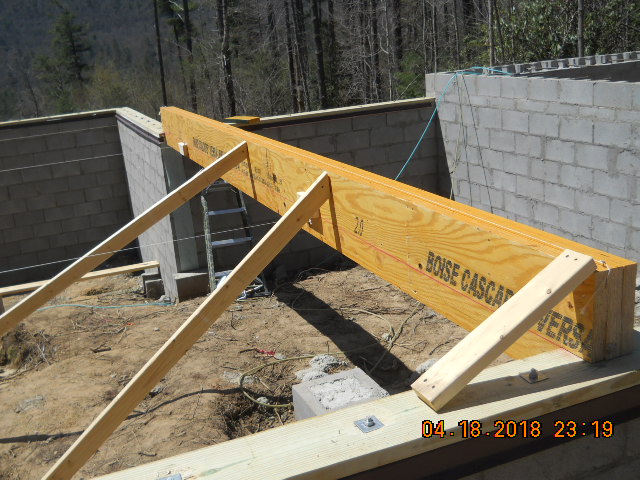
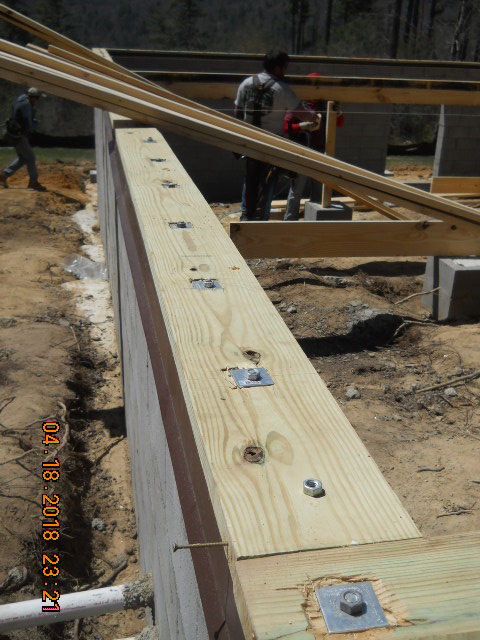
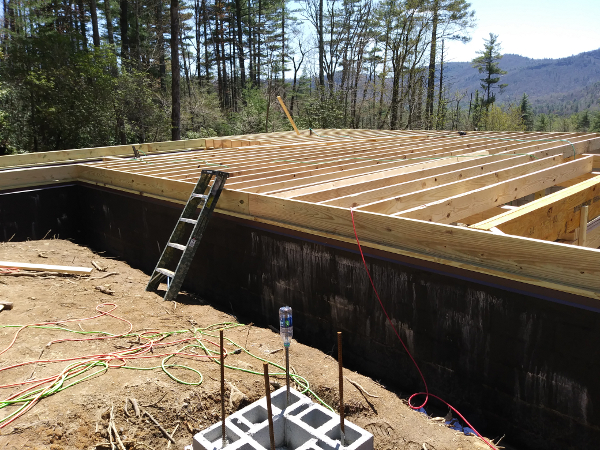
13 Framing: Floor Girders 4-18-2018

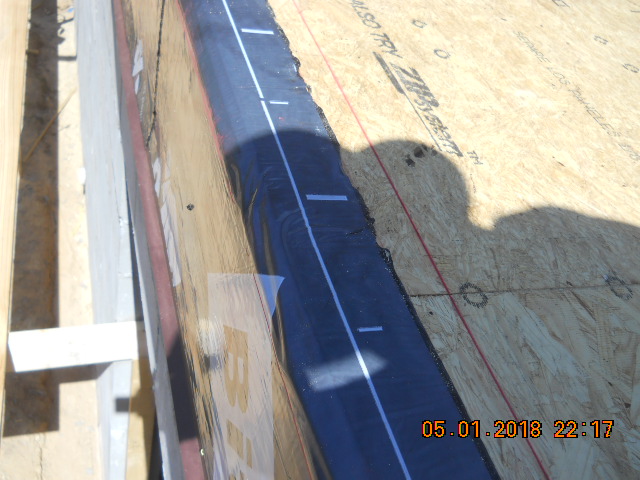
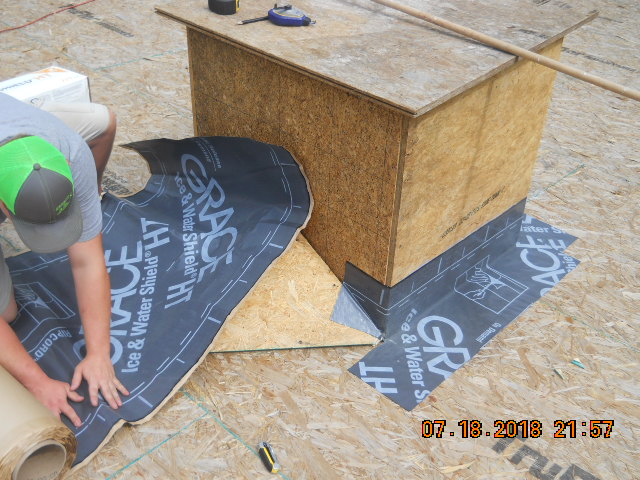
14 Waterproofing 4-20-2018


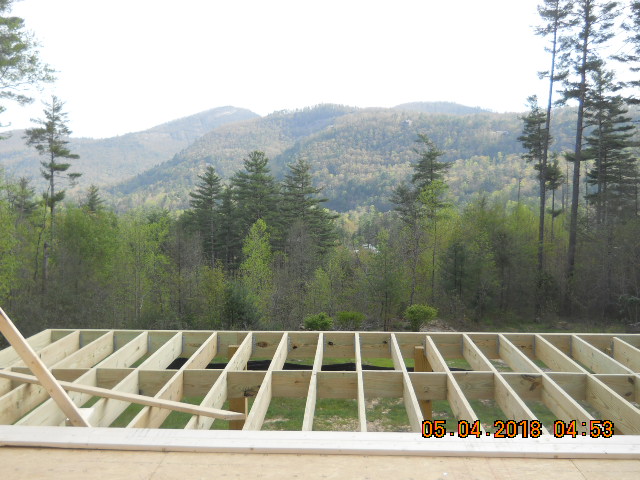
15 1st Floor Joists 4-28-2018
16 1st Floor SubFloor 4-30-2018 through 5-2-2018
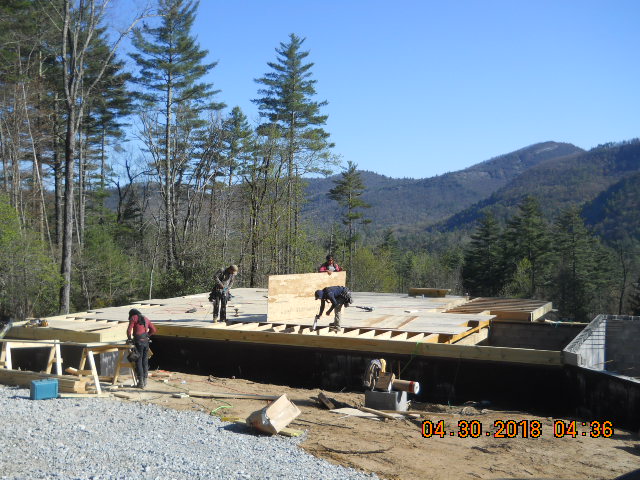
Glued and screwed (star drive coated screws( for squeak-proof subfloor) with Advantech T&G subflooring. That’s one smooth, flat and strong subfloor.

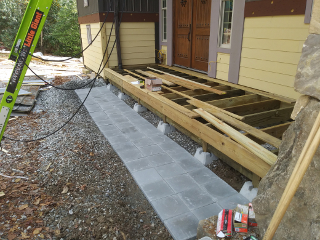
17 1st Floor Rear Deck Framing 5-2-2018
Galv flashing (with paint), peel & stick subflashing over, then PT nailer board for a leak-proof installation in compliance with Code and beyond. This is where the “rubber meets the road” for all decks, and HOME ARCHITECTS does it right.
Outer band of PT 2×12, sloping 1″ down and away from house, ready for exterior timber posts.

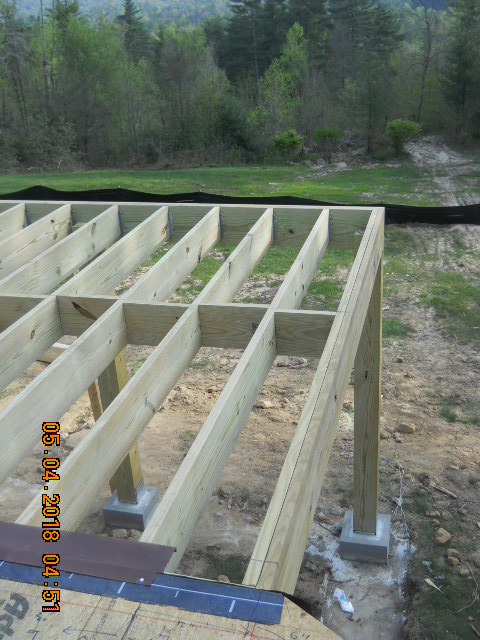
Notice how our firm takes the PT 8×8 posts down to a galvanized steel column base connector at a filled concrete block, projecting up from the surrounding grade (and down to a continuous concrete footing below the ground). We don’t like any wood touching the ground (pressure treated or not), and we don’t want those steel connectors being installed under the ground.
It might amaze you to discover that most Contractors, without details like ours, do in fact run wood posts into the ground and also may or may not use steel connectors at the footings. Now just what condition do you imagine the end of those posts and steel connectors will be in after 10 years? Or even 2 or 3? Our firm doesn’t leave such things to chance. We detail them properly so the huge investment in your house is durable and more trouble free. A little more effort for a lot less trouble over the years.
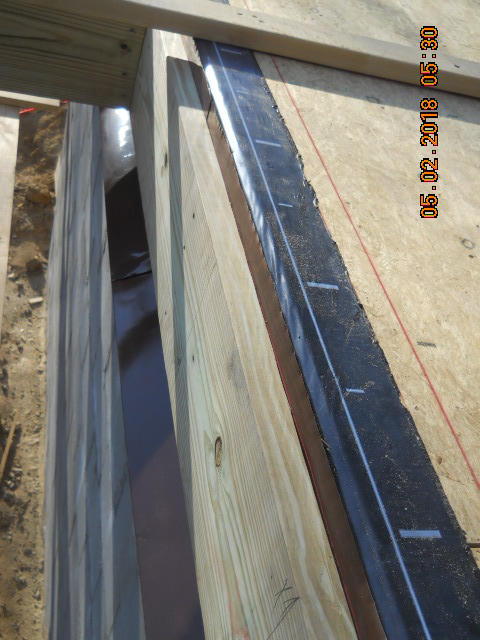
18 1st Floor Deck Flashing 5-3/4-2018
See above and below:
First, our details guided the Contractor’s framer to install a peel and stick waterproof subflashing against the PT rimboard at the floor edge of rear of the house, where the rear porch will attach to the main house. This also continues, in one piece, up and over the top outer edge of the rear subflooring, as you can see below.
Next, very tall rust-inhibitive enamel painted and galvanized vertical deck band flashing is attached directly against the peel and stick membrane, with a drip edge at the bottom.
Then, the PT wood deck band is bolted to the wall.
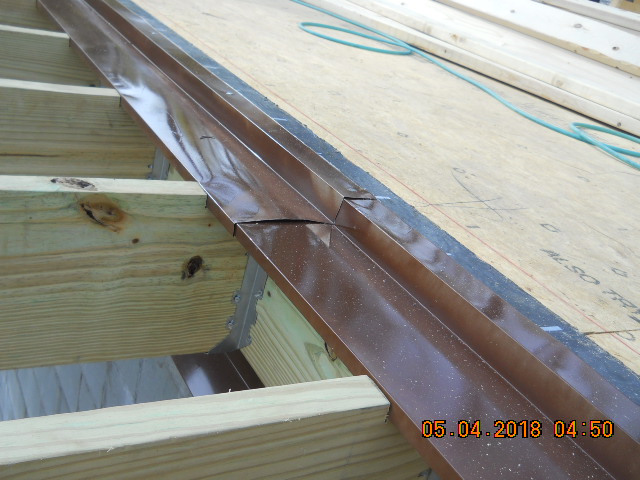
Next, our details have a horizontal “Z” counter flashing fastened over the edge of the subfloor, down, then over the first 5″ or so of the floor joists, with a short but important vertical drip edge (which is carefully tucked into a slot sawcut into the top of the deck floor joists). Note: any horizontal deck flashing without this vertical drip edge is doomed to transfer rain water back into the structure through surface tension. If you don’t believe us, take a full glass of water and hold it over your kitchen sink. Then gradually start tipping it until it starts to pour out the water, then keep turning it until you have the glass horizontal. You will notice that surface tension indeed allows the water to hold unto the underside of surfaces until it flows backward along the underside of the glass. The exact same thing will happen with flashings that do not have the HOME ARCHITECTS drip edge, one of our trademarks that results in your house being drier, more watertight and being more durable for decades longer than other houses without benefit of our details.
We will be having insect screening placed over the top of the deck joists, then the deck boards over those. That is the most economical way to screen a deck.
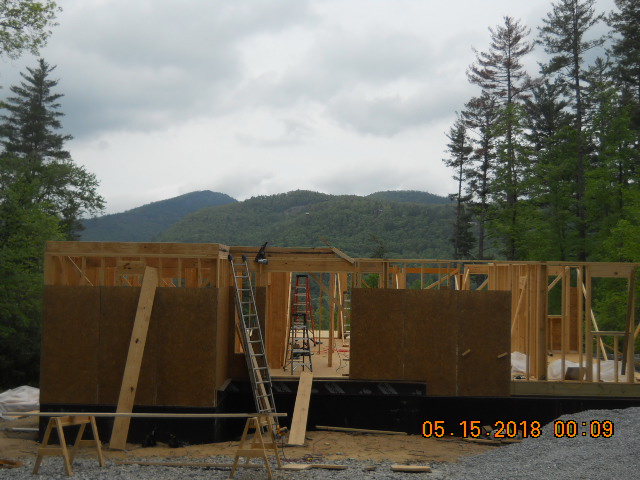
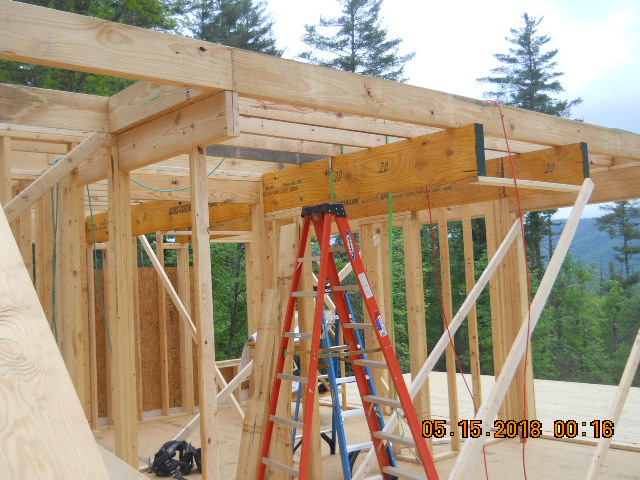
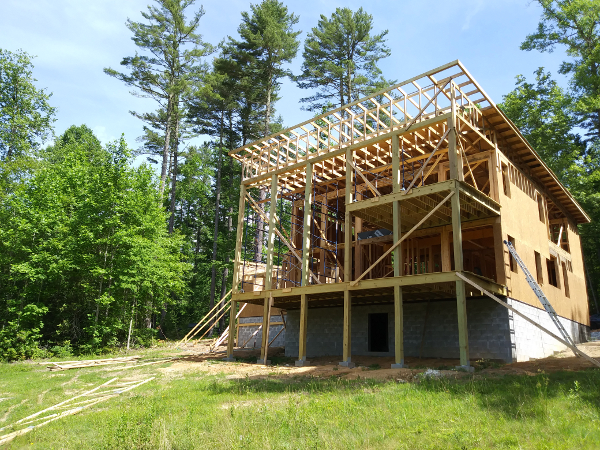
19 1st Floor Walls 5-4-10-2018
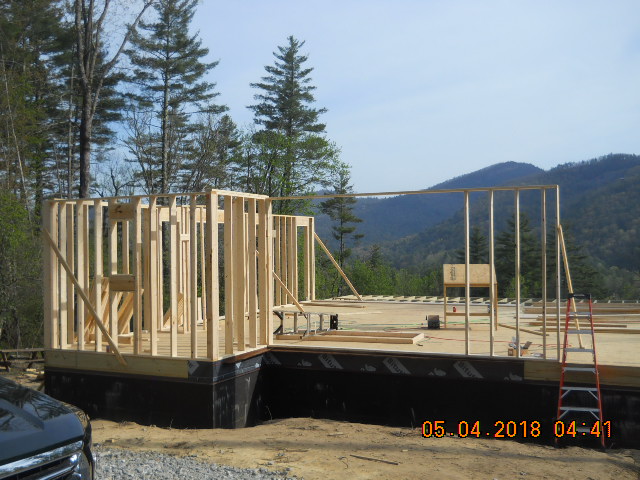
2×6 exterior walls and mix of 2×4 and 2×6 interior partitions.
This is an exciting stage of the construction. And somehow, things look bigger now, and the logic and functionality of well thought out floor plan become obvious.
19c 1st Floor Wall Sheathing 5-12-2018
20 Roof Truss Delivery 5-9-2018
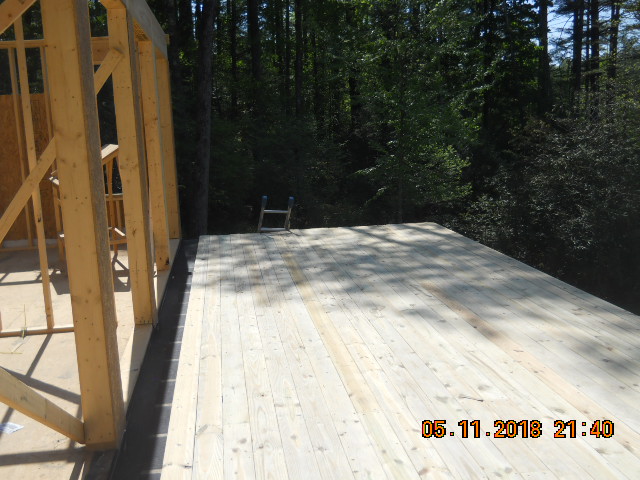
21 Rear 1st Floor Decking 5-11-2018
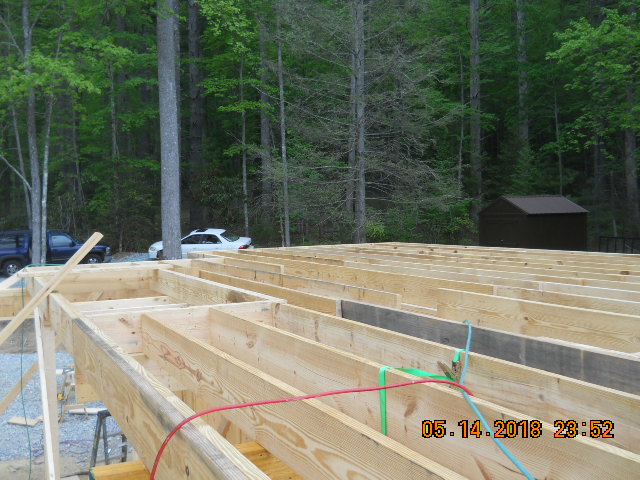
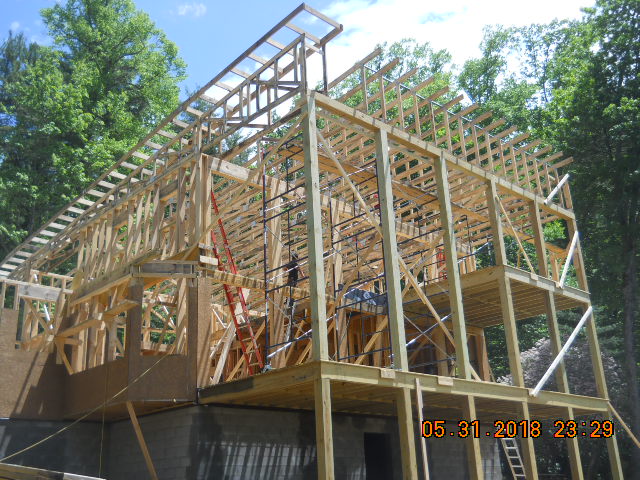
22 2nd Floor Framing 5-14-2018
23 Garage Driveway Ramp Gravel 5-10-2018
24 2nd Floor Walls 5-17-20-2018
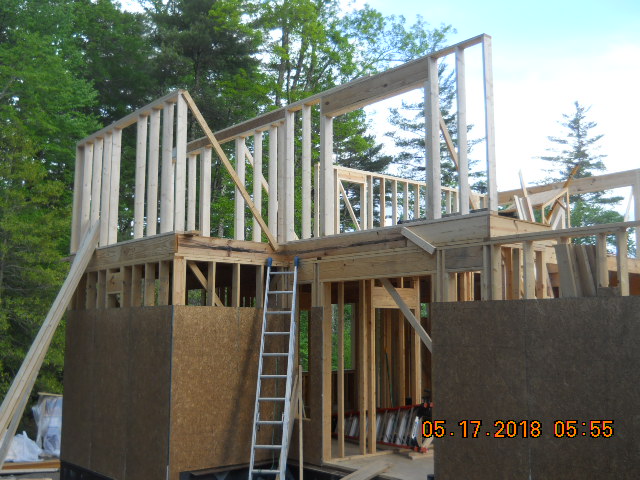

And then we had torrential rain for about 2 weeks straight. Must have been a record.
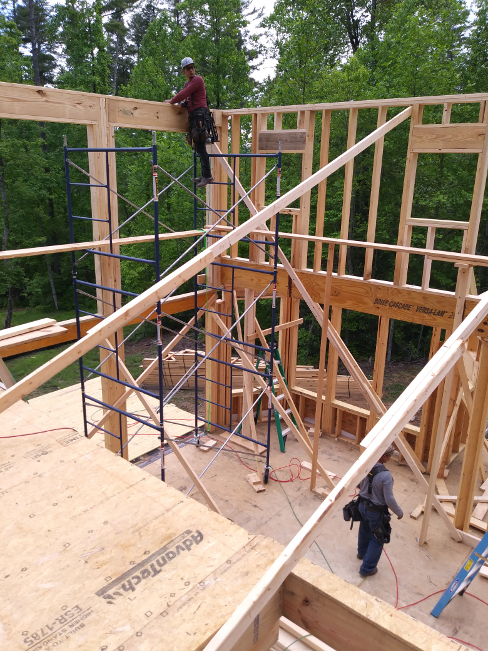
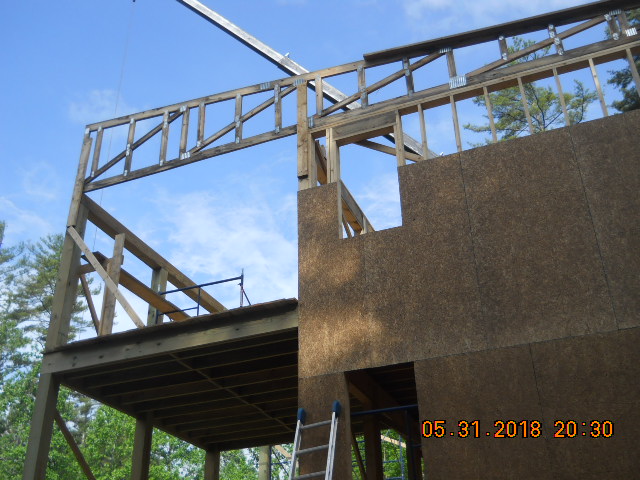
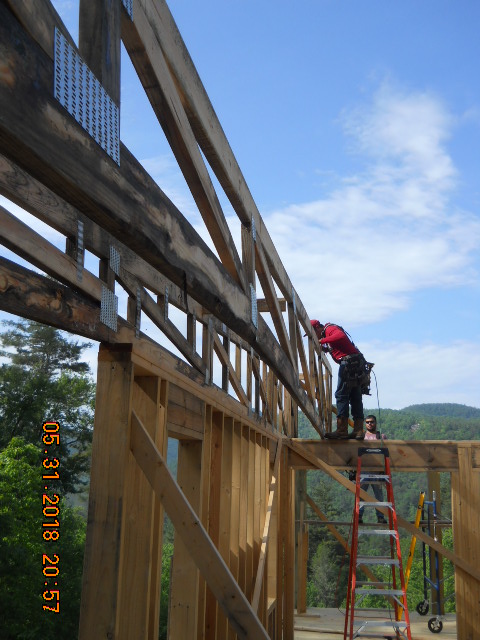
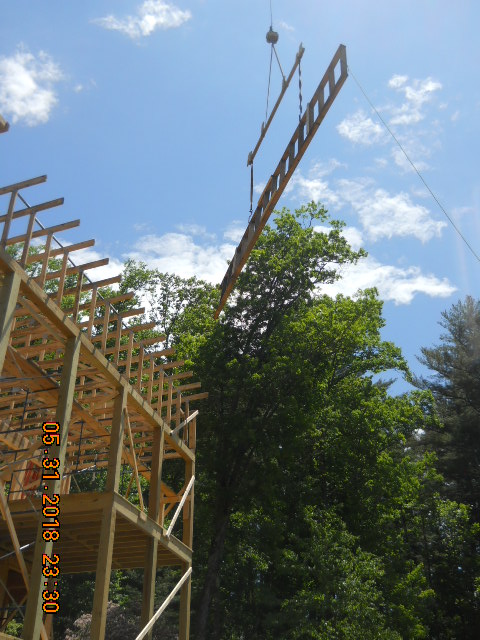
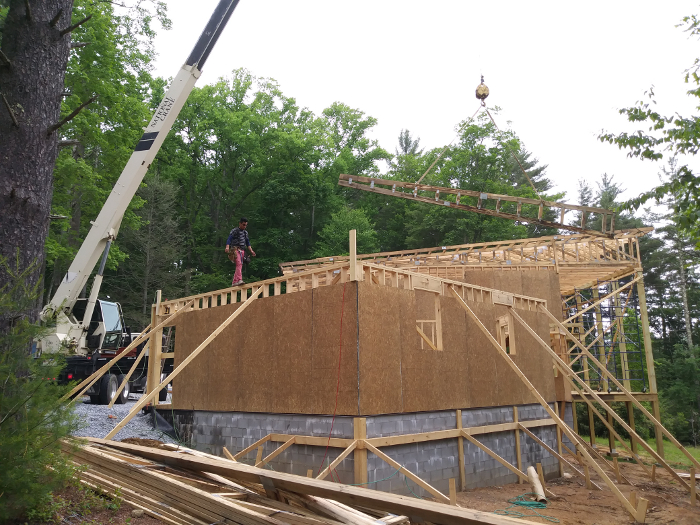
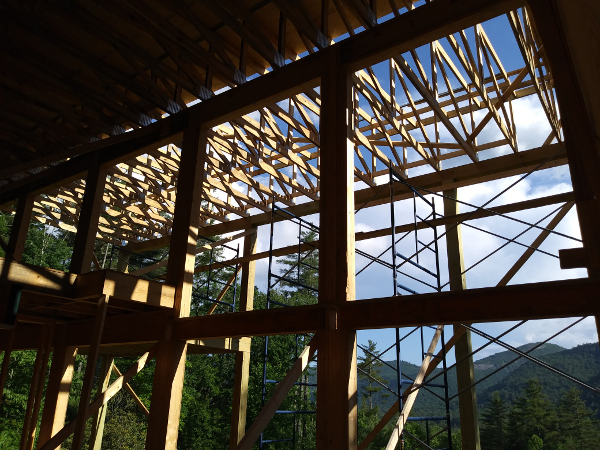
25 Roof Truss Install 6-1-2018
This is the most exciting aspect of the project to date. And due to the simple yet functional architectural & structural design, all of the main house roof trusses were erected in half a day.
CLICK ON PHOTO ABOVE TO SEE A TRUSS BEING LIFTED BY CRANE ONTO HOUSE (in a separate tab on your monitor).
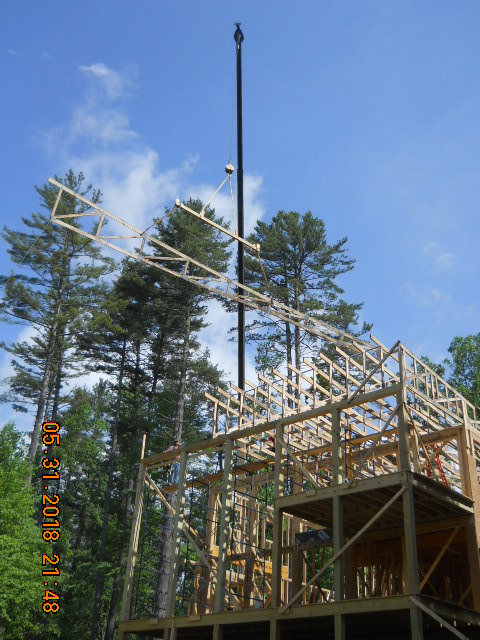
Notice how crane operator intelligently field-built a “strongback” of 14′ long 2x6s with vertical stubs (to secure the sling straps) so at least 2 large hooks could be extended to pick up the trusses at multiple points (rather than in the middle) to help avoid damaging the trusses while being lifted. Gangnailer prefab trusses like this are inherently weak in the X-plane, even though they are extremely strong in the Y-plane, after installed and braced. Smart Contractors nderstand this and take precautions. And even with these precautions, one of the main long roof trusses broke while being lifted and had to be replaced by the truss fabrication plant.
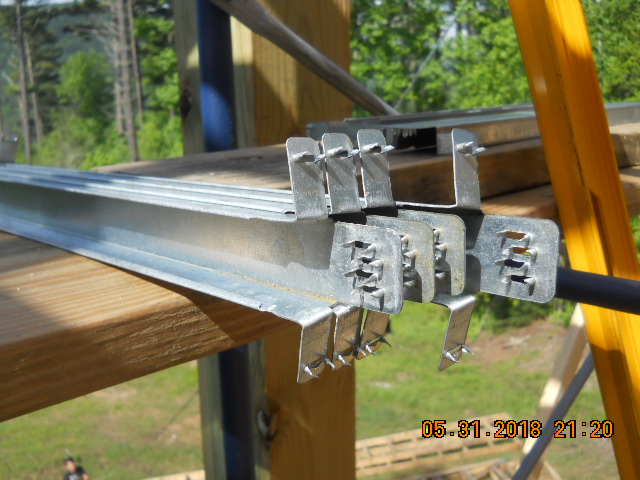
Below: note special galvanized steel bracing provided by the truss fabricator, with teeth that allows framing carpenters to easily hammer into place, which also are sized to space the trusses at the specified 24″ o.c. This helps speed erection and bracing.
Huge crane lifts the 400 pound 56′ long roof trusses effortlessly.
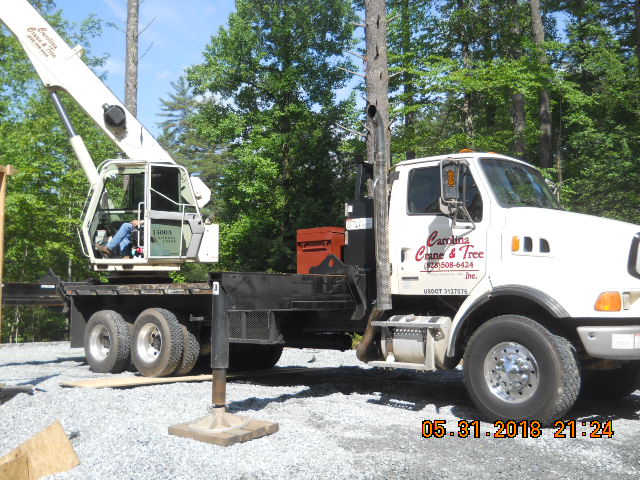
Large stabilizer arms and feet keep crane rig firmly planted.
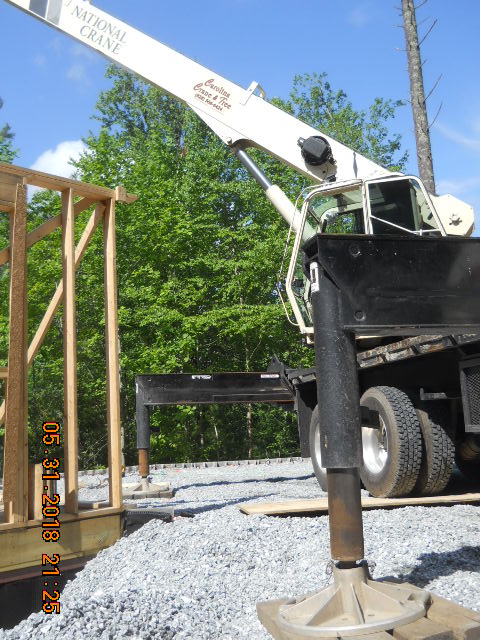
The crane truck with stabilizer filled the space of our 2 car garage.

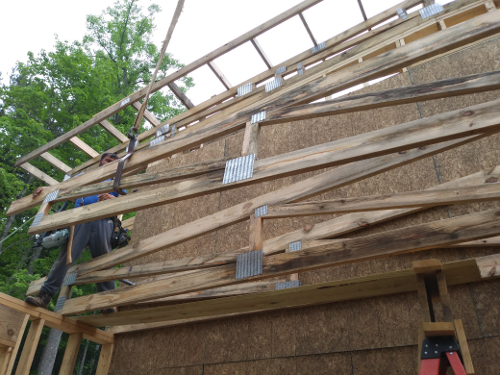
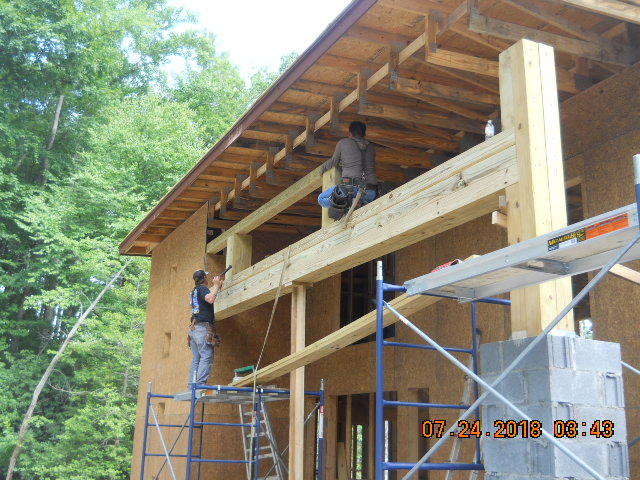
Below, there is a HOME ARCHITECTS first: prefabrication of the overhang outriggers:

The advantage and reduced cost is in terms of labor:
instead of each and every outrigger having to be hand-measured and hand-cut and hand-installed, each entire side of the house side rakes are crane-lifted in a large piece then fastened into place.
This saved about a week’s work of man-hour time over the entire house.
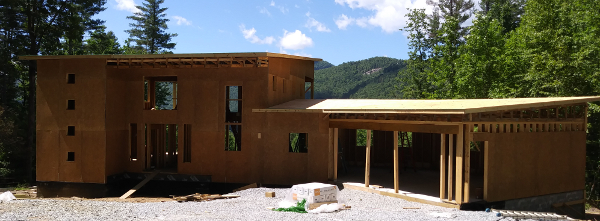
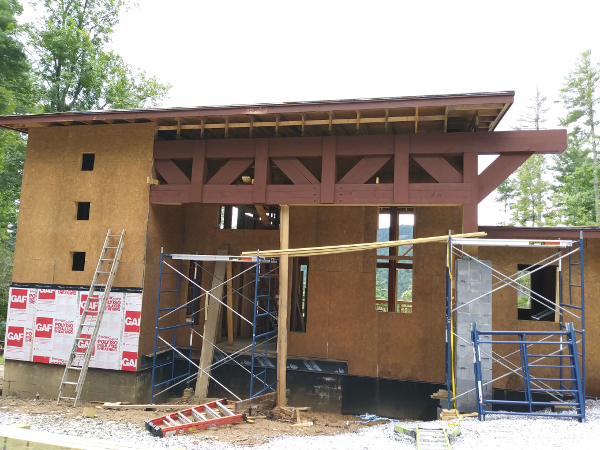
This above photo starts to make it apparent that there’s going to be a billboard’s worth of tall and wide glass facing the great mountain view. That just doesn’t happen without careful architectural planning and design. HOME ARCHITECTS ® has developed special wind wall posts and beam arrangements to allow there to be very little actual wall between you and your views. Mainly posts and large panes of glass. Not many companies: Architects, Designers or Contractors understand that you want large views (more glass) and fewer still understand how to accomplish this and keep your house strong, like this Architect. They’ve been at it for 52 years. It takes time and lots of real-world experience to know how to do things like this properly.
26a & b Garage Walls/Termiticide 6-6-2018
Orkin did the honors, applying the termiticide over the garage gravel.
Note how the Carpenters were able to place the 2×6 frame walls on top of the concrete header block top course, because the Architect had the foundation crew custom cut the top course to be exactly 5-1/2″ wide at the top (the exact width of a 2×6 plate). This is very unusual. Normally the slab would have been installed by now. However, there has been a long delay because this particular concrete subcontractor has had difficulty in finding a concrete finishing crew capable of dealing with the warping side slopes of the slab, so the GC has had to find another concrete finishing crew. And we don’t want to delay the framing, the roof trusses, the roofing or the dry-in. And so, we are framing around the incomplete garage floor area. Nice to have such competent Carpenters.
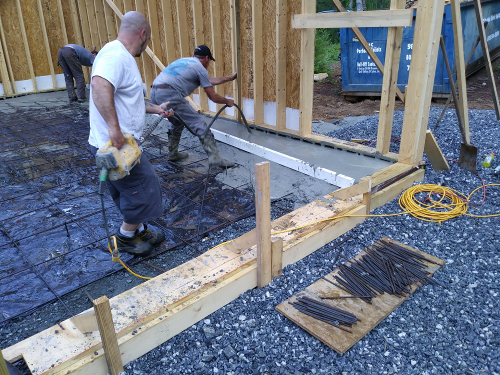
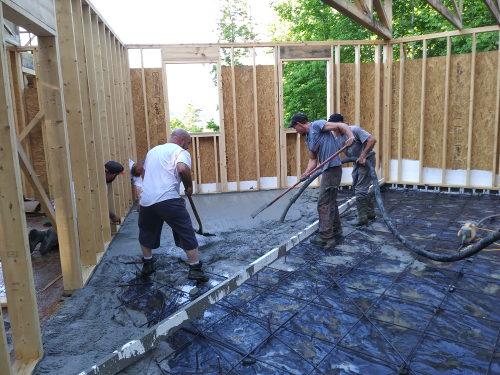
26c Garage Vapor Barrier & Rebar Steel for slab 6-7-2018
The concrete forming crew did an excellent job forming the garage door entrance sills, using stakes and cantilevered formwork to allow the concrete to slide beneath it and be formed to the proper sill profile as detailed by the Architect. Also note Architect’s diagonal corner rebar reinforcing (learned from an old-time NC Contractor 16 years ago) and installed correctly by the rebar crew. The diagonals at the corners serve to guard against shrinkage cracks at the corners, which is where nearly all garage slabs crack. Except in HOME ARCHITECTS projects due to this economical precaution. Also note how this Architect slopes the garage slab from rear to front, to allows water on vehicles to drain toward and under the large garage doors, and how the Architect detailed a “rain riser” at the door, and slope its surface down and out. And how the heights of these step downs will permit wheelchairs to operate over them, so owners can live here for the rest of their lives, should they become incapacitated.
26d Garage Roof Trusses 6-11-2018
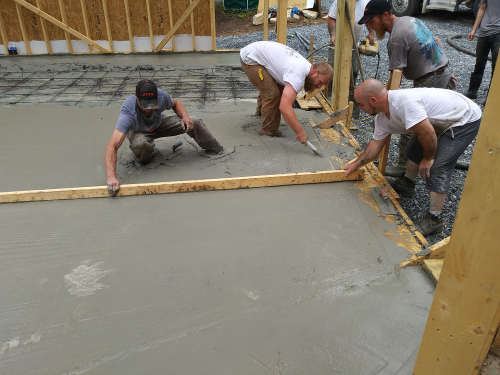
26e Garage Slab Pour 6-12-2018
Installing grade pins of slab top prior to pour:

Concrete truck and pump mixer ready to go:
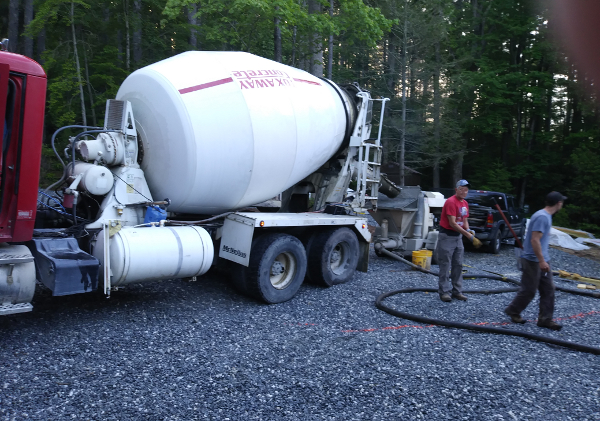
Pumping and forming the concrete (4,000 psi mix):
27 Roof Sheathing 6-13/19-2018
The character of the home interior starts taking shape as the roof sheathing progresses: a grand sense of shelter combined with a huge connection with the mountain view. No one does it like HOME ARCHITECTS ® when it comes to bringing the outside in and the inside out. Why: because this Architect knows how to obtain larger glass areas for budget building and still resist fierce mountain winds.
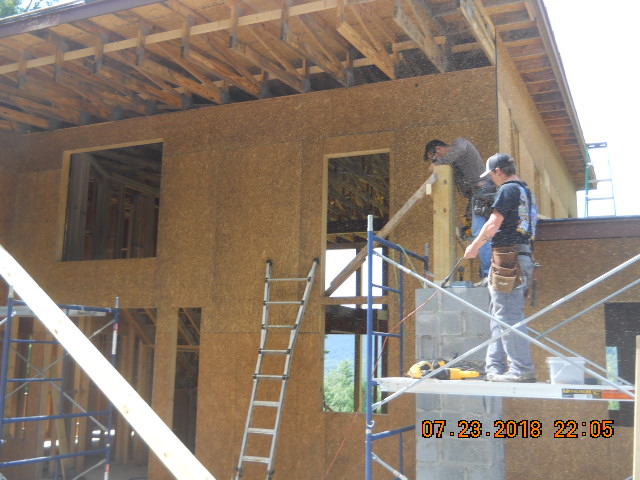
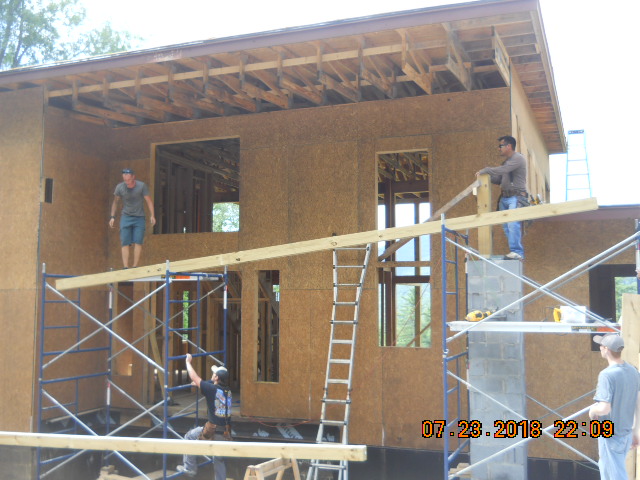
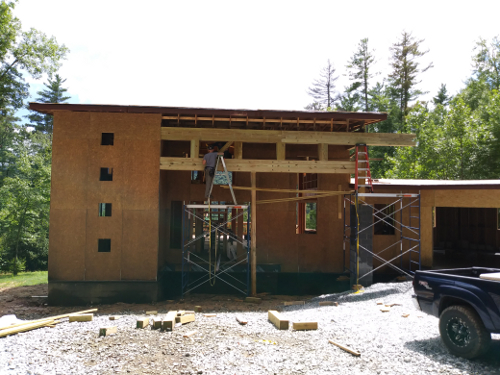
28 2nd Floor Wall Sheathing 6-19/22-2018
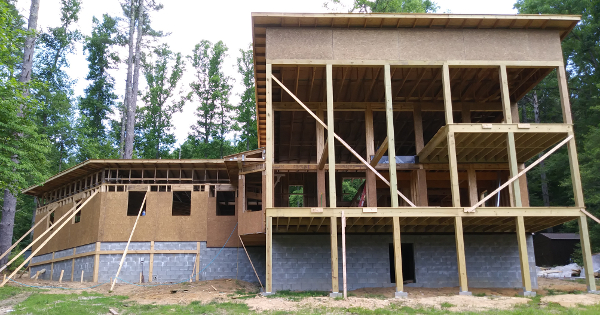
The sense of exterior design is starting to become observable, now that the mass is being enclosed. Also: the interior is becoming more protected and cooler.
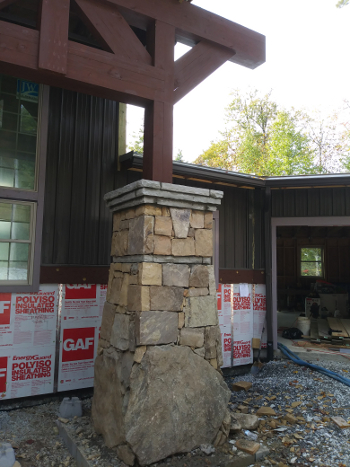
29 CMU Pedestal 6-23/25-2018

Boulders are going to added around the bottom of the concrete block pedestal, then more refined stone as it rises.
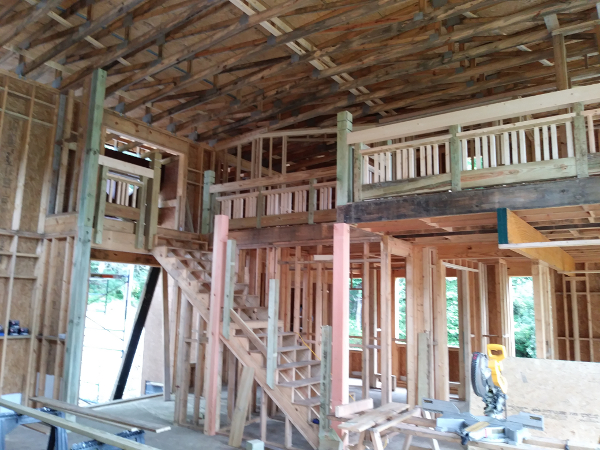
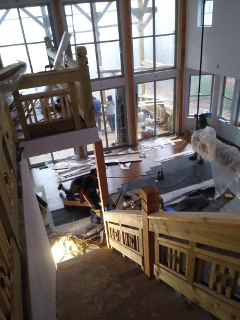
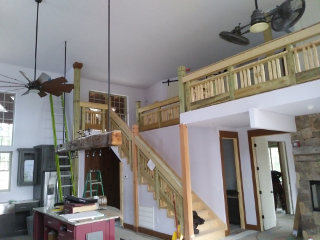
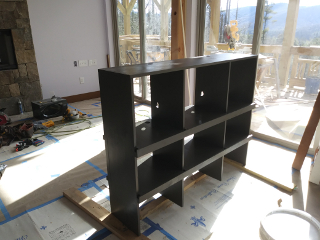
30 Stair Interior Framing
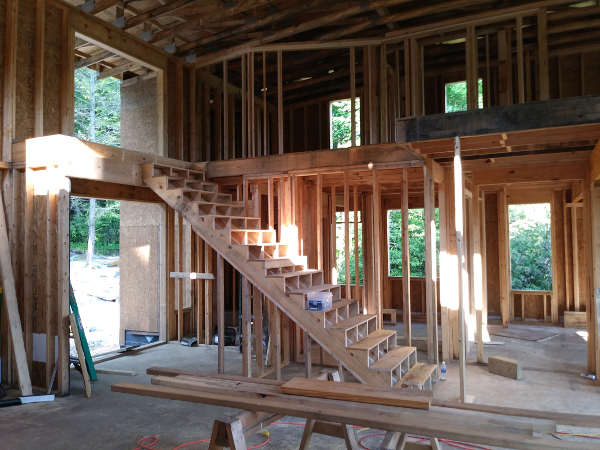
Most builders only use 3 stringers: one on each far side and one up the middle. This Architect uses 4, along with additional members screwed to the sides of the stringers. And instead of the typical builder 3/4″ treads, this Architect uses full 1″ thick treads, glued and screwed to the stringers. The Architect’s stair feels about as solid as cast in place concrete. No noticeable bounce. And the Architect’s details have steel bucket connectors at the top.
31 Blocking 7-9/20-2018

Blocking is used in both horizontal and framing, like between floor joists, stiffen the floors and prevent twisting of the joists, and also between vertical framing, such as seen here, between wall studs. Home Architects use a lot of blocking, to stiffen the entire structure. This help resist fierce mountain winds (often 90mph to 140mph).
32 Hurricane Strapping 7-6/20-2018

It is a Code requirement that roof framing members be strapped to the walls with steel bands. Requirements can vary based on regional loads. However, Home Architects typically prefers to use a double hurricane strap at the extreme ends of each roof framing member and single straps at interior wall-to-roof members. Rand Soellner Senior Staff Architect, learned decades ago, in the aftermath of Hurricane Andrew, that toenails just can’t hold when high storm winds come to exert uplift. And smooth nails don’t work either: they pull right out. Which is why this Architect uses a different type of nail and has them installed in a direct-shear position: the wind has to literally break all the nails (or the 18 gage steel straps) hold each roof member, in order to be able to pull the roof off of the houses they design. And that’s hard, even for gale-force winds to do.
33 Chimney
Many of this Architect’s Clients want expensive and tall stone-clad chimneys with copper metal and fancy details. The Architect simply couldn’t afford that. His chimney is barely visible and will be clad with prefinished metal entirely. It only took about 2 hours to frame and sheath. Simple = less expensive (and less prone to leak).
34 Fascia & Drip Edge 7-15/19-2018

Architect had workers use a high-end Olympic solid stain on front, back and bottom of the fascia PT 1x8s and PT 1×2 drips edge boards before installing them. Why: because trying to come back later on ladders or off the edge of the roof to stain these boards and also try to paint around gutters mounted to them would have been very difficult and not provide anywhere near as good of coverage. Architect selected a “Russet” medium brown with slight reddish tint as an accent color., which is also what most of the trim pieces will be on the house, which will contrast nicely with the much darker brown industrial metal siding.
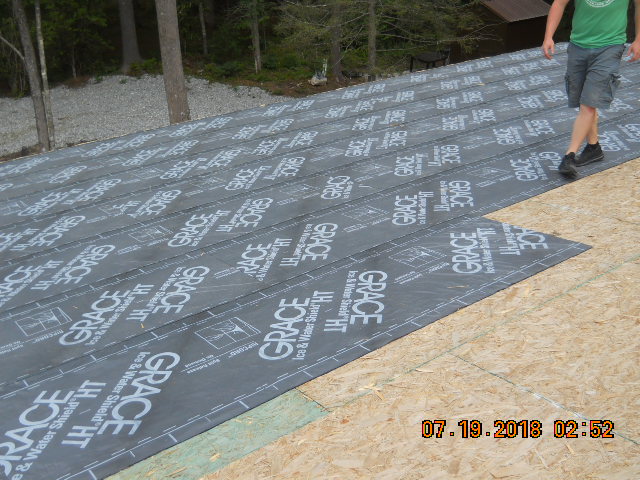
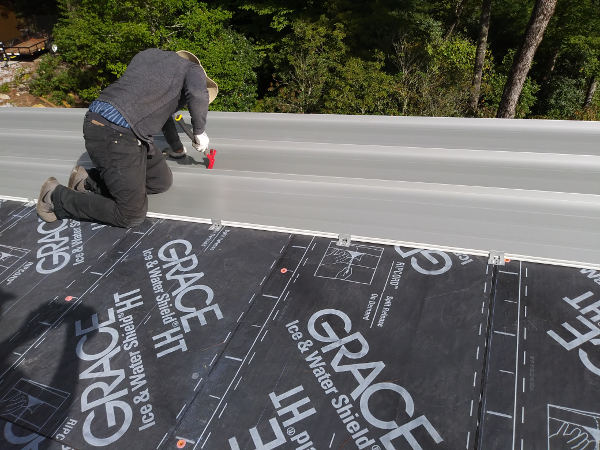
35 Roof Underlayment 7-19/23-2018
CLICK ON IMAGE ABOVE TO SEE VIDEO
This Architect likes to use thick and adhesive backed membranes as underlayment. The adhesive backing bonds with the wood roof decking and seals around nails and screws. This results in a nearly leak-proof roof. The actual exposed roofing (standing seam metal in this case) acts to not only protect the underlayment membrane from UV, but also general wear, making a nearly unbeatable combination of systems using a superior underlayment like this. The old-school thin asphalt paper roof underlayments are not good enough. This Architect requires better performance for his own house and those of his Clients.
Here, you can see the Architect’s requirement for a cricket behind roof penetrations like chimneys. And the Architect requires that the crickets are covered in the special adhesive-backed roof underlayment the up the side walls for about 12″. This makes it almost impossible for them to leak.
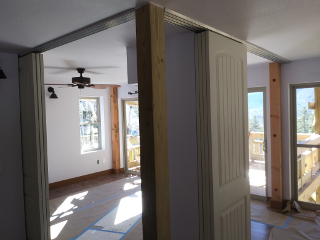
36 Interior Wind Posts
Architect has #1 SYP 6×6 posts bolted to the very little bit of 2×6 wall in this window wall. Check it out. There’s about a billboard’s worth of glass opening to the great mountain view. You can’t do this without the expert licensed Architect’s eye like Home Architects. This system, combined with other wind beams and posts can resist the high mountain winds when ordinary houses collapse. Superior engineering. Builders don’t know how to do these things on their own. Architects design, Builders build.
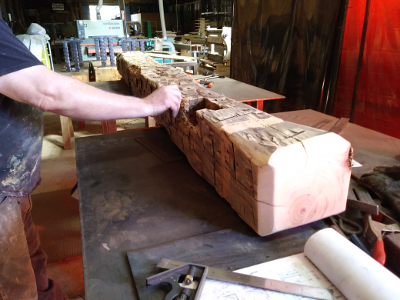
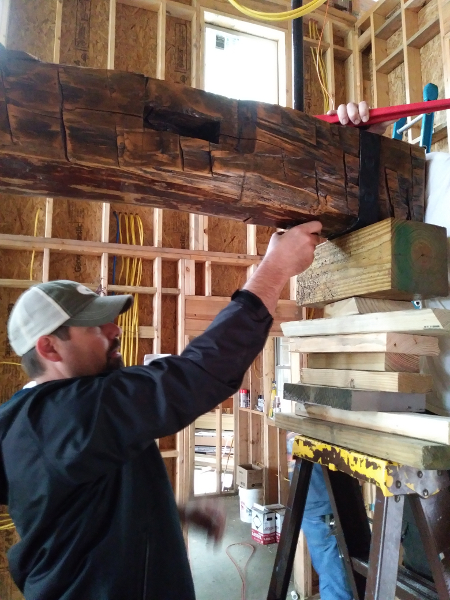
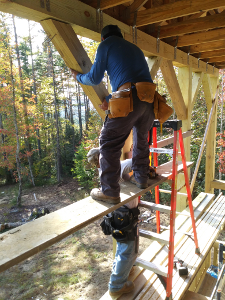
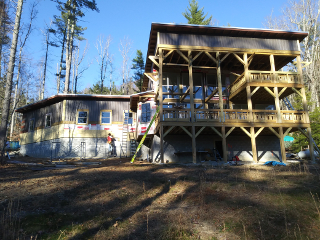
37 Monster Timber Truss 7-23/8-8-2018
This is sort of the “logo” element of the house for the Architect: that and the large stone column (boulders & stones not yet installed). The majority of the front of the house is meant to be rather simple and laid-back, with these 2 elements being the most expressive.
Carpenters raise timbers.

Experienced carpenters assembling the “monster” truss timbers under the guidance of the Architect. Competent carpenters’ skill and intelligence make this possible.
Starting to install the diagonal timbers. Very exciting. This truss screams: STRONG. This huge timber truss (and the rock-clad column under its right side) are the front side “logo” feature of this house.
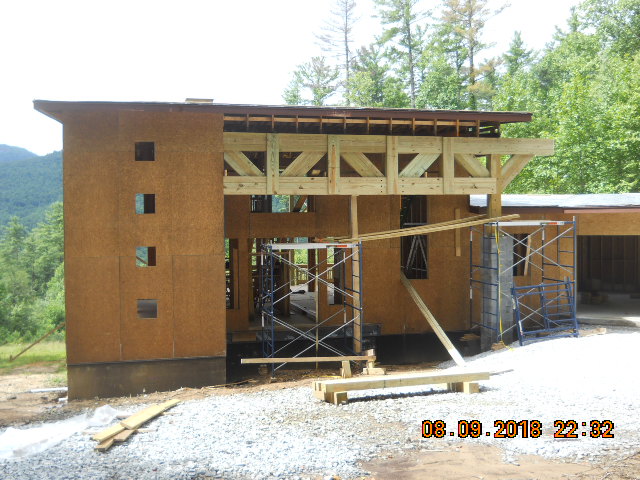
The timber truss is complete in terms of framing. It is held together with a combination of about 100 11″ TimberLok screws, 100 8″ TimberLoks, vertical 2×12 connector panels (with 3″ star drive screws) and vertical and horizontal galvanized steel 1/2″ diameter bolts and threaded rod with lock washers.
Next, it will receive a coat of Olympic high quality exterior solid stain in the Russet color (same as fascias), then metal bands & clavos, then finally timber pegs. Arnold Schwarzenegger would be proud.
38 GuardRails 7-26/8-20-2018
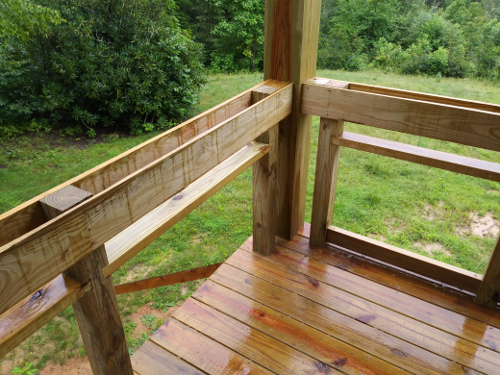
The Architect designed these railings out of humble precut boards: 4×4, 2×4, 1×6, 1×8, 2×2 (all PT at exterior). The final construction creates a much more substantial impression, due to utilizing ordinary materials in a creative way.
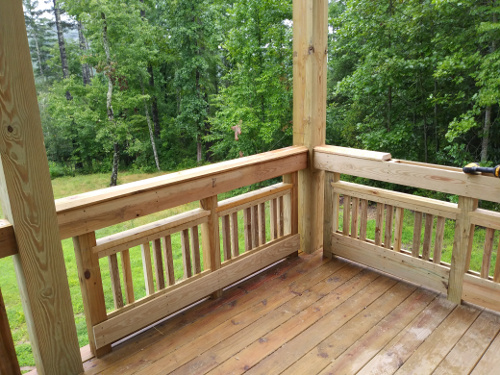
Also, not many GuardRails can actually resist the Code required 200 pound point load in any direction at any point along the top rail, or the 50 pound pressure in a square foot, applied to any part of the infill picket portion. THESE can. A linebacker could run fill tilt into these and be bounced back off them. The Architect understands how to tie the members together and to the main structure of the house to resist required loads and beyond. And, per IRC, top of GuardRails must be at least 36″ tall, which is also the case in NC.
Note Architect’s skillful use of Code required spaces along with pure artistry, to achieve a rhythm of pickets that maximizes views while creating interesting groupings of members.
Strong and intelligent carpenters’ skill makes this possible. There is a mathematical formula to the guardrail’s member spacing. Even though it uses ordinary boards from any lumberyard, the manner in which it is assembled elevates into the realm of architecture. These railings are also fastened together with lifetime warranty star drive 3″ long exterior screws (no nails), so they will always remain firm and tight.
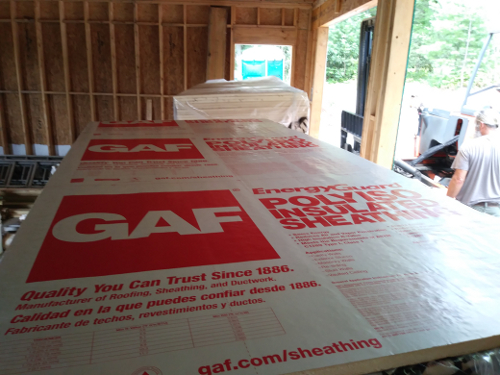
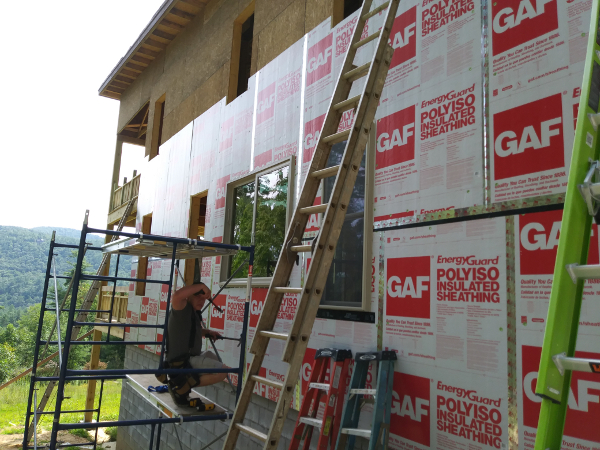
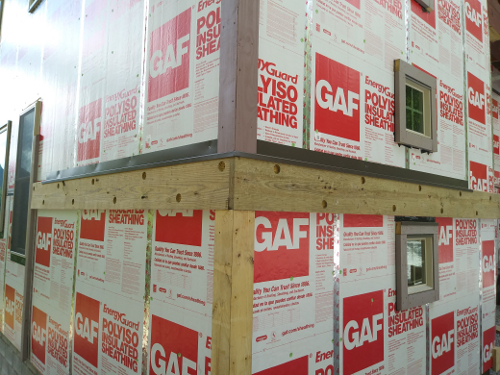
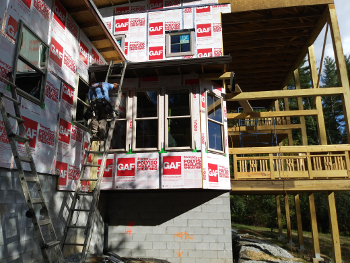
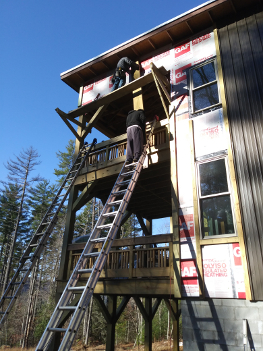
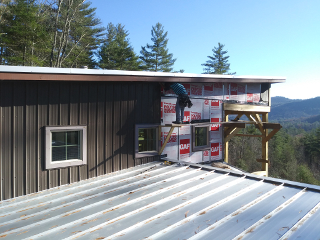
39 Exterior Continuous Thermal Insulation Sheathing 8-10-2018
Home Depot forklift (Moffitt) unloading 2 large pallets of the rigid foam insulation panels into the garage. 110 sheets of polyiso (polyisocyanurate) rigid foam sheathing for the exterior walls will add another R6.1 to the wall main insulation value. That’s the best R value per inch on the planet right now for insulation. it doesn’t get any better than this. Total wall insulation value will be approximately R 28.2.
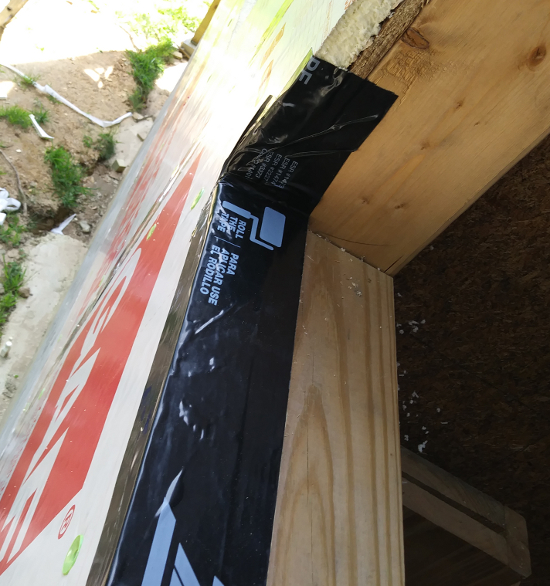
There is a foil facing on the faces of the panels, which means the foil tape will adhere well. The tape is being used to seal the panels together into a giant waterproof membrane. After careful consideration, the Owner, Architect and Builder agreed that using these superior panels allowed them to remove the requirement for the other originally indicated water-resistive membrane that was to go over the thermal sheathing. As a matter of fact, that could have created more problems: having a double waterproof membrane in close proximity to each other. So it was determined that taping the foil facers together should prove to be ab excellent water-resistive (if not waterproof) barrier under the exterior cladding. In particular, HOME ARCHITECTS created a special detail, using ZipTape flashing tape to be installed at the top of each vertical course of thermal sheathing: a “Z” flashing strip, to insure that any moisture existing on the surface of the thermal sheathing cannot leak through those joints into the interior. And all vertical joints will receive foil tape. In the event that panels experience some minor shrinkage, the Z flashing will remain in place at the head joints, continuing to keep out moisture, as will the vertical foil tape.
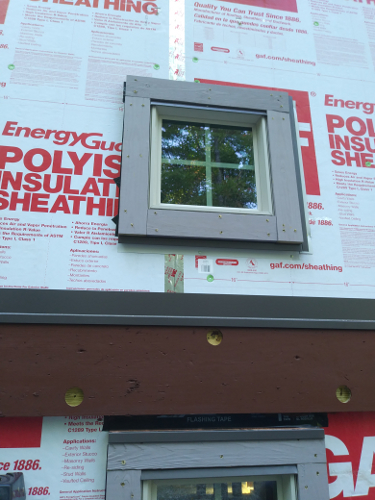
The nailing fin that projects out all around the windows, is nailed through the thermal sheathing, then special flashing tape is bonded around the perimeter. Before the siding is installed, there will be a couple of metal head flashing pieces installed, to keep rain out of the top of the window. The tapes will conduct any moisture down along the sides of the windows, then down the wall and out the bottom. It’s all carefully taped to keep out water and air.
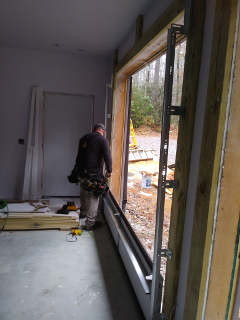
40 Windows & Sliding Glass Doors 8-24/31-2018

This is a PT (Pressured Treated) sloped sub sill under a window opening. This is highly recommended by Dr. Joseph Lstiburek of Building Science Corporation. And this has been part of HOME ARCHITECTS details for over a decade. The idea: when the window fails (not if), and begins leaking through its sill, the water will flow over this and out the wall. See the peel and stick flashing tape over this below:
This acrylic high quality flashing tape bonds to the wood surfaces and in also held in place by the window after installation, so even if, 50 years from now, the adhesion gives way, the synthetic material of the tape surface should remain in position, performing its water-shedding job, conducting any water coming through the window over the tape surface and down and out.
Note how the corners were installed first, so the horizontal and vertical tape pieces bonded over them.
41 Truss Patches 8-24-2018
The Architect was horrified when one of the roof trusses cracked in two, when being lifted into position, several weeks ago. The point of weakness was at one particular joint, and after that joint failed, the truss broke in several other places. The Architect believes the reason one truss broke while being lifted was due to the fact that the truss had leaned sideways during the lift, placing the wood struts and metal plates in their weakest position, and the trusses had been laying on the ground for 2 months in some of the most torrential rains in decades; so the wood had been further weakened by being super-saturated with water. This likely caused the metal gangnailers to let go, when turned sideways, with the long members pulling down on the weakest joint.
Even though this one truss was replaced with a new one and none of the other trusses had any problems, the Architect was concerned about this one joint location on all of the main house roof trusses. Therefore, he and the Owner (one in the same on this project) agreed to a modest change order to the Contractor ($500) to reinforce this one joint with a double #2 Southern Yellow Pine 4′ long brace on each side of this joint on each truss, with 10 #9 3″ long wood screws driven into each side. So now, there are 20 #9 screws securing a total of 4-1/2″ thickness of structural wood together at each of these joints. This small “insurance policy” makes the Architect/Owner breathe easier, and should just about guarantee that there will never be any problems with the roof trusses.
Just one more thing HOME ARCHITECTS does to help its Clients have dependable projects, when they allow them to provide extended services.
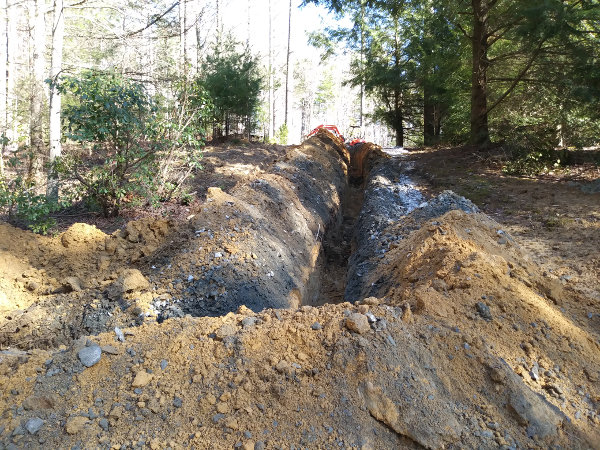
42 Drainage Under Ground 9-4-2018 through 9-10-2018
43 Exterior Trim
44 Exterior Siding Delivery
The metal siding panels were custom cut at Best Buy Metals in South Carolina. This allowed the walls of the project to have full-height wall panels:
Also, about 2,000 linear feet of color-matched trim pieces where included. The Architect had to carefully detail the condition at corners, around windows and doors, and the top and bottom of the wall panels, to keep it looking professional.
Why metal siding on about 75% of the exterior wall surfaces?
Well, for one reason: economy. The factory finished wall panels are less than a dollar a square foot. More like around $0.69/SF. Compare that with ANY OTHER MATERIAL, even without paint or stain. Nothing comes close to the value of prefinished metal panels.
2nd Reason: they panels can be full-height of the wall in one piece. Less joints = less work and fewer future problems.
3rd Reason: the pain on the metal wall panels is a siliconized polyester. Guaranteed for 40 years. Personally, this Architect doesn’t trust that paint finish for roof panels, because after about 7 years or so, it exhibits rather pronounced chalking. Kynar is a better paint finish for roofs and much longer lasting. But for walls, all of which are under roof overhangs? I think that’s a safe bet.
4th Reason: in these parts, it often costs more than $10,000 to repaint (or restain) the exterior of your house (depending on its size). These often happens about every 5 to 7 years. Let’s say 6 years on average. If you intend to live in the house you’re building for the rest of your life and if you have perhaps another 30+/- years to live, that’s about 5x that you’re going to have to pay that painter, assuming the cost remains the same, which it surely won’t. It is sure to continue to increase over time. But even at today’s prices, that’s another $50,000 you’re going to have to pay to maintain the exterior of your house. This owner did NOT want to have to do that. Therefore the choice of prefinished metal siding.
5th Reason: the Real Estate Broker wife of the Architect to be living here has noticed a distinct shift in style preferences. Of course, there remains a great deal of traditional residential architecture in this mountain area of 2nd vacation homes. However, she has also noticed what she calls: Industrial Mountain Style. It features such materials and details and metal wall siding, including some warehouse like features, exposed bold structural elements (like the massive timber truss featured at the entrance of this house), retro light fixture and Steam Punk elements. The exterior and interior of this house fits right in that category of Industrial Mountain Style. And as it turns out, that helps control the budget.
45 Exterior Paint & Stain
The exterior stains and paints where computer custom mixed to exactly match the metal siding and other surfaces, contributing to the high-level of appearance for this project.
46 Front Site Area
47 Front Porch
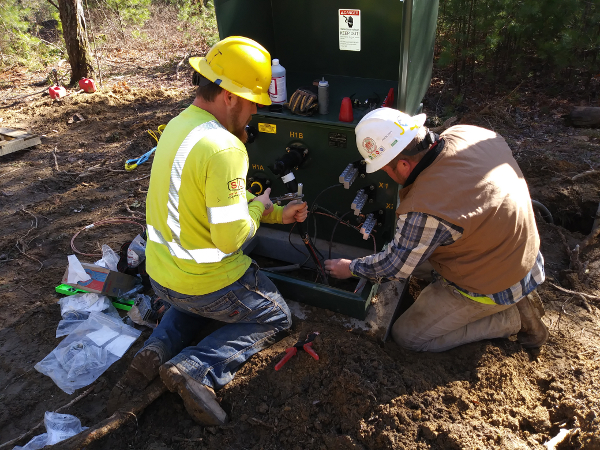
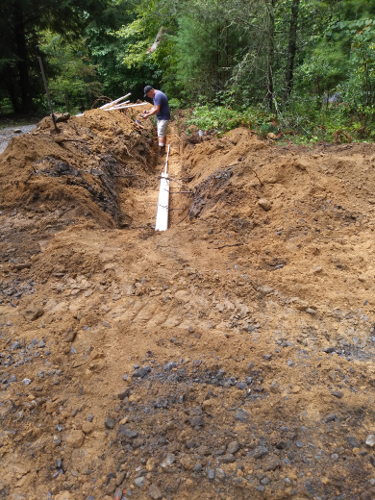
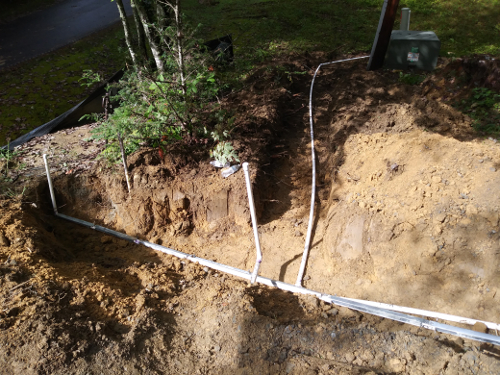
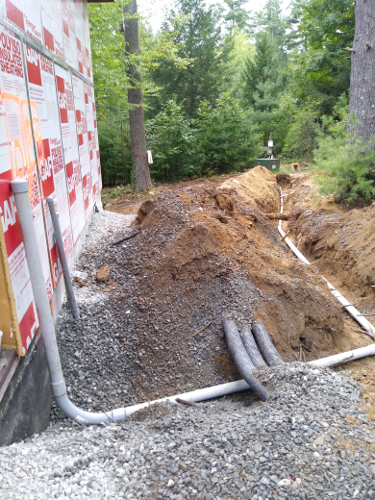
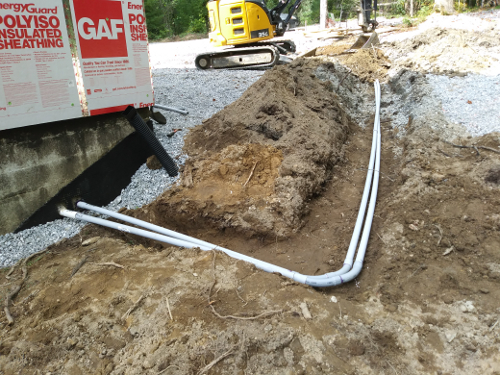
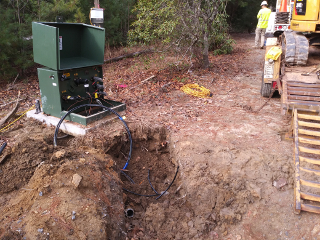
48 Site Utilities 9-9-2918 through 9-14-2018
Trenching and installing underground site utilities in the dense North Carolina mountain soil is bone-crushing, back-breaking, grueling, sweaty harsh work. Not fun. Anyone who thinks they are personally going to build their own home does not understand reality. Perhaps these photos will give you some insight. This is work for big boys with big machines and strong bodies and determined hearts. There was about a quarter of a mile of drainpipes, water lines, DSL conduits., electrical conduits and future conduits installed into the unyielding mountain ground. Saprolite (“rotten rock” or “almost rock”), tree roots, rocks and dense soil were encountered everywhere. Nothing you can dig with a shovel by hand. Dirty, tough, demanding work, work work.
CLICK PHOTO ABOVE FOR VIDEO OF PART A OF SITE UTILITIES
CLICK PHOTO ABOVE FOR VIDEO OF PART B OF SITE UTILITIES
Location of septic sewer line leaving crawlspace, with one downspout drainline running past it:
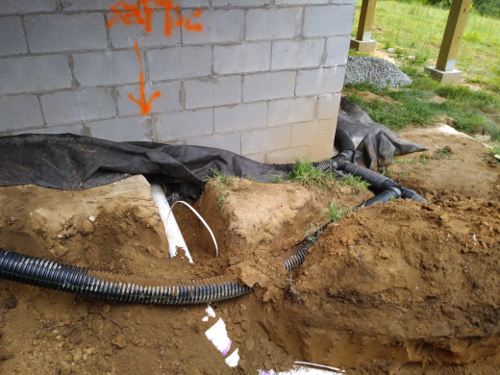
Waterline, DSL conduit and several other electrical conduits running from house toward street:
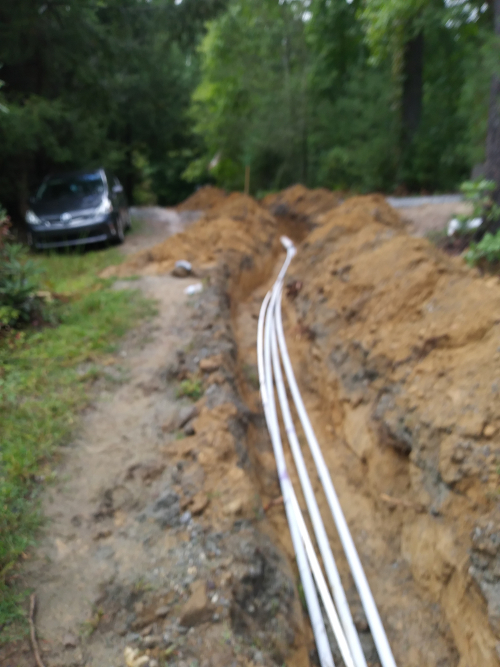
Note 6″ PVC chase at the end, which contains all the pipes going toward the street. The chase helps protect all the conduits from displacement from the driveway above, under which it passes.
And here we are on the other side of the under drive chase, closer to the street:
Conduit riser for DSL at phone pedestal:
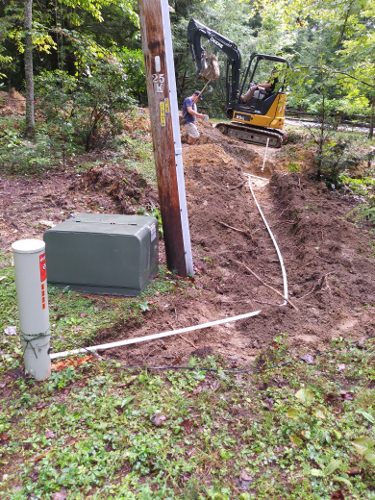
Waterline and DSL conduit for next door neighbors and DSL for this project towards phone pedestal:
Electrical Service Entrance conduit as approved by Duke Energy for Sumter Electrical Contractors to use to connect transformer:
And to the side, the main house electrical conduits #1,2,3 and DSL.
Owner and Architects requested that they be allowed to install this 3″ PVC Schedule 40 conduit for main electrical service, so others won’t cut all the other newly installed conduits and pipes. Duke Energy approved this approach.
Conduit #2 terminating at tree for well light #2:

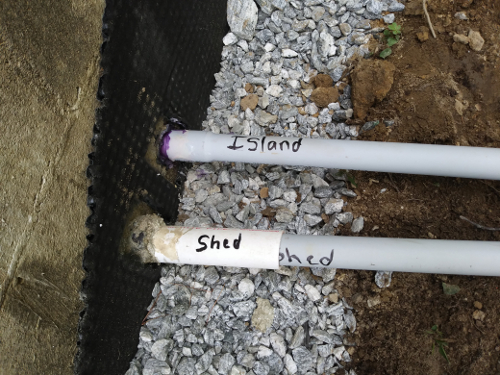
Power conduits to both the island turnaround and the shed:
The powerful trackhoe used to excavate most of the utility trenches:
49 Wainscoat Exterior
Carpenters and Architect custom distressed the PT 2×12 exterior wainscoat board, which divides the upper metal siding and the Hardie lap siding below:
50 Window and Corner Trim
Architect specified Pressured Treated wood for ALL exterior wood, especially trim. Should last just about forever. And it was given a high-end Olympic or Cabot solid stain. Star drive exterior screws mounted. Holes will be filled with Lexel and touched up.
51 Metal Siding 9-17/30-2018
Carpenters screwing on factory finished economy siding with self-tapping prefinished screws with matching paint color.
Also: russet colored wainscoat was screwed on with pilot holes for dowel ends.

As the Carpenters working on the job said: “That looks BadAss!” Coming along.
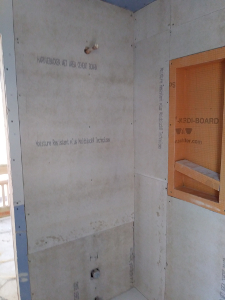
52 Bathroom Shower Niches
Home Architects uses waterproof Schluter Kerdi shower niches, 28″x 12″ vertically, with the Schluter shelf to yield a double niche compartment in their projects.

(Note the double height Accessibility blocking for future possible handrails below the niche unit).
Schluter doesn’t appear to explain that their niches are made of 1/2″ thick material. But that’s what it is. This is so it marries up to concrete backer board all around the lip of the installed unit.
Here is another big secret, to be revealed to other Architects and Contractors: Schluter does not publish a rough-in size. They really should. But here it is: the actual rear of the niches are 13″ wide x 29″ tall. We recommend a rough-in between framing of 13-1/2″ x 29-1/2″. The 14-1/2″ you get between a 16″ o.c. stud spacing is kind of a lot. But it does work. Here’s a view of the back of one installed unit:
And if you set the niche unit down on your horizontal blocking, you should probably install another piece of blocking below that, to serve to be a nailer for your concrete backerboard below the unit, because the niche unit will consume most of the single piece of blocking.
Tile setters can run their mortar and tile right into the niche units, because they are made waterproof.
No more WalMart Shower Caddy in this house.
52A Bears
North Carolina is home to thousands of black bears, particularly in the western part of the State in the mountains. Like in Sapphire, NC, where this house was built.
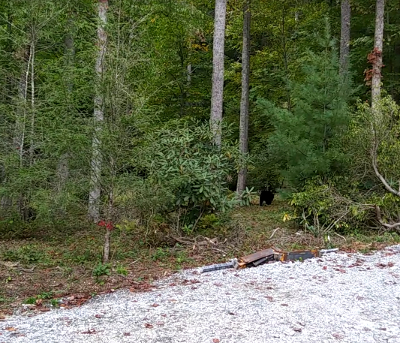
Look carefully just right of center in the photo, between the bushes and trees. That’s Tripod, a 3-legged momma bear and there are 2 of her cubs trailing her to the left (unseen behind the bushes). She was about 100′ from the house under construction. She had been checking on the dumpster until the Architect/Owner asked workers to no longer dump their lunch scraps in there, for concern the bears might hurt their paws on construction debris while rooting around for food.
There were/are also wild turkeys, raccoons, squirrels, chipmunks and deer.
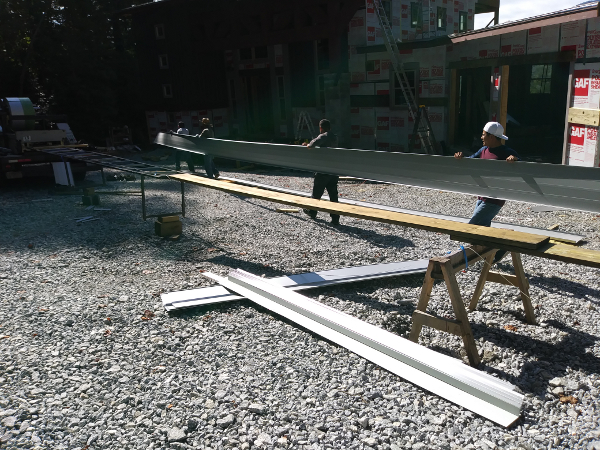
53 Roofing 9-29-2018 through 10-2-2018
Having a metal roof can create issues: like having unbroken, single-length metal roof panels 54′-5″ long
And how to fabricate that: on-site with special rolling machinery,
Then how to accept those long sheets coming from the machine,
Then how to get those long sheets up onto the roof safely and without bending or breaking the metal roof panels.
The rolling machinery trailer on site, in front of the house:

The custom metal roof panels coming out of the machine:
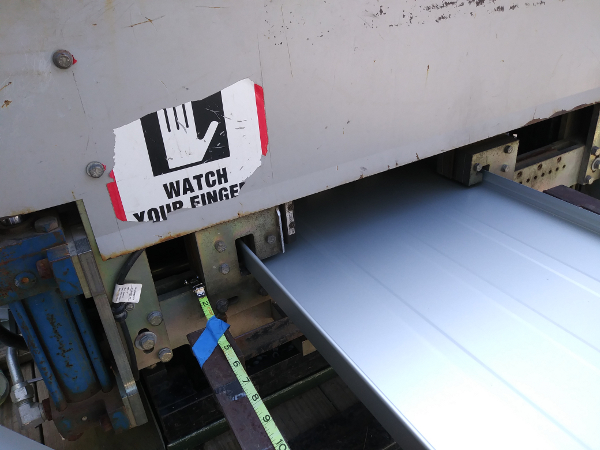
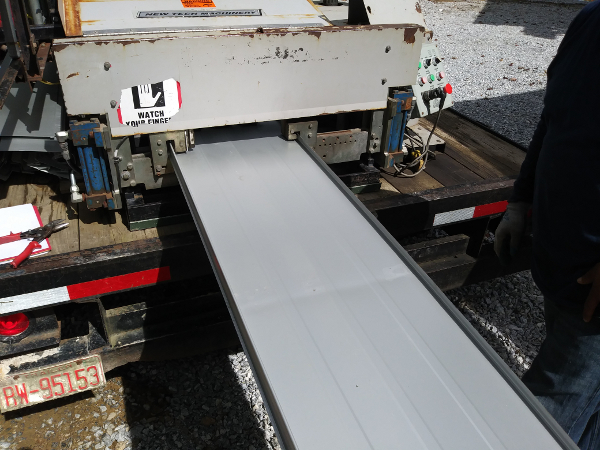
Roofers set up trestles and sawhorses about every 8 to 10 feet to support the panels as they came out of the machine.

CLICK ON PHOTO ABOVE TO SEE YOUTUBE VIDEO OF LONG METAL ROOF PANELS BEING EXTRUDED ON-SITE
5 metal workers picked up the panels to avoid bending and breaking them.
4 metal roof workers dropped ropes from the roof low edge, then simultaneously pull up on the panels. The thicker 24 gage panels gave them additional strength to just barely avoid crimping and folding over itself as they were raised.
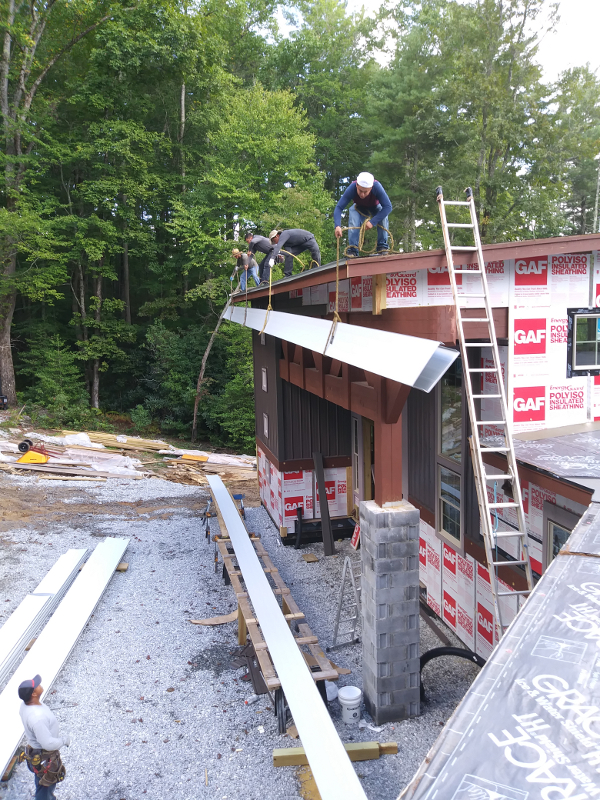
The workers needed to lightly hammer the sides of the standing seam hold down clips to help engage the seams of the panels.
Having no joints from the top of the roof to the bottom = no leaks.
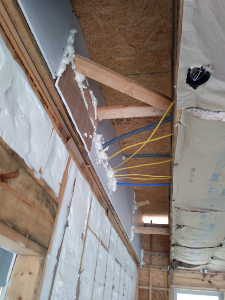
54 Long Ceiling Downrods 10-10-2018
There are 2 of these 3/4″ I.D. (1″ O.D.) black steel (Lowes called it “iron”) pipes with couplings and custom store- carved threads with flanges to secure them into overhead blocking between roof trusses and through the 250 pound reclaimed timber beam which will “float” over the kitchen granite (Jurassic color) island, with LED track lights on the beam.
Note: don’t try this at home, kids. Why: because we had to buy two 20 pound 18″ long heavy pipe wrenches and then had to have 3 strong people hold the pipe with another person cranking the flange onto each end. Why: because the components you buy off the shelf at a big box store don’t always work the way they are supposed to work. Meaning: you may have to recut new threads with the pipe wrenches. Tip: use plenty of WD40 on the pipe threads when doing this, and pick out the curls of metal so they don’t clog the modified threads. And once again: to those of you who think you can build your own house: no you can’t. The above exercise required several big strong men cranking on this pipe. Impossible to do it yourself.
Kitchen Island Timber “Chandelier”
This is grouped here as part of the previous work. It displays what the iron downrods ended up supporting.
The Architect found this reclaimed 200 year old chestnut timber in a pile of logs. He took it to his garage, where he applied liberal coatings of boric acid and water solution, to kill any bugs inside it. He then transported it in his pickup truck to a shop with woodworking craftsmen. They skip-sanded it, knocking off the sharper protrusions and removed rotted sections, then applied a coat of satin polyurethane and installed a couple of iron bands with clavos.
The Architect then took it back to the house under construction and with the help of the Electricians, bored 2 holes, each slightly larger than the iron pipes. Then the Architect and 3 Electricians heaved the timber up onto 2 tall step ladders and installed wooden chocks to get it to the desired level, then installed the flanges to secure the timber into place.
Christian Fletcher, co-owner of TCF Electric and lead Electrician on this project shown here tightening one of the supporting flanges under the timber. This became an electrical item because wires were installed down one of the iron pipes from the attic, which supplied power to 3 track lights mounted on the timber “chandelier”. Christian was a “can-do” guy that helped get many important things accomplished with the electrical systems of the project.

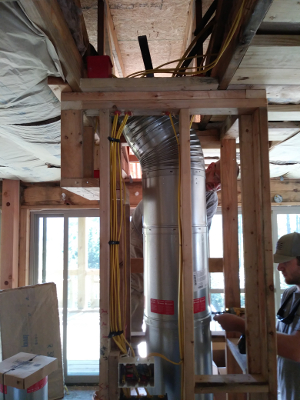
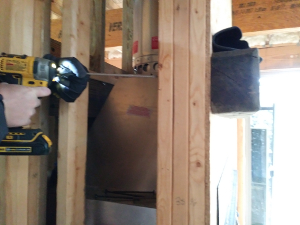
55 HVAC Rough-In
Owner ran out of steam. No photos.
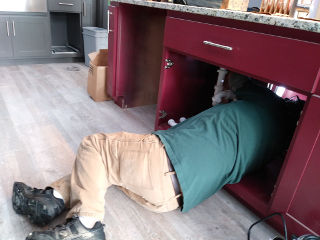
56 Plumbing Rough-In 10-18-2018/ 10-26-2018
Unfortunately, original plumbers made several mistakes: put a toilet in a closet, then bored the hole too close to the closet, didn’t know how to install a vessel sink tailpiece, never installed the main hot and cold water piping in the crawlspace, never installed the site piping, misaligned piping with the cabinetry, and many other problems, such as abandoning the project when we needed to be bearing down on it. Had to replace them with another Plumber who had to fix all the first Plumber’s problems. Was not fun. Not recommended for the faint of heart.
There was one thing the original plumbers did right: they did install fire caulk-foam in the annular space around the piping at the first floor and crawlspace floor level.

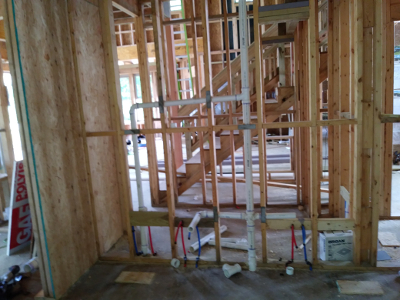
57 Electrical Rough-In 10-3-2018/ 10-16-2018
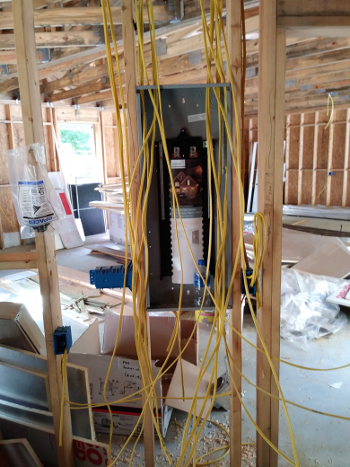
Lots of romex wiring running all over the place: inside walls, floors, attics, crawlspace.
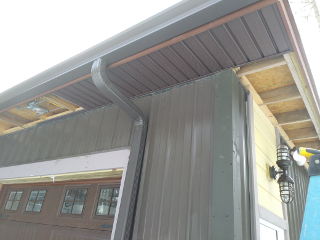
58 Gutters & Downspouts 10-4-2018
Alex’s Gutters & Downspouts did a very professional job for a downright economical price. What a great value Alex brings to the Sapphire-Cashiers-Highlands community. There were other providers asking 3x as much from the Asheville area. Get Alex. He’ll do a better job for less.
Architect specified a medium to dark brown gutter color to blend with other colors on the wall.
59 Chupacabra 10-11-2018
When the wild turkeys first made their appearance, the roof framing was being installed. The Architect saw about a dozen of them on the meadow below. They were kind of ugly. Knowing that the workers present were mainly Mexican, he remembered an old X-Files show about a Mexican devil dog called a “chupacabra”. So he yelled:
“Aieee! Chupacabra!” while pointing at the meadow below. All the Mexican workers looked down, startled, wondering where the mythical devil dogs were, seeing only several wild turkeys. Well, the Architect thought this was funny.

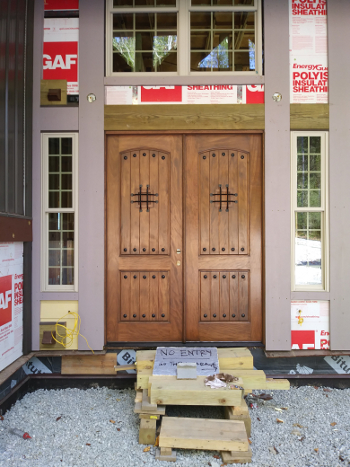
60 Front Doors 10-11-2018
Front doors are a big deal to most people having a custom mountain house designed and built. This is a main statement as to the quality and character of the house, and by extension, the owners. So many owners want this to be something special. Trouble is, this normally comes with a high price. It is not uncommon for 8′ tall double 3′ wide doors made of mahogany or other high-end hardwood and with side lights to cost $6,500 or more.

The Architect selected and ordered mahogany doors in a mahogany frame from an online source for only $2,000 delivered price to the project. Amazing. 8′ tall x 6′ wide opening. Nice arched carved pattern with verticals. Clavos. Speak easy grills. Incredible price. Downright cheap. For top quality. And in a prehung frame. Weighed hundreds of pounds. Took 3 guys to move it around. 4 hinges on each side. Architect had carpenters install 3-1/2″ long screws above and below each and every hinge, into sold framing. Architect also personally installed large throw bolts on the interior side near the top, bottom and middle, to keep these tall doors from warping over time, which does happen all the time in this Alpine Rain Forest region, if not taking precautions like this. Also, stained and install satin polyurethane exterior protection coating within a few days.
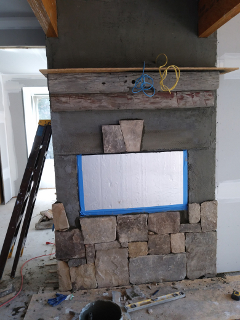
61 Front Stone Column 10-12-2018
Architect selected and purchased very large stone flat boulder chunks for the lower part of this special large column.
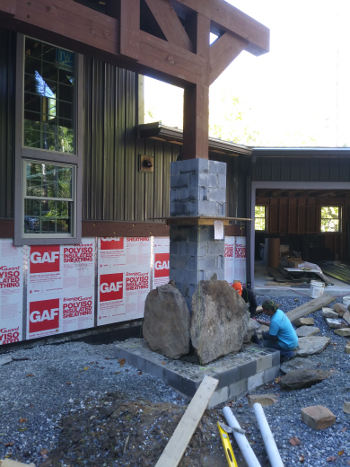
The stone masons were from a region of Mexico famous for ancient pyramid construction. The lead mason was descended from these same ancient builders. Building large stone structures is in his blood. They moved these large stone around using ramped wooden walkboards and long wood and steel prybars.
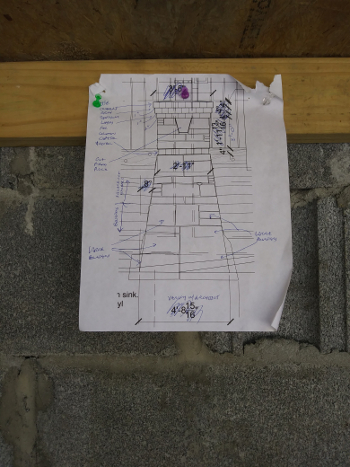
Blow-up detail of Architect’s stone column drawing, tacked right onto the upper part of the column substructure, to guide the masons:
The Architect changed from the large stones at the rough base to a more refined ashlar rectangular native stone from Tennessee (colored sandstone of beige and brown colors), along with some North Carolina gray stone for reveals and top stepped capital.
62 Sand in Truck 10-12-2018
This project, like all construction, has stages where the building seems to consume materials like a pregnant dinosaur. “Yum-ahwb, ghfght, ohb, ummm.” Such was the framing, trim, and sand for masonry mortar, shown here, in the Architect-Construction Manager’s truck:

63a Foam Insulation 10-17-2018
USI insulation did a great job with several types of insulation and also offered a real value: foam insulation in the walls for a minor upcharge. Well worth it. Walls are one of the main sources of air infiltration and bug infestation. Installing liquid expanding foam in the walls pretty much eliminates that.
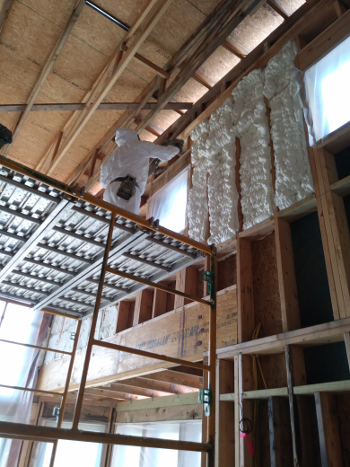
The installers waited until the expanding foam dried, then sawed the face of it flush to the wall studs using long, thin hand saws. Architect also had them foam his trademark “EnergyHeaders”, where he uses 2 headers in a 2×6 wall, leaving several inches of space between the headers, allowing liquid foam to fill that space, which helps both structurally and decreases energy loss. Walls were originally indicated to be R26 but ended up as R28, which is a substantial improvement from the normal R13 in most 2×4 walls and also more than the R19 in 2×6 walls.
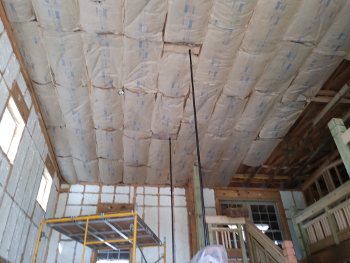
63b Batt Insulation 10-18-2018
The attic/roof and the floor were insulated with fiberglass batts with kraft paper facing as a vapor barrier. R49 in the ceiling/roof and R30 in the floors over the crawlspace. Architect also insisted that the vapor barrier facing flanges be opened and stapled over the face of the roof truss bottoms, to yield a superior continuous vapor barrier. Most companies don’t do this, resulting in inferior vapor protection. HOME ARCHITECT insists on this step, particularly in mountainous regions in Alpine Rain Forests. You have to have better vapor protection to keep away mold.
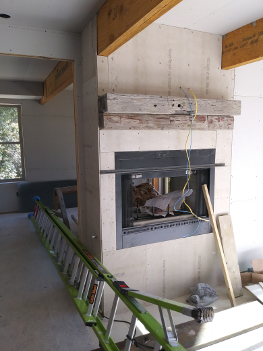
64 Fireplace 10-22-2018
Framing around a fireplace is a tricky business. The Architect made sure the framers and fireplace installers understood the manufacturer’s requirements, such as distances of combustible materials to the fireplace box.

Also, today’s fireplaces must have exterior combustion air delivered to the firebox from an outside duct. And this fireplace has a gas log lighter. And cut stone facing. And a hearth and mantel. All critical items.
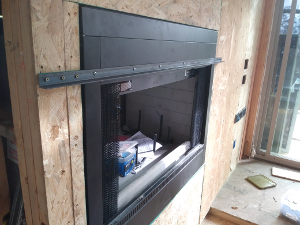
And here is something many designers and builders leave out: a steel angle to support the stone over the fireplace opening. Because some people use thinner rock (such as cultured stone), they believe this is not necessary. They are wrong. Any stone of any kind is heavier than framing wood. And it is also subjected to thermal expansion and contraction caused by the intense heat of the fires under them. As such, you really can’t depend solely on mortar to keep the stones in place over years. Better to have a traditional steel angle screwed to the back-up framing to support the stone facing, as the Architect here did. This stone is real native stone, however, it was hydro-laser (water high pressure) cut in Asheville and to be only about 1-1/4″ thick. Corners were also provided, allowing the appearance to be that of natural 5″ native stone, while being less than one fourth the weight, allowing support from wood framing, saving thousands on structural support.
65 Flue & Chimney 10-18-2018
Once the fireplace is installed, if it is a wood burning fireplace, you have to provide a though-the roof flue and chimney. Such is the case here.
Anyone considering a DIY construction needs to think twice. These kinds of things are VERY technical and can burn down your house if not done properly. And you’d better believe your Code Official will be around to inspect it before you install the drywall around it. Notice the offset required at the 2nd floor ceiling level to get the flue pipe between the roof trusses. Architect deftly handled the framing and finishing.
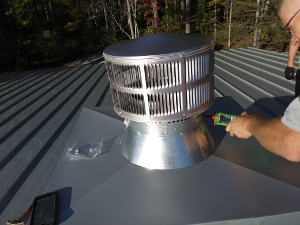
And here, the expert fireplace and flue installer from Biltmore Hearth & Home applies exterior grade sealant around the top spark arrestor, secured to the flue pipe below, along with a storm collar, sealed to the metal chimney cap. Not a job for DIY. No leaks. Perfect venting. Also note the gorgeous Kynar 500 silver metallic paint (with clear coat) standing seam metal roof (over galvalume treatment over 24 gage steel single-length field rolled roofing panels).
66 Gas System 10-18-2018
Blossman Gas out of Sylva installed the house’s gas piping in the crawlspace and in the house, along with the exterior tank and site piping.
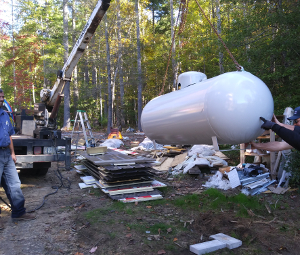
This house only needed a 250 gallon tank, because only the gas stoves and log lighter in the wood burning fireplace use gas.
67 Timber Braces 10-19-2018
Many mountain houses have timber bracing. Some people think this is just because it looks quaint. That is not true. These timber braces actually bolt the structure together, particularly at post and beam porches, where the high mountain winds need to be stopped and resisted.
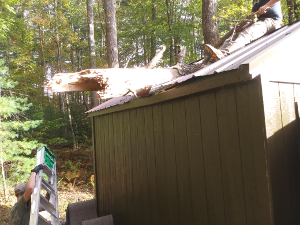
68 Tree Fall on Shed 10-21-2018
As they say, sh*t happens. Especially in the mountains. Here, the roof of the Owner’s shed was partially smashed by a rotten tree, coming to visit from the neighbor’s land. As it turned out, the owner’s Gorilla shelves from Lowes absorbed most of the impact, saving the walls from any damage.
69 Drywall 10-22-2018 / 11-6-2018
DELIVERY 10-22-2018
We start with 222 sheets of 4′ x 12′ x 1/2″ drywall being delivered.

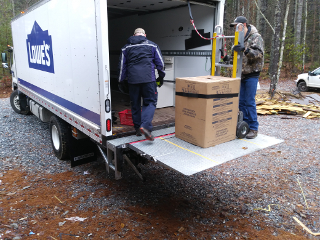
The only problem is: Lowes and other people who deliver drywall no longer take it up to a 2nd floor. That means the owner and one other guy had to carry 70 sheets of drywall upstairs. Because the drywall hangers refused and would have bailed on the job if this had not been done for them. So if you are a DIY kind of person, that could give you a heart attack or kill your back or knees. You had better be in great shape and be large and muscular.
HANGING THE DRYWALL 10-24-2018

The 4 person Mexican crew that hung the drywall did it in 3 days. They came about 9AM and didn’t leave until around 11PM each night. They know how to work.
The Architect wanted the atmosphere between the garage and main house completely separate. This meant that the drywall needed to go from the floor to the underside of the roof deck. And that all penetrations needed to be foamed so that fire and smoke and fumes could Not transfer from the garage into the house. This took some extra work:
But it was worth it. Other designers and builders may not care about things like this.
And below, see the Architect’s good work indicating 1/2″ concrete backerboard (mold inhibitive):
The Architect then had the stone mason screw metal lath to the backboard, then coat that with mortar, then back-coat the shaved rock pieces with mortar, and stick those to the brown coat in the lath. That turns the entire assembly into being fireproof from the outside in. But the drywall people don’t usually hang the concrete backerboard. That typically must be done by others you pay to do that.
Like for instance, here in the shower wall areas to be tiled: that needs to be concrete backerboard:
mold-inhibitive type is best, which this is, from Hardie, the same folks that make the exterior cement siding.
Note the built-in shower niche (Schluter Kerdi). The tile will be installed over a setting bed troweled right into these niches. Great product.
TAPING THE DRYWALL 10-29-2018
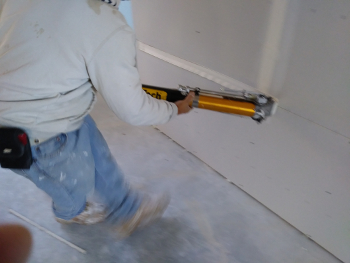
This is a state of the art drywall taping tool called a Bazooka. It appies drywall compound and drywall tape at the same time, in one movement. It is expensive and worth it. It makes drywall finishing much easier and faster.
And here is secondary compound with a wider putty knife on the ceiling:

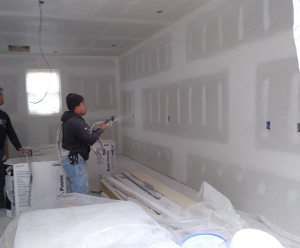
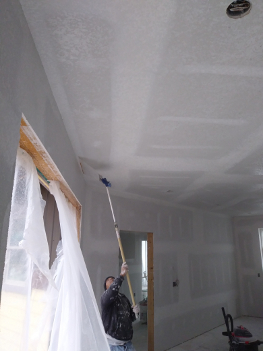
SPRAY TEXTURE & KNOCK DOWN 11-6-2018
And below is the spray texture coating being applied to the walls:
Next is a wide blade being swiped lightly over the still wet texture, giving the drywall the “Knock-Down” surface treatment:
Note the kerosene heater, which was necessary to keep the house interior from freezing during the cold weather, which would have destroyed the drywall finishing operation:
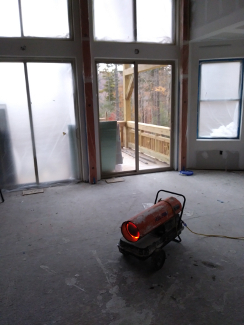
This worked, mainly because the house was so well insulated.
70 Mantels 10-23-2018
Most builders don’t do a very good job of installing mantels. In fact, some of them fall off, injuring people. But here, we did it right:

Architect had the trim-out carpenters install Simpson & TimberLok long thick screws from behind the mantels through studs and into their rear, making it impossible for them to fall. Some of the guys did chin-ups on them.
71 Front Area Progress 10-25-2018

The metal siding, while an exceptional value in terms of material cost (69 cents/SF), has turned into something of a problem to install in areas where there are windows and other obstructions. The progress on the metal siding was very slow, in terms of manpower. However, the Architect ended up replacing several trim-out crew with faster workers who got that task done twice as fast. So part of the slowness of the first half of the siding could have been the psychology of trim-out people looking for an extended weekly paycheck as opposed to newer workers who got paid a lumpsum to complete specific tasks. However, in the end, the Owners received a house with metal siding that should last the rest of their lives (paint guarantee is 40 years). The main point being: it costs about $14,000 to re-paint the exterior of a typical house in this region every 5 to 7 years. The Owner did Not want to have to bear this expense another 5x during the rest of his life. Little to no maintenance was the idea. So the Owner got that.
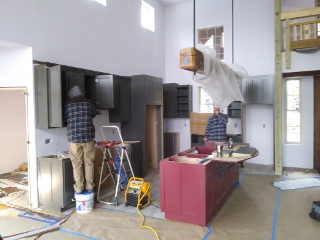
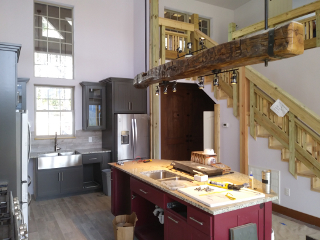
72 Cabinet Fabrication 10-27-2018
While this particular cabinet maker made erroneous comments regarding other related scheduled items (like appliance delivery), was unresponsive to costs incurred by the owner due to the cabinetmaker’s granite sub’s mistakes, quoted one price for a granite upgrade, then tried to charge double for that same choice, refused to answer his phone after hours and on weekends, he actually did good work and made excellent cabinets and did in fact get things done on time, despite their carping about that. Just probably not a good personality/business expectation mix for future work. They also did include some upgrades at no cost, which were appreciated. This is a good cabinetmaker.
Here’s a big pile of cabinet boxes for this project before installation:
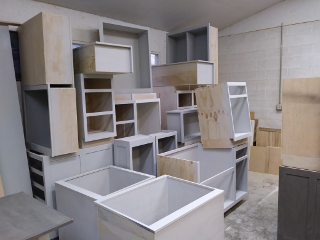
Owner’s wife chose painted finish to go with the Industrial Mountain Style theme.
73 Shower Pan H20 Proofing 10-28-2018
Luis A. installed this membrane shower pan to the master bathroom custom tile shower floor:
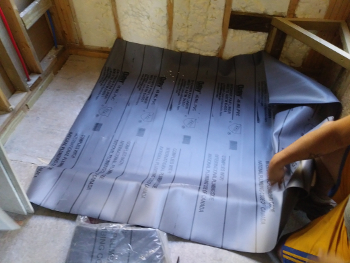
This is installed under the mud bed of mortar (but over a concrete backer board) to keep water from the shower from getting into the wood floor and wall structure.
74 Mexican Lunch & Dinner 10-29-2018
Here’s the deal with hiring Mexican workers for a long period of time (as in weeks and months): They expect you to occasionally buy them lunch and sometimes dinner, when they are working extra hard and long (like after dark and sometimes as late as 11PM). So while this concept of buying workers meals sometimes for working hard might be foreign to Anglos, it is quite common in the Hispanic community. They appreciate it and work harder if you do this:
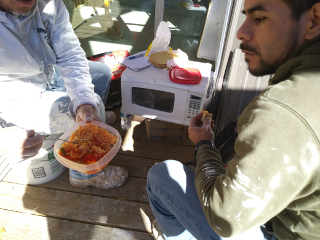
It is also common that Hispanic construction workers bring a microwave oven that they hook into the temporary power cables so they can make better food (than most Anglos bring).
75 Fall Colors 10-31-2018
Speaks for itself:
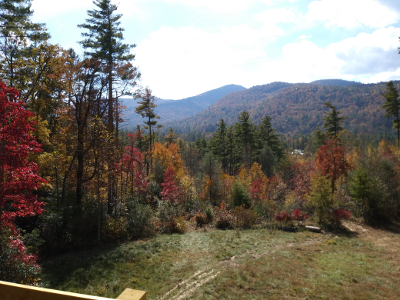
No touch-ups. The real deal. What God gives us in these parts.
76 Fireplace Stone 10-29-2018 / 11-2-2018
Here’s the metal lath screwed through the concrete backer board and into OSB and studs:

With the brown coat mortar coat starting.
And here is the cut real rock going up on the parging.
78 Improved Downspouts 11-1-2018
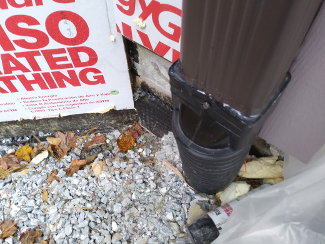
Before the above improvement was made there where a couple of problems. Alex the gutter pro fixed them both at no extra charge:
1. He installed sealant around the downspout and black plastic receiver near the bottom. Before this, water coming down inside the downspout was splashing up and out of the downspout and soaking the surrounding wall surfaces at every downspout. Problem fixed.
2. He installed a gutter top edge extension at a critical geometric change. It stopped the gutter overflow that had previously been happening there. Problem solved.
79 Painting Interior 11-6-2018 / 11-8-2018
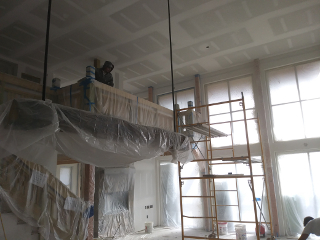
Spray painting about 40 gallons of light gray paint from Lowes.
One of the ghosts who did the great painting job:

81 Tile 11-9-2018 / 11-12-2018

First, the entire wooden subfloor was covered with 15# asphaltic felt. Then under where tile would be placed, went down 1/2″ thick concrete backboard (mold-resistive), then a mold-resistive setting bed, then the porcelain tile, then epoxy grout. Note: you really need t he advice and counsel of an Architect expert in such matters because there are things you need to know about dealing with epoxy. If you aren’t familiar with this, don’t do it. This Architect is familiar with it and now enjoys mold-free tile walls and floors in all his showers and kitchen, laundry bathrooms.
85 Garage Doors 11-12-2018
These doors have special purlins that make them capable of resisting 110 mph wind loading. They are screwed together in sections. The exterior looks like walnut wood, but in fact is a high-tech metal paint that looks like wood grain. The interior is a vinyl surface with a core of foam insulation.
87 Wood Flooring 11-12-2018 / 11-16-2018
The wood flooring in this project is 3/8″ thick engineered hand-scraped birch from Cambodia. It was installed over the 15# asphalt felt, which serves as a vapor barrier from the crawlspace below and on the upper floor, as cushioning. It is stapled down with special size fasteners through a tongue & groove joint. The finish is guaranteed for years and is spectacular. Looks like mahogany.
88 Cabinet Install 11-13-2018 / 11-21-2018
Once again: this cabinetmaker does very good work and makes a great cabinet. We just have some administrative differences of opinion with them about a few things. They did a professional installation.
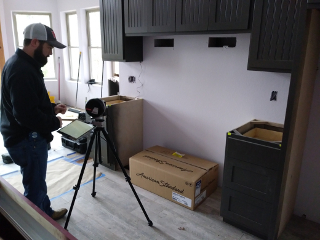
89 Counter Measuring 11-15-2018
The granite counter subcontractor to the cabinetmaker comes out, usually several days after the cabinets are installed and uses lasers to determine the exact dimensions that the granite counters need to be cut. Then they go back to their shop and cut and prepare the granite slabs. This includes holes for sinks and faucets.
90 Appliance Delivery 11-15-2018
If you think you’re going to DIY your appliance delivery and installation, think again. If you’re a desk jockey and aren’t big and strong and know a lot about this sort of thing, you’re asking for trouble. Especially regarding gas appliances. Only hire professionals to do this. And only your Plumbers should install the water lines to your refrigerators. There are things you don’t know about that they do, to avoid a problem and insure proper operation.

Above, you see the pile of appliances, with the refrigerators being rolled into place and the gas range/ovens, that will have to have the gas company install the proper valves and piping to them to convert them from the natural gas typical sold format to LP gas (once again: not for DIY). And the microwave ovens are heavy. That takes 2 or 3 big guys that understand the various mounting hardware piece to fix them to the upper cabinets over the ranges.
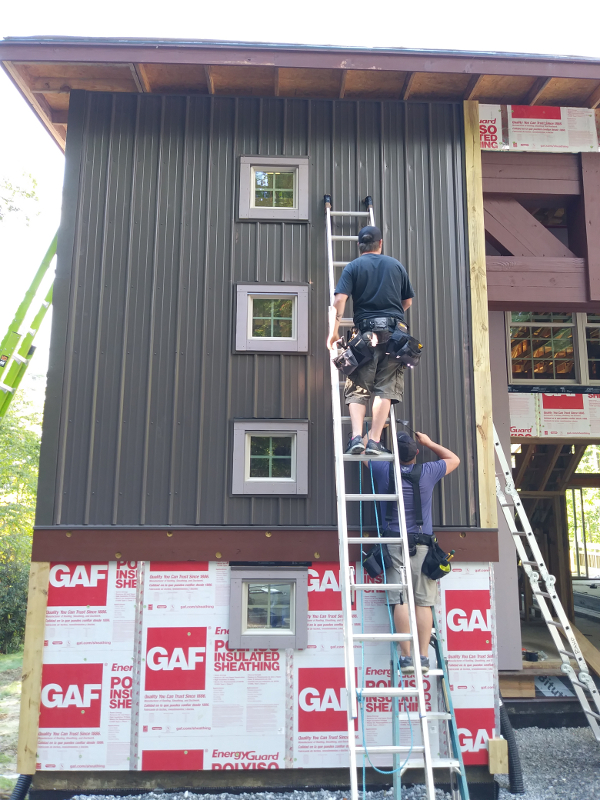
91 Metal Wall Siding Progress 11-17-2018 / 11-20-2018
Once again: the metal siding turned into a huge chore. The Architect had to fire the original guys that had been milking this work for several months, because it never progressed at the rate they promised, like maybe they were looking at this project as a weekly paycheck that would go on forever, rather than a specific scope of work to get done. The Owner hired a new Mexican crew and they got busy and got it done. They were paid a fixed sum for a specific scope of work. That was the difference that seemed to work better, and they were Not scared to do the high work that the Anglo workers didn’t want to do. But at least now, the Owner should have his wish: an exterior wall surface that never needs painting (at least during his lifetime).
92 Front Porch 11-17-2018 / 11-18-2018
Once again, the Owner and Architect relied on industrious and capable Mexican framers to get this specific task done in 2 days: foundation piers and framing on the first day, and decking and steps on the second. The Architect commented often on how good it was to work with professionals that knew what they were doing and who kept at it, even into the dark, to complete specific tasks on a given day.
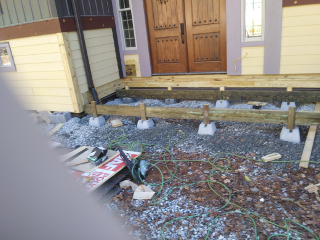
It was important, both in terms of cost and time, that the Architect devise a simple method of supporting this front deck-porch. He worked with the local Building Officials to create this separate structure that could be simply supported on prefabricated concrete deck blocks (from Lowes), bearing on the existing 3’+ of gravel. For the steps, the Architect created the idea of using 2″ thick precast concrete patio pavers over the gravel, then laying solid severe weather (For Ground Contact) 6x6s, stacked. No stringers to figure out or cut. Just stacked solid pressure treated materials, screwed together with long Simpson structural post and beam screws. This made for a super-solid set of front steps and deck/porch.
And the final product:
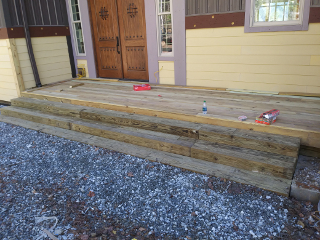
Note how the Architect sloped the gravel down and away from the main house and front porch so that rain will run away from the house.
93 Interior Doors 11-21-2018
Most of the interior doors are typical, however, the Architect did a few things that make this house remarkable in this regard:
1. There are NO door conflicts. All doors open so as not to get in the way of people or other doors. Sounds easy, but most homes have many door conflicts. It takes a lot of professional architectural thought.
2. The upper rear bedroom functions mainly as a Home Office. However, to allow it to also function as a Bedroom, 8′ tall hung gliding doors on overhead tracks were installed. See photo below: they allow the room to be totally open to the rest of the Loft, or enclosed.
3. There are pocket doors on the 1st Floor at the entrances to the Master Bathroom. This means: those doors vanish when not in use.
4. These interior doors normally would have cost upwards of $20,000. However, through intelligent Value Engineering in cooperation with Jennings Building Supply, the cost of the materials was just a little more than one-fourth that cost.
5. The doors came prehung and primed off-white, saving cost on future finish painting and hanging.
6. The doors are the “Cheyenne” style, with carved upper arch and vertical panel appearance, giving them a rich appearance.
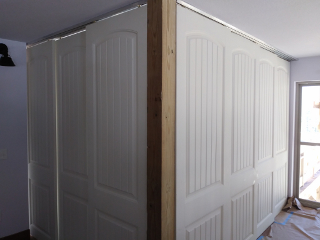
This is the identical viewpoint of this rear upper bedroom, used for both home office and bedroom. Only the overhead track gliding doors have been moved.
94 Exterior Progress (metal siding and Hardie lap siding & trim) 11-21-2018
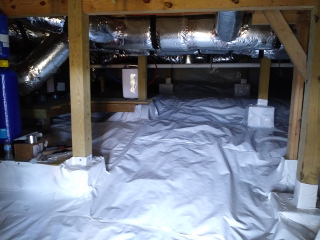
95 Crawlspace Encapsulation 11-21-2018
Many people don’t understand what the big deal is about encapsulation until it’s too late. Too late for what?
1. Bugs.
2. Mice.
3. Snakes.
4. Mold.
5. Excess humidity.
6. Damage to materials.
How does encapsulation fix those conditions? Or make them never happen in the first place?
Well, encapsulation is typically a 12mil to 20mil white vinyl or reinforced polyethylene continuous sheet over the entire earth “floor” and up the interior side walls (up to within 3″ of the wood structure above). It is held to together with very sticky, very thick white vinyl tape, in continuous lengths. At the top, continuous sealant is applied to keep creepy crawlies and moisture from venting out the top edge. Okay: so nothing gets through that.
Next, you install a dehumidifier in the crawlspace. A good one, of at least 70 quarts a day capability. You have a Plumber hard pipe that through the wall and it drips the condensate from the dehumidifier directly to the outside. You don’t have to empty anything.
Then, you install a cheap WalMart box fan ($20 or less) on top of a concrete block, plugged into a 24 hour 1/2 hour segment automatic on-off timer, that is plugged into a GFCI electrical outlet in the crawlspace.
So what does this all do? You end up with an internally ventilated, dehumidified crawlspace that is 99.9% resistant to pest infestation and controls the humidity to an acceptable level. Who wouldn’t want that?
It took USI a day for 2 guys to install this.
96 Interior Stair Finishing 11-24-2018

This was a lot of work for Carlos “Cadillac” Carpenter.
97 Interior Post Capitals 11-24-2018
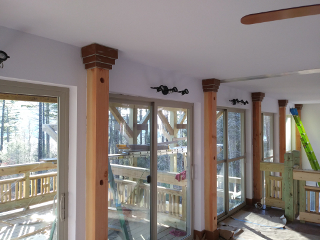
This provided wood trim around the post tops where there was a gap at the drywall ceiling.
98 Exterior Siding Update 11-24-2018
Siding is finally about at the 99% stage. It has taken months.
100 Granite Counters 11-26-2018
At last the granite counters arrive and are put in place.

102 Ceiling Fans 11-29-2018
103 Exhaust Duct for Microwave Ovens 12-3-2018
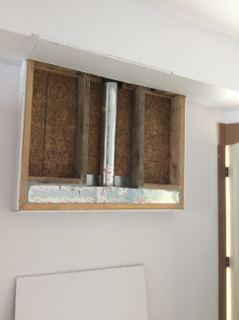
The owners had lived with recycled air from microwaves and supposed vents over ranges all their lives. This time, in their forever house, they wanted an honest to goodness real exhaust from the microwaves above their ranges. This metal ductwork feeds into an overhead metal exhaust duct that goes to the outside.
104 Meter- Power Energize 12-3-2018
106 Sewer to Septic 12-4-2018

When the original Plumber did do this and didn’t do this and didn’t do this, we took care of it with other people, got it inspected, passed and moved on to a new Plumber.
107 TV Stand-Cabinet 12-4-2018
Tony and Rand custom built this big screen TV stand for the family.
108 Lights On 12-6-2018
First time lights are on.
109 Snarfling Cat6 for DSL 12-7-2018
TCF Electric taught this trick to the Architect. You put a strong vacuum cleaner at one end of a connected conduit and it can pull a then nylon cord through the conduit, if you put a fairly small piece of something like a chunk of a shopping bag tied to its end. This trick allowed the Architect and the Electricians to draw about 300′ of cord through the owner’s underground conduit, from the side of his garage to the phone pedestal near the street, where the Internet DSL needed to be connected.
110 Shower Doors & Glass 12-7-2018
Clear tempered frameless glass fixed panels and doors into the master shower. Very cool. Jennings Building Supply provided the materials and labor, both of which were high class.

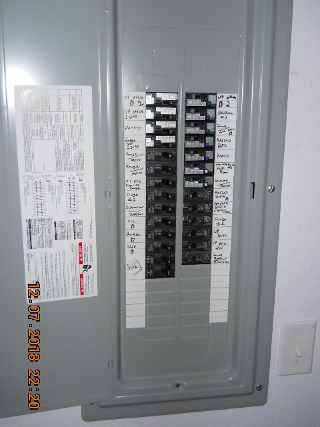
111 Final Electrical Panels 12-8-2018
Electricians labeled power panels, identifying what breakers control what circuits and where.
112 Plumbing Trimout 12-12-2018
Words cannot express how unhappy the Owner was with the original Plumber, the many problems caused by them, the additional costs required to pay other new Plumbers to finish and fix the problems they created. Was very happy to finally find a professional and competent Plumber who noticed these problems and fixed them, after the original Plumber abandoned the project.
113 Soffits 12-13-2018 / 12-18-2018
Not many people even know what the word “soffit” means.
A soffit is the part of a building under the roof overhang, using finished materials to enclose it. In this particular case, a dark brown perforated vinyl material was used. It allows the roof to vent, as required by Code, at the top and bottom of the roof slope. Louis is a great job.
114 Eleven Chupacabra 12-13-2018
As mentioned before, here are the nearly dozen wild turkeys visiting during a big snow storm that shut down the project in the middle of December. The owner and his wife worked all day long removed snow and ice so workers could come the next day and help get the house done.

130 DONE for Certificate of Occupancy 12-21-2019

NOTE: there were many steps not documented. The above are simply a few of them. The idea is that people achieve some understanding of how complicated a house is to build and what a difficult venture it is, and expensive. No one should attempt to do a DIY home project.
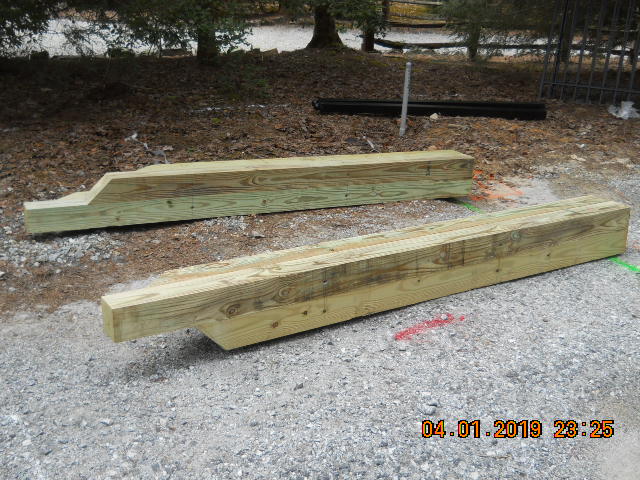
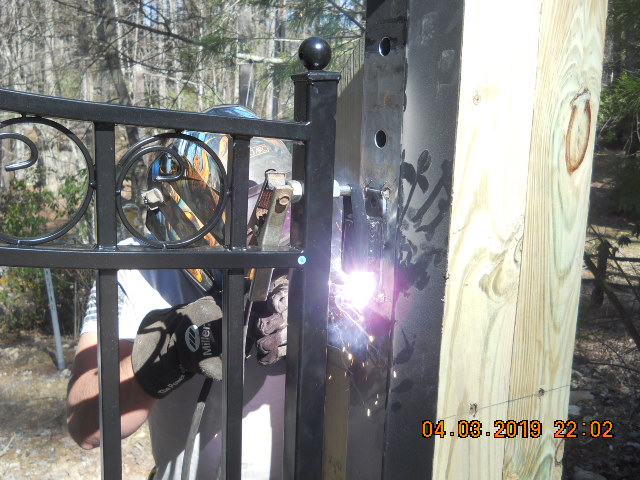
132 Gate Area 4/1/2019- 4/10/2019, then 5/15/2019
Architect designed and laid out quad PT 6×6 posts for each side and the gate guys cut them and screwed them together with owner’s hardware.
Gate guys mixed up concrete in portable mixer, poured into holes they dug and inserted the gate posts:

Owner’s gates attached:

Probably 1,000 feet of wiring installed underground between the left and right gate and the house:
Some wiring was 120v, other was low voltage. Very complex.
Hinges, sensors & lights installed:

Gates from keypad perspective:
Gates up close:
Nighttime:
133 Painting Trim
134 Turnaround Circle Boulders
136 Pantry Island
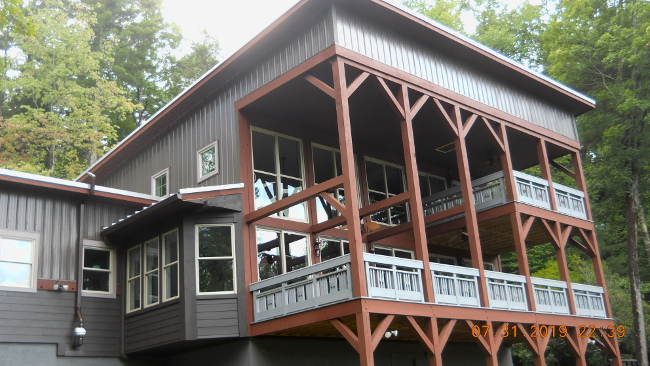
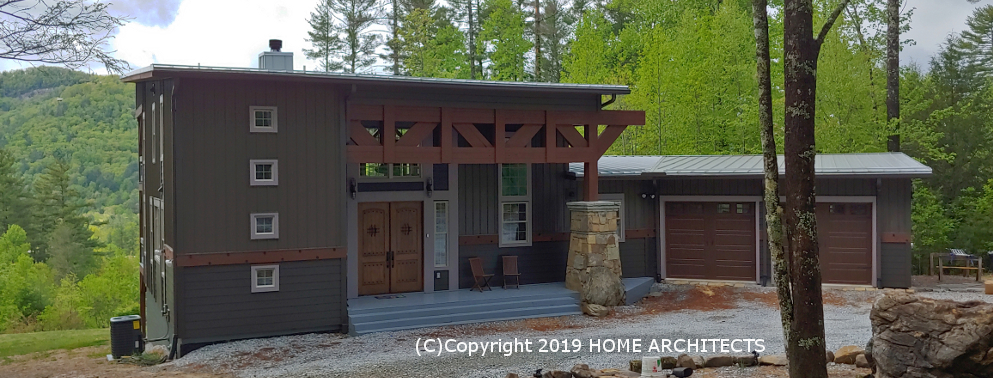
140 Finished exterior of house from front
141 Finished interior of house

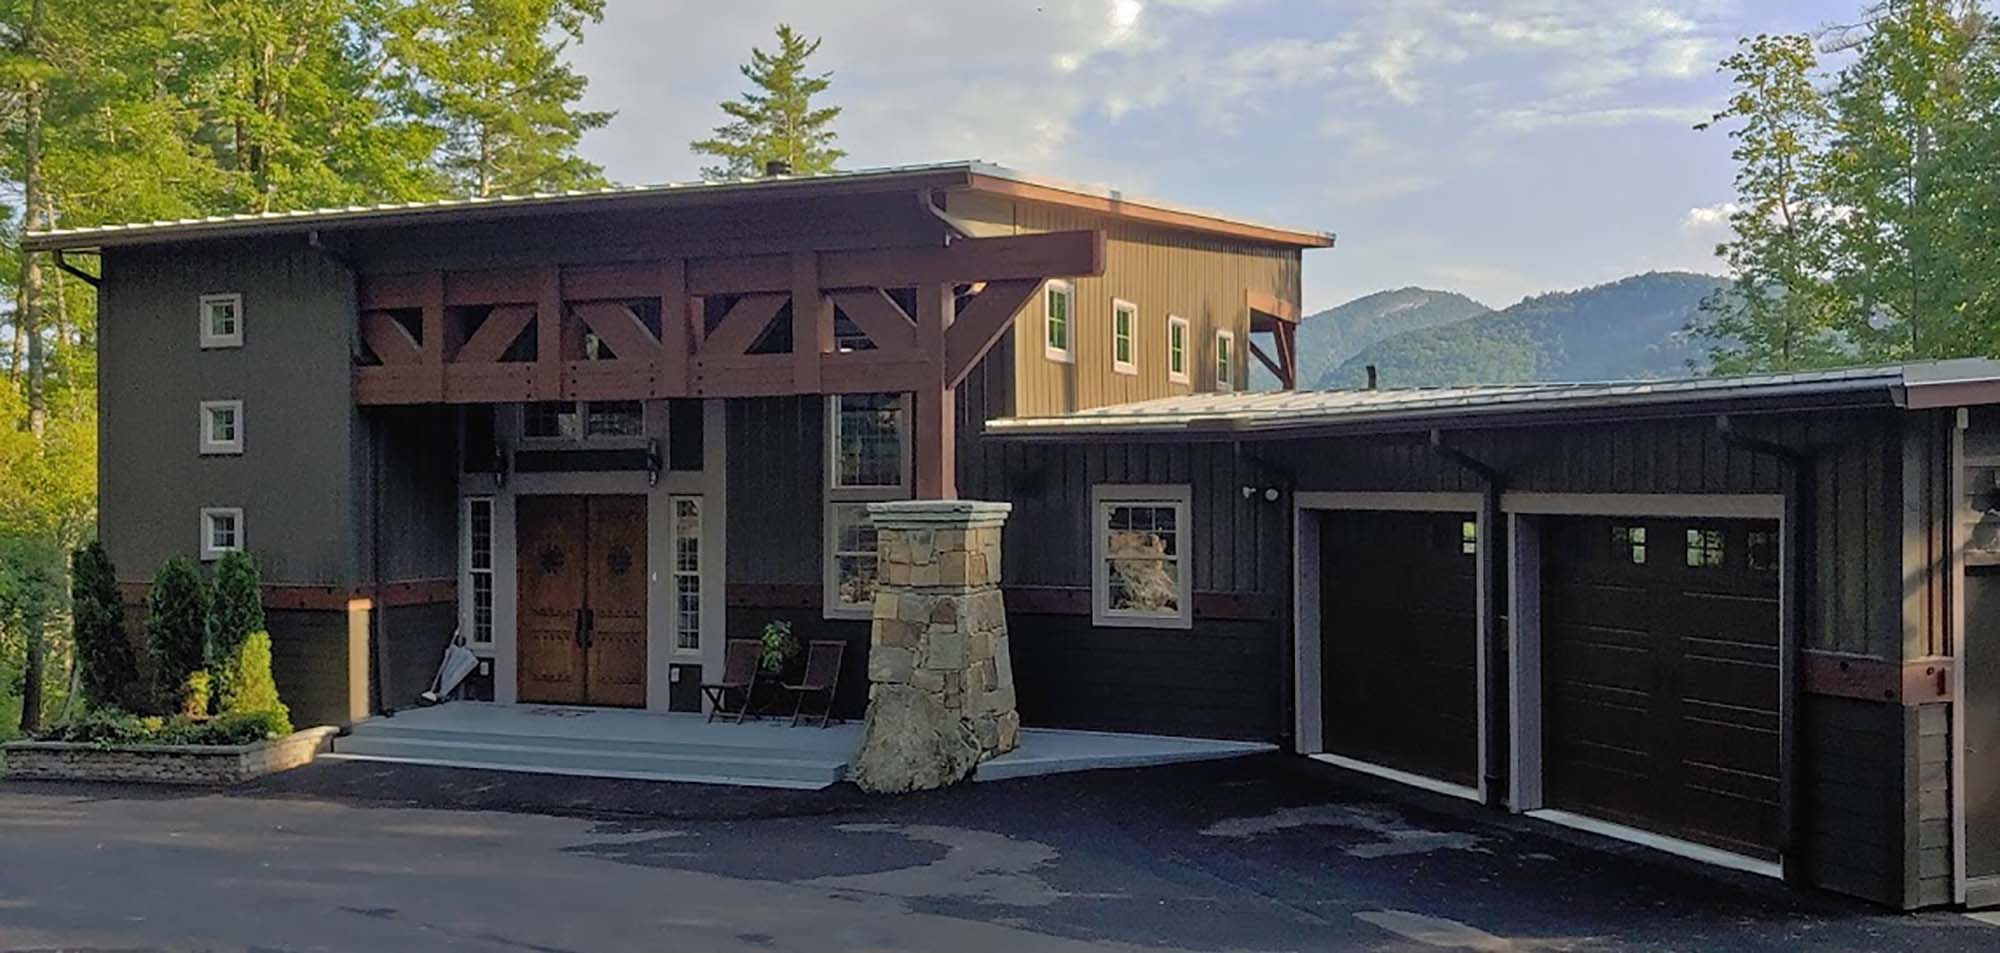
141 Finished rear of house