Anti-Slip Front Porch is this Architectural company’s review of how they improved one house’s front porch.
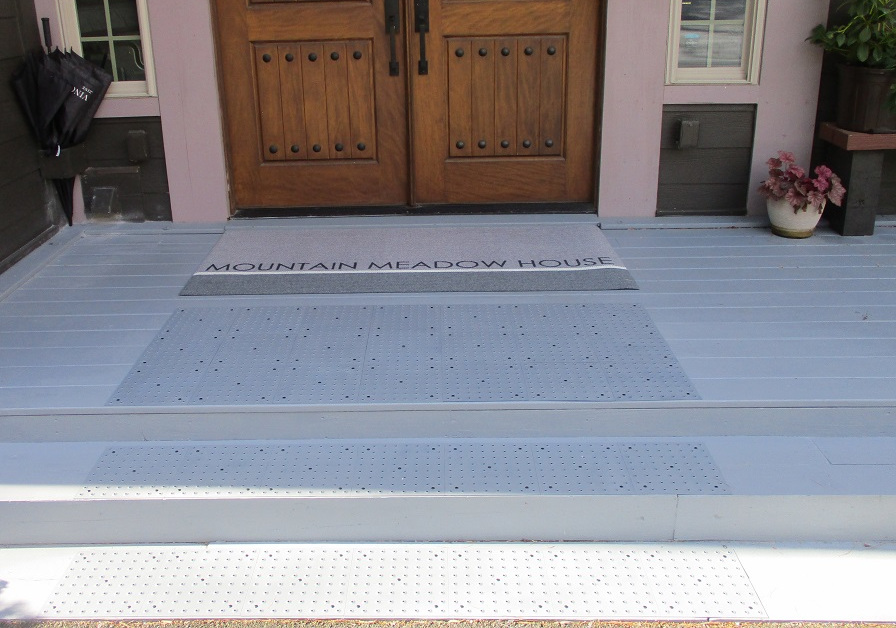
Above is the end result.
Below are the steps leading up to the finished solution. Do not attempt without a licensed Architect designing and guiding the process for best results.
STEP 1
Sand existing stained wood deck.
STEP 2
Use solid stain to recoat the deck, making sure the area under the new cleats receives at least 2 coats.

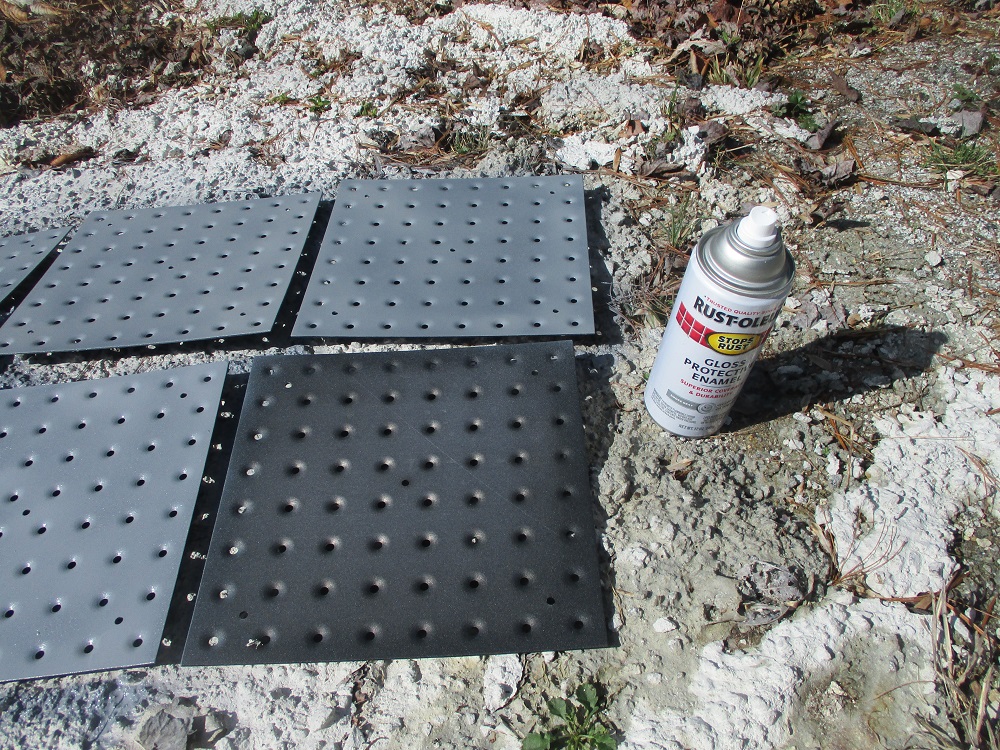
STEP 3
Order and obtain anti-slip metal cleat squares. Could not locate stainless steel, which would have been preferred. However, did find Marine-Grade aluminum, with a black powder coat. Architect sprayed front and rear with Rust-Oleum finish enamel, 2 coats, matching as close as possible, the finished wood deck surface color.
STEP 4
Arrange the anti-slip cleat square tiles together, aligning with center of new porch custom mat.

STEP 5
Screw cleats down using the stainless steel screws provided by the cleat manufacturer, using the phillips head driver in a screwgun/drill. Start with the first row center cleat tile. And start with the center hole first, then the perimeter of the first tile, then move on to the next. Screwing down the center hole first in each tile flattens the tile to the deck, which is the objective. As you move along, make any minor corrections to insure organized appearance centered with entry mat/doors. Set back tiles just a little from the edge of the wood steps to avoid catching a shoe on the tile underside.
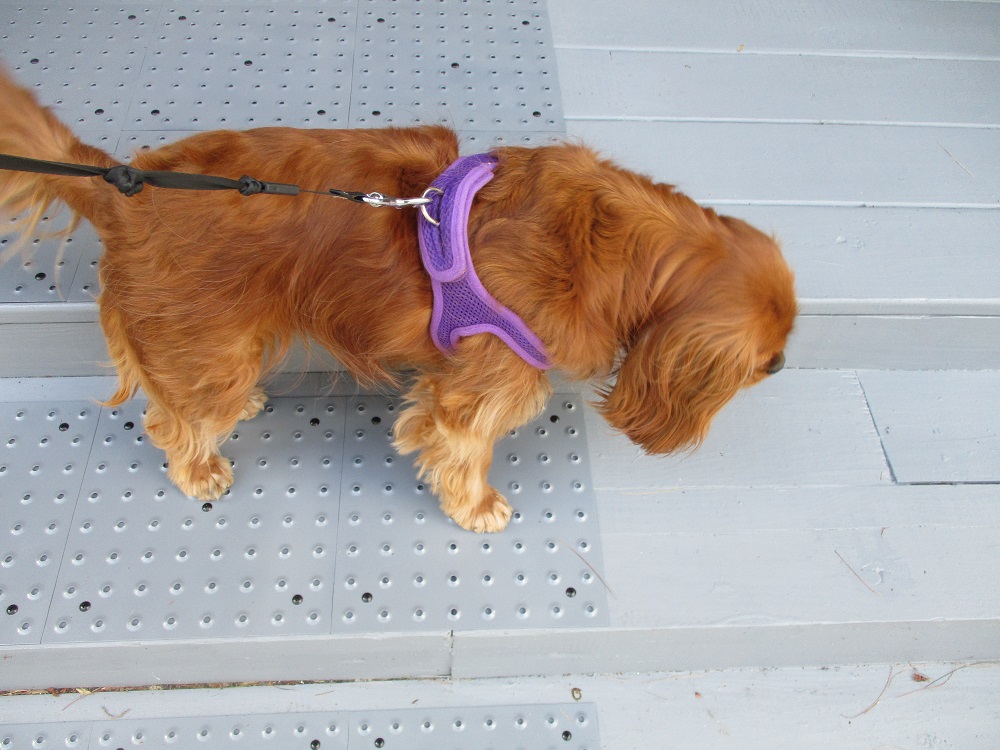
Polly inspects finished tiles.
COMMENTARY
The Architect used this opportunity to replace and upgrade the front porch coir mat which wasn’t performing well. Matterly custom made the new mat in a larger size than before. The Architect’s goal was to cover as much of the front porch as possible, within the width of the front doors so that any snow and ice collecting there during the winter would be rendered anti-slip due to both the mat and the cleat tiles.
The cleat tiles are 10″x10″ and are each fastened to the deck with 5 stainless steel screws: one in the center of the tile and the other 4 at the corners. The cleats are about 1/16″ thick, plus have a raised dome pattern with punched openings for traction. The manufacturer states in its literature that snow up to 1″ thick will be trampled down into the raised open domes, allowing the bottoms of shoes to contact the cut dome surface, which is highly slip-resistant.
COSTS (as of date of this initial publishing)
Anti-slip cleat tiles:
$395.88 including free UPS shipping all the way from British Columbia, Canada from Clearway Supply.
This was for 36 tiles (three 12-packs) of which 5 rows of 7 (35) were actually used.
Spray Paint:
RustOleum 4 spray cans of “smoke gray” with tax $32.49 from Jennings Builders Supply.
Custom Front Mat:
$126 with 10% discount and free shipping (cheap at twice the price) from Matterly.
TOTAL PRICE (not including labor): $554.37
BACKSTORY ABOUT WHY YOU MIGHT WANT TO DO SOMETHING LIKE THIS ASAP:
True Story:
Ted was a retired neighbor of the Architect’s. Ted was one of the smart NYPD police detectives that caught the notorious Son of Sam serial killer decades ago. About 4 years ago, Ted was carrying his family’s two shih tzu dogs in his arms for their walk. Ted slipped on ice on his front wooden porch. He instantly broke his leg. He was in a couple of hospitals during his care, where he was put on a catheter, which had not been properly sanitized. Ted was dead a couple weeks later.
Note to self: don’t fall. And take precautions NOW to avoid falling in the future, especially if you live in an area where snow and ice can result in your front porch becoming slippery. Salt can help, but it can also corrode the screws that hold down your front porch deck and steps. The above traction cleats can help.