Distressed Plywood Plank Floor Whitewashed is about how this Architectural firm custom made wide plank flooring out of plywood for a rich look on a low budget.
And actually, this architectural firm also GRAY WASHED some of the planks, to give “motion” to the floor appearance and also varied the amount of white washing and sanding to give some variation, which, in their opinion, makes the floor more interesting and appear richer.
NOTE: this firm is Not recommending that anyone and everyone do this as a DIY project. Why: it will consume much more work than you ever imagined, including sweat and blood and you could really hurt yourself. The company recommends that you always hire a licensed Contractor to perform all of these activities and steps.
Why did the company do this: because one of their staff members didn’t want to pay $4 to $11/sf for the material of normal hardwood flooring, then another $2 to $3 to a specialty installer to get a wood floor in their basement. They didn’t trust laminate flooring; they had seen some online reviews that indicated that this type of flooring could possibly become “unclicked” in the middle of the floor, resulting a very difficult repair, involving possibly half of the installed flooring. So, the decision was made to Not go with any sort of “floating” thin flooring, including “pre-engineered” hardwood thin veneer prefinished planks, which are typically very narrow in width. So: the staff member decided to buy sheets of pine plywood, which is real wood, slice them into about 12″ wide planks, distress them, white-wash them (and gray-wash), then glue and finish nail to the OSB sub-flooring. The cost of the plywood sheets: about $0.60/sf. Yes: way under a buck a square foot. But a lot of sweat equity was required to get the final installation looking like you see in the above photo, and there were some other costs.
Read more below for the step-by-step method:
STEP 1:
BUY SHEETS OF PLYWOOD
Buy sheets of 15/32″ Georgia Pacific plywood grade B-C sanded one side. Lowe’s carries this usually in stock. Hand pick each piece. You want sheets that are flat, even and straight, with as few knots as possible in the finished face, and with undamaged edges. Calculate 32 sf (Square Feet) per sheet of plywood and always figure an extra 10% or so to make sure you don’t get caught short. For this little project, the actual sf required was 540 sf, so 18 sheets of plywood was purchased (576 sf) which the firm felt was close enough, because they knew the installer and also knew that there would not be much waste.
STEP 2:
HAVE PLYWOOD SHEETS CUT INTO PLANKS
Have a woodworking carpenter with experience and a nice table saw cut the sheets of plywood into approximately 12″ wide strips, all 8′ long. Note: in our case, this turned out to be 11-7/8″, to account for the width of the saw blade. IT IS IMPORTANT THAT ALL OF THE PLANK WIDTHS BE IDENTICAL. They all have to align when you’re putting them down. So, our 18 sheets of plywood were cut into 4 strips (planks) each resulting in a total of 72 planks. In our little job, we had to pay the carpenter $250 to cut our planks. Lowe’s refused to do this, even when we offered them an additional payment. So, that added another $0.44/sf to our material cost, jacking that up to about $1.04. Still not bad. Do NOT try to do this yourself with a Skill Saw. Not only would that be dangerous, your cuts HAVE to be perfectly straight, and they won’t be if you try to do that. Can you cut these sheets on your own table saw? Sure, but once again, that can be dangerous and mistakes can happen. And do you really need to own a table saw?
STEP 3:
DISTRESS PLANKS
The idea is to try to simulate old warehouse flooring from a hundred years ago, that you were savvy enough to reclaim and re-purpose in your project for next to nothing. The reality is: reclaimed wood is a huge market and nearly always has a stiff marked-up cost, because many people want this material. So what you’re going to have done to your “planks” will lend them a little age and character. Why: because we really don’t recommend using just the plywood faces as they are. Why: because they look like plywood, due to the wide grain, which is nearly unmistakable, if left unaltered. Why is that a bad thing? Because it looks cheap (and it is).
We’re trying to conceal and misdirect here. Sort of like how a make-up artist makes your favorite Hollywood actors look more glamorous than they really are.
So how do you do that? Methods are up to your imagination. We’ll share a few that we used with you. However, be careful: remember: this is plywood. The face veneer is probably less than 1/8″ thick. If you’re too aggressive, you can tear chunks of that right off the “plank”.
Okay, here’s what we did:
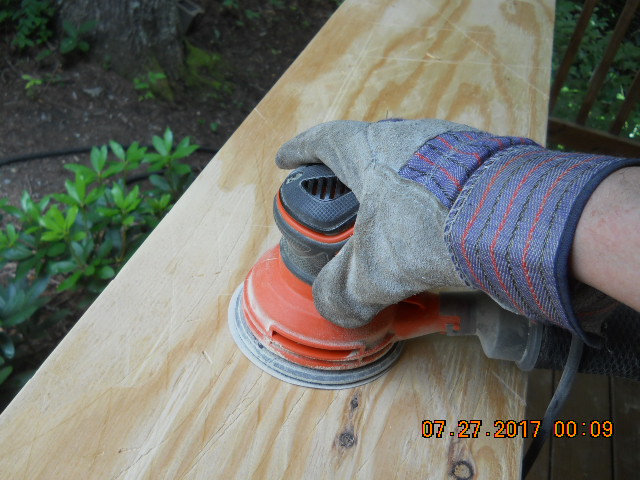
A. Sanded the exposed face of each plank:
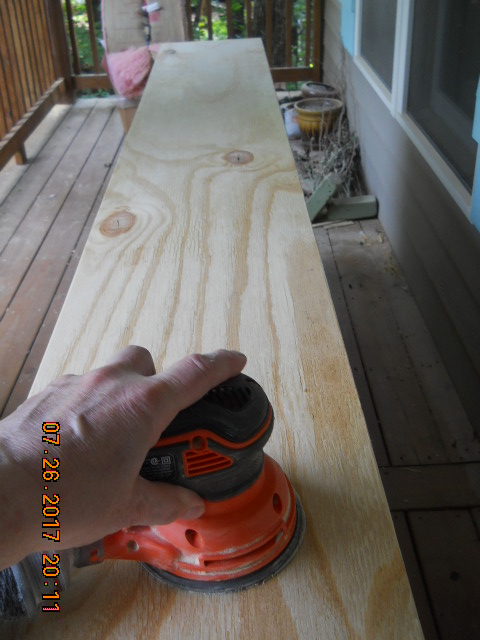
Forget the DIY blogs telling you to do this by hand using 100 grit sandpaper. That’s insane. It would take you forever. We bought a $25 Black & Decker orbital sander. One of the best purchases of our lives. So easy to use, reliable and cut our time sanding by 90%. And we used the loop and lock (like Velcro) sanding discs. We did our first sanding using 80 grit. Worked great. Took some elbow grease, but we got 95% of the plywood maker’s paint, grade stamps and other markings off the wood. Wait a minute: isn’t this plywood supposed to be already sanded on the finished face? Yeah, well, it’s not good enough. And you still have all those grade stamps and other marks on the wood. So get over it. You have to sand the planks. Oh: use protective eyewear (goggles), gloves and a dust mask or respirator. Did we? No. But we have to say these things so you don’t hurt yourselves. We did wear gloves. Avoids splinters. Took about 10 minutes per board x 72 = 720 minutes/60 = 12 hours. Not for the faint of heart or weak of arm. DIY is a lot of sweat equity. I don’t think we’re going to be doing this ever again.
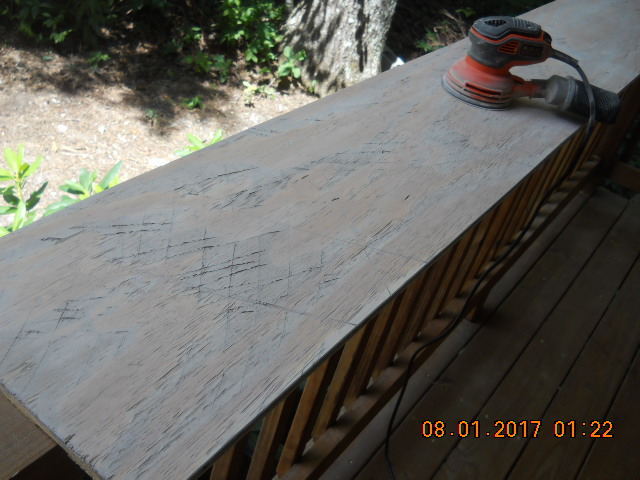
B. Hand file diagonal scratches into the face of the planks:
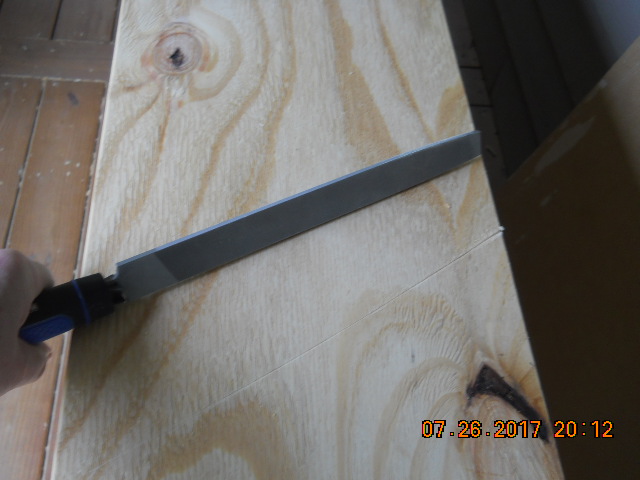
We bought a medium file at Lowe’s for around $10 and a handle for it for another $10. We made the scratches in groups of 2, separated about a foot or two apart. Then we went back in the other direction. Another 5 minutes each plank.
C. Gouge radial marks like a large diameter old saw blade using a hammer claw:
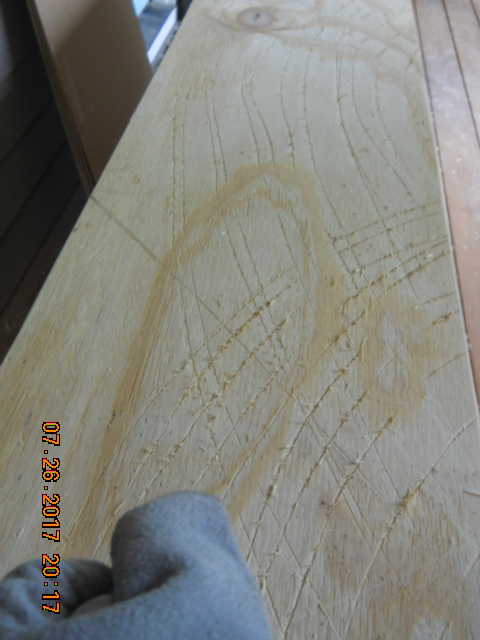
We thought this technique was the coolest, but it turned out to be almost invisible on the white-washed boards. It did have some effect on the darker gray-washed planks. Another 10 minutes each plank.
D. Hammer blows to the face of the planks using the claw end:
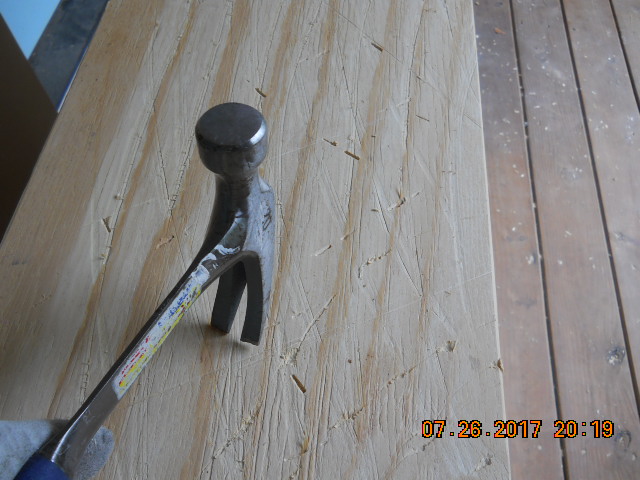
We went at an angle one way down the board, then reversed the angle and went back the other way. Another 2 minutes each plank. And: you’re going to ask why this should be done: because this is pine plywood. It is a softwood. Your furniture, high-heels, pet claws, dropped things will dent the wood. Having distressed marks on it to begin with will turn future marks nearly invisible.
E. Hammer blows along edges.
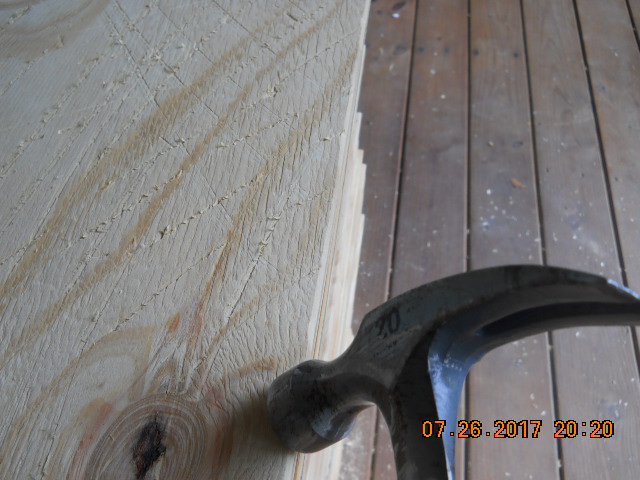
This gives a more rustic look to the edges of the boards, giving the illusion that they are thicker and rougher than plywood could ever be. Be careful: do this gently, or you’re going to splinter long chunks of veneer along the edges, which happened to us a few times before we got the feel of what the wood wanted to let us do to it.
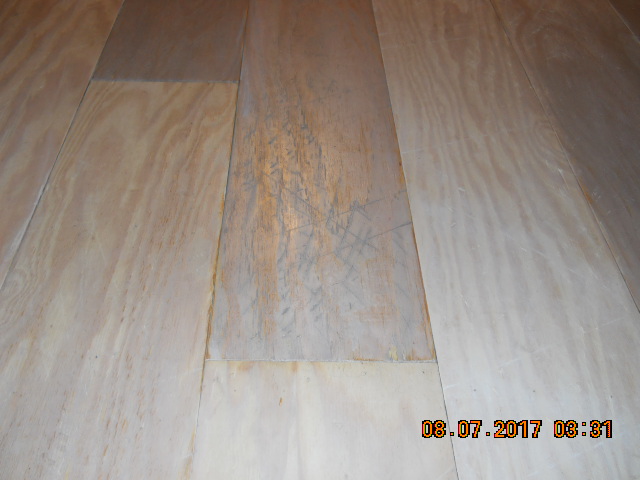
F. Result:
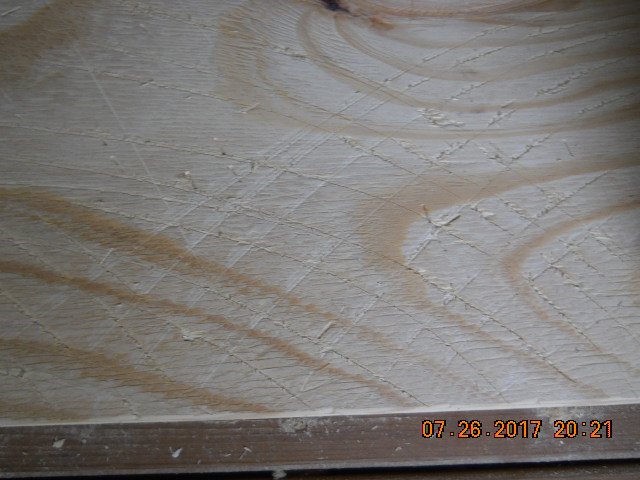
Here you can see some of the raised grain we caused by our distressing. You could have also hit it with a chain and other methods.
G. Second Sanding:
Due to the raised grain and splinters and imperfections you caused during distressing, you must sand the planks again. Ugh. This time we used a 120 grit sanding disc(s), to result in a finer finished surface. Don’t go crazy. Just trying to make sure the splinters are knocked down. Remember: you’re dealing with a thin veneer here. Another 5 minutes per plank.
STEPS 4 & 5:
WHITE-WASH AND GRAY-WASHING
White-washing and Gray-Washing
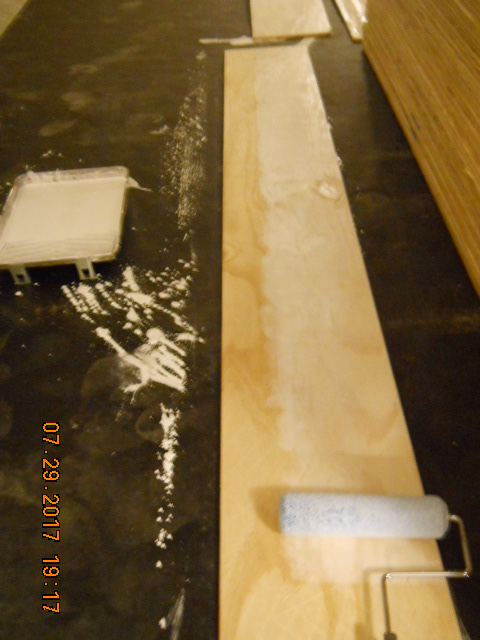
The Architect suggested and the team used a white-wash of 1 part latex flat paint with 3 parts water. That turned out to be a good mix. But that’s actually kind of strong. So we wiped about 75% of the boards with rags to remove some of the white-wash almost immediately. There was only 1 gallon of white latex required with 3 gallons of water in one 5 gallon pail, and only a quart of gray with perhaps a gallon of water in another 5 gallon pail. Not a lot of cash there. And a fabric roller and a paint brush (4″ cheap).
Then after letting the white-wash dry overnight, the team applied the gray-wash (same ratio and type of paint to water for the gray-wash), using a stick and roller. We didn’t really get the effect we were after: of having the darker gray settle down into the distressing grooves. It covered everything. Even though we wiped it off almost immediately, we still ended up sanding more off later.
STEP 6:
SANDING THE PAINTED BOARDS
Not again? Yes. You now need to sand the boards yet a 3rd time. Why: because otherwise the paint will take over the planks and you’ll have a hard time understanding that these are made of wood. You’re going to need to expose a little wood grain. Not too much! But some. And our objective was to knock down some of the gray-wash to start seeing the white-wash under it, but that didn’t happen. Another 5 minutes per board using the 120 grit disc.
And we guess that’s okay, because we made each board different from the others, to give the floor more interest and what we call “visual movement.”
STEP 7
GLUE AND NAIL DOWN THE PLANKS
(after you sweep and vacuum the floor substrate twice).
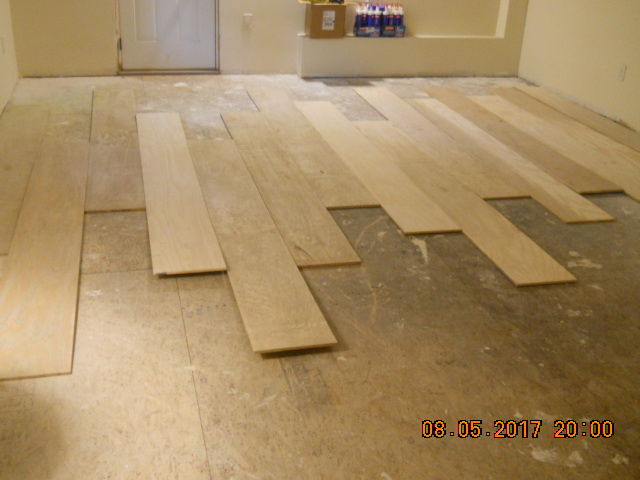
First, we just laid down the planks across the width of the room to make sure that we didn’t end up with tiny slivers on one side. Worked out well. Only had to cut off 1″ of the last row of boards. As you can see, we are purposely randomly mixing the white-washed and the gray-washed boards, to create interest.
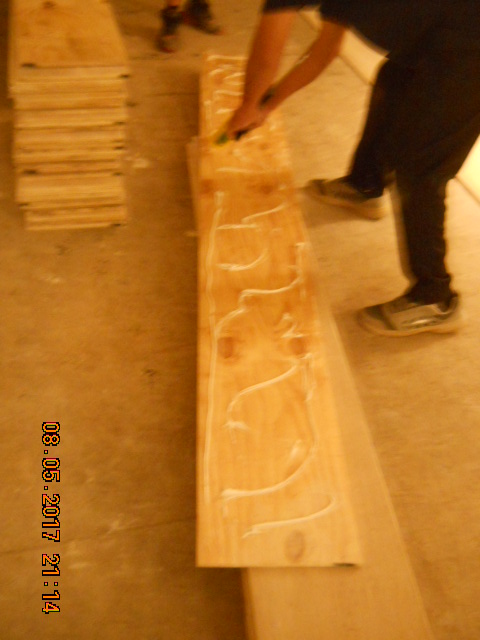
And here’s what we’re using to glue the boards to the OSB structural floor:

Eco-Bond Heavy Duty construction adhesive (out of Wisconsin, USA). No perceivable VOCs and no odor at all. Probably one of the safest construction adhesives out there today. Now then, we weren’t sure that we had ordered enough Eco-Bond, so we hedged our bets and also bought more adhesive with reportedly low VOCs (Locktite PowerGrab). As it turns out, the Eco-Bond was all we needed. about a dozen 10 ounce tubes was enough to coat the rear sides of our 72 boards. They were each about $5.50/ tube. We used an “S” pattern like the board below, and then filled in with straight “dashes” between the curves.
Then the guys laid the boards down into position.
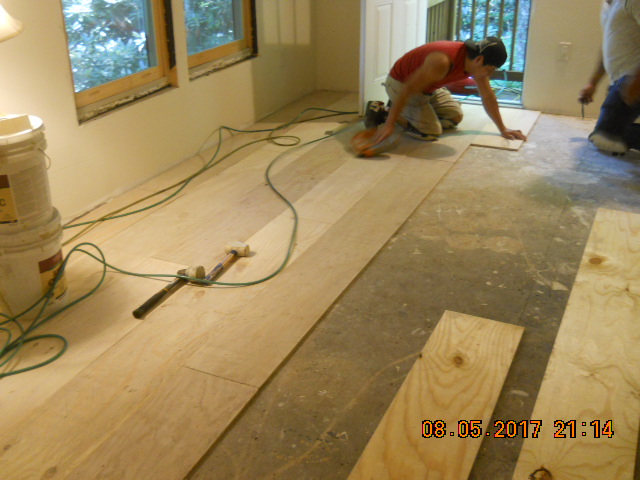
And then using an 18 gage finish nail gun, hit each board with 3 nails across and about 10 rows. So we used a little over 2,000 nails. And because they are small gage, you really don’t see them, unless you get down on your knees are search for them.
We started each row of boards with varying lengths of custom cut board length, using a chop saw. All the saws were set-up outside. You don’t want anything creating debris that could get under the boards to make them be anything but level and even. All of the boards were pushed tight together along their sides and ends. But we maintained 1/2″ of clear gap along all of the perimeter at the walls, to allow the flooring to expand and contract with humidity variations throughout the seasons, to avoid buckling of the planks. The wall base, which is 3/4″ thick, will cover that gap.
STEP 8
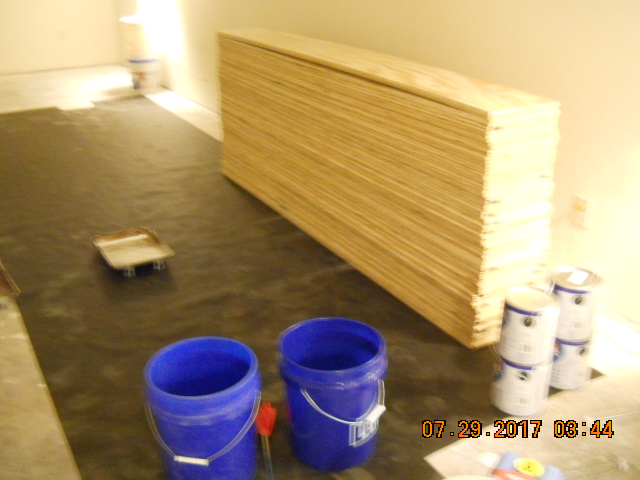
INSTALL DONE: VACUUM AGAIN
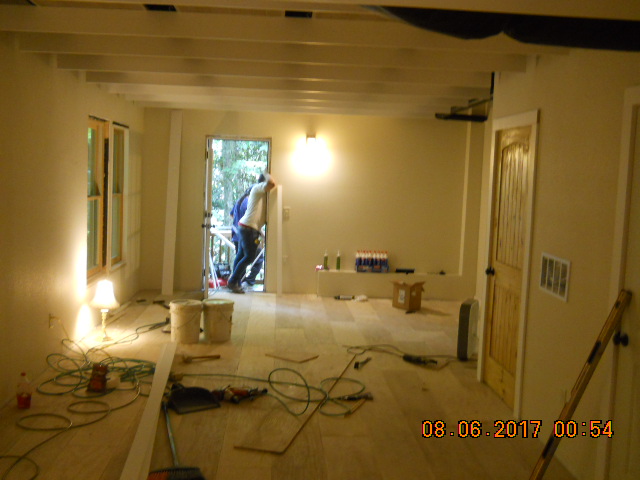
Believe it or not, this mess is the completely installed flooring. We cleared away all the left over boards and tools, then vacuumed again, to prepare for the next step.
STEP 9
POLYURETHANE LIQUID COATING
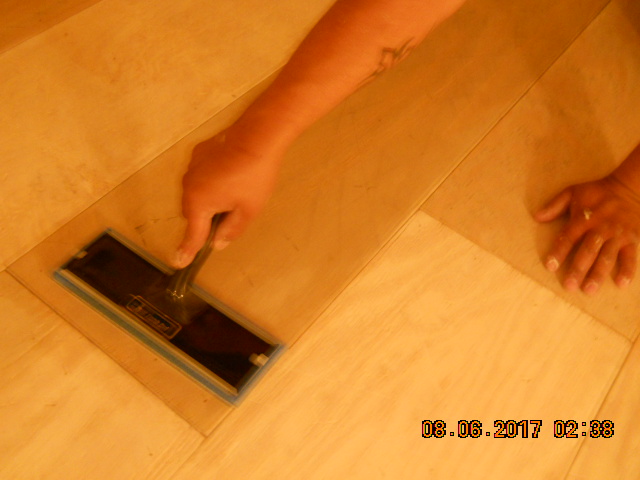
Here the floor installer is using an oil-based liquid polyurethane over the cleaned and fully installed wood floor. This first coat will stand there, with nothing on it at all for 24 hours. We bought 3 gallons of oil-based polyurethane (Min-Wax), but I think we’re only going to end up using 2 of those. Lowe’s accepts unopened and unused merchandise.
And here’s what the completed installation looks like:
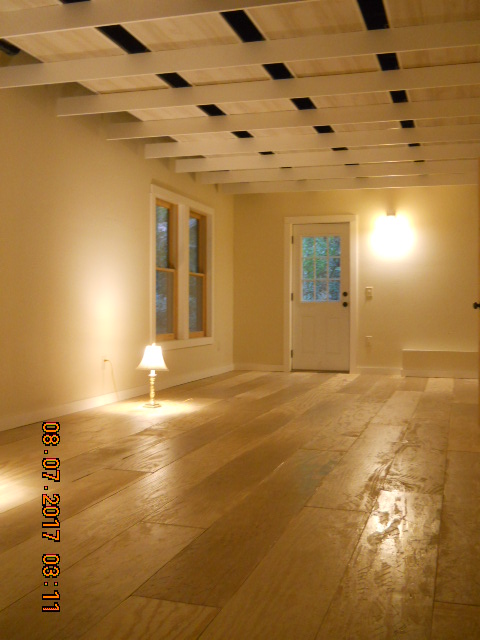
Note the very cool one of a kind custom architectural ceiling, also designed by this architectural firm. Note that the coloration of the ceiling boards is fairly close to the floor boards, and that the white-primed boards for the ceiling “blades” was used for the wall base and window and door trims for a harmonious total composition. The drywall has a medium knock-down finish and a light beige flat latex paint (“Cream in my Coffee” is the actual color name). The ceiling area above the architectural dropped ceiling was sprayed a flat black to conceal all the utilities, insulation and structure up there, which the Owner wanted to remain accessible for maintenance purposes.
STEP 10
FINAL POLYURETHANE COAT (#2) ON THE FLOOR
You can put on 3 coats if you like, but we felt pretty good going with 2.
All-in I think we’re probably around $3/sf for only the flooring labor + material. Not bad, when lower budget hardwood is probably going to be more like around $7/sf or so (labor + material). But that doesn’t include the personal slave labor to distress, sand and white-wash all those boards. Never going to do that again. So I guess we’ll pay more the going rate the next time around.
Note: this firm is a mountain style residential Architect. This particular project is one of a kind: extremely low budget for a basement finishing mini-project, and also using a lighter palette for a special circumstance, to reflect more light, due to limited windows and lighting. Normally, the firm has darker wood stains and more elaborate details. In the end, coordinating with the Owner about what they want for each and every project. And the result above is exactly what this particular Owner requested and received.
tags: Distressed Plywood Plank Floor Whitewashed, Cashiers, Mountain, timber frame, Lake Toxaway, Highlands, Glenville, Sevierville, Hendersonville
1 Comment
Linda
2:02 pm - January 19, 2019This floor is the most beautiful I’ve ever seen! It’s exactly what I want but when I ask contractors about it, they laugh at me. The building sub code at the municipality where I work even calls me Miss Plywood. I wish you were near me to do this for my home…and hey, with your great instructions I just may do it myself. Thanks for sharing! Linda