Fence Around Utility Area is about this Architect’s approach to concealing utility gear and materials from view from the exterior of an award-winning house.
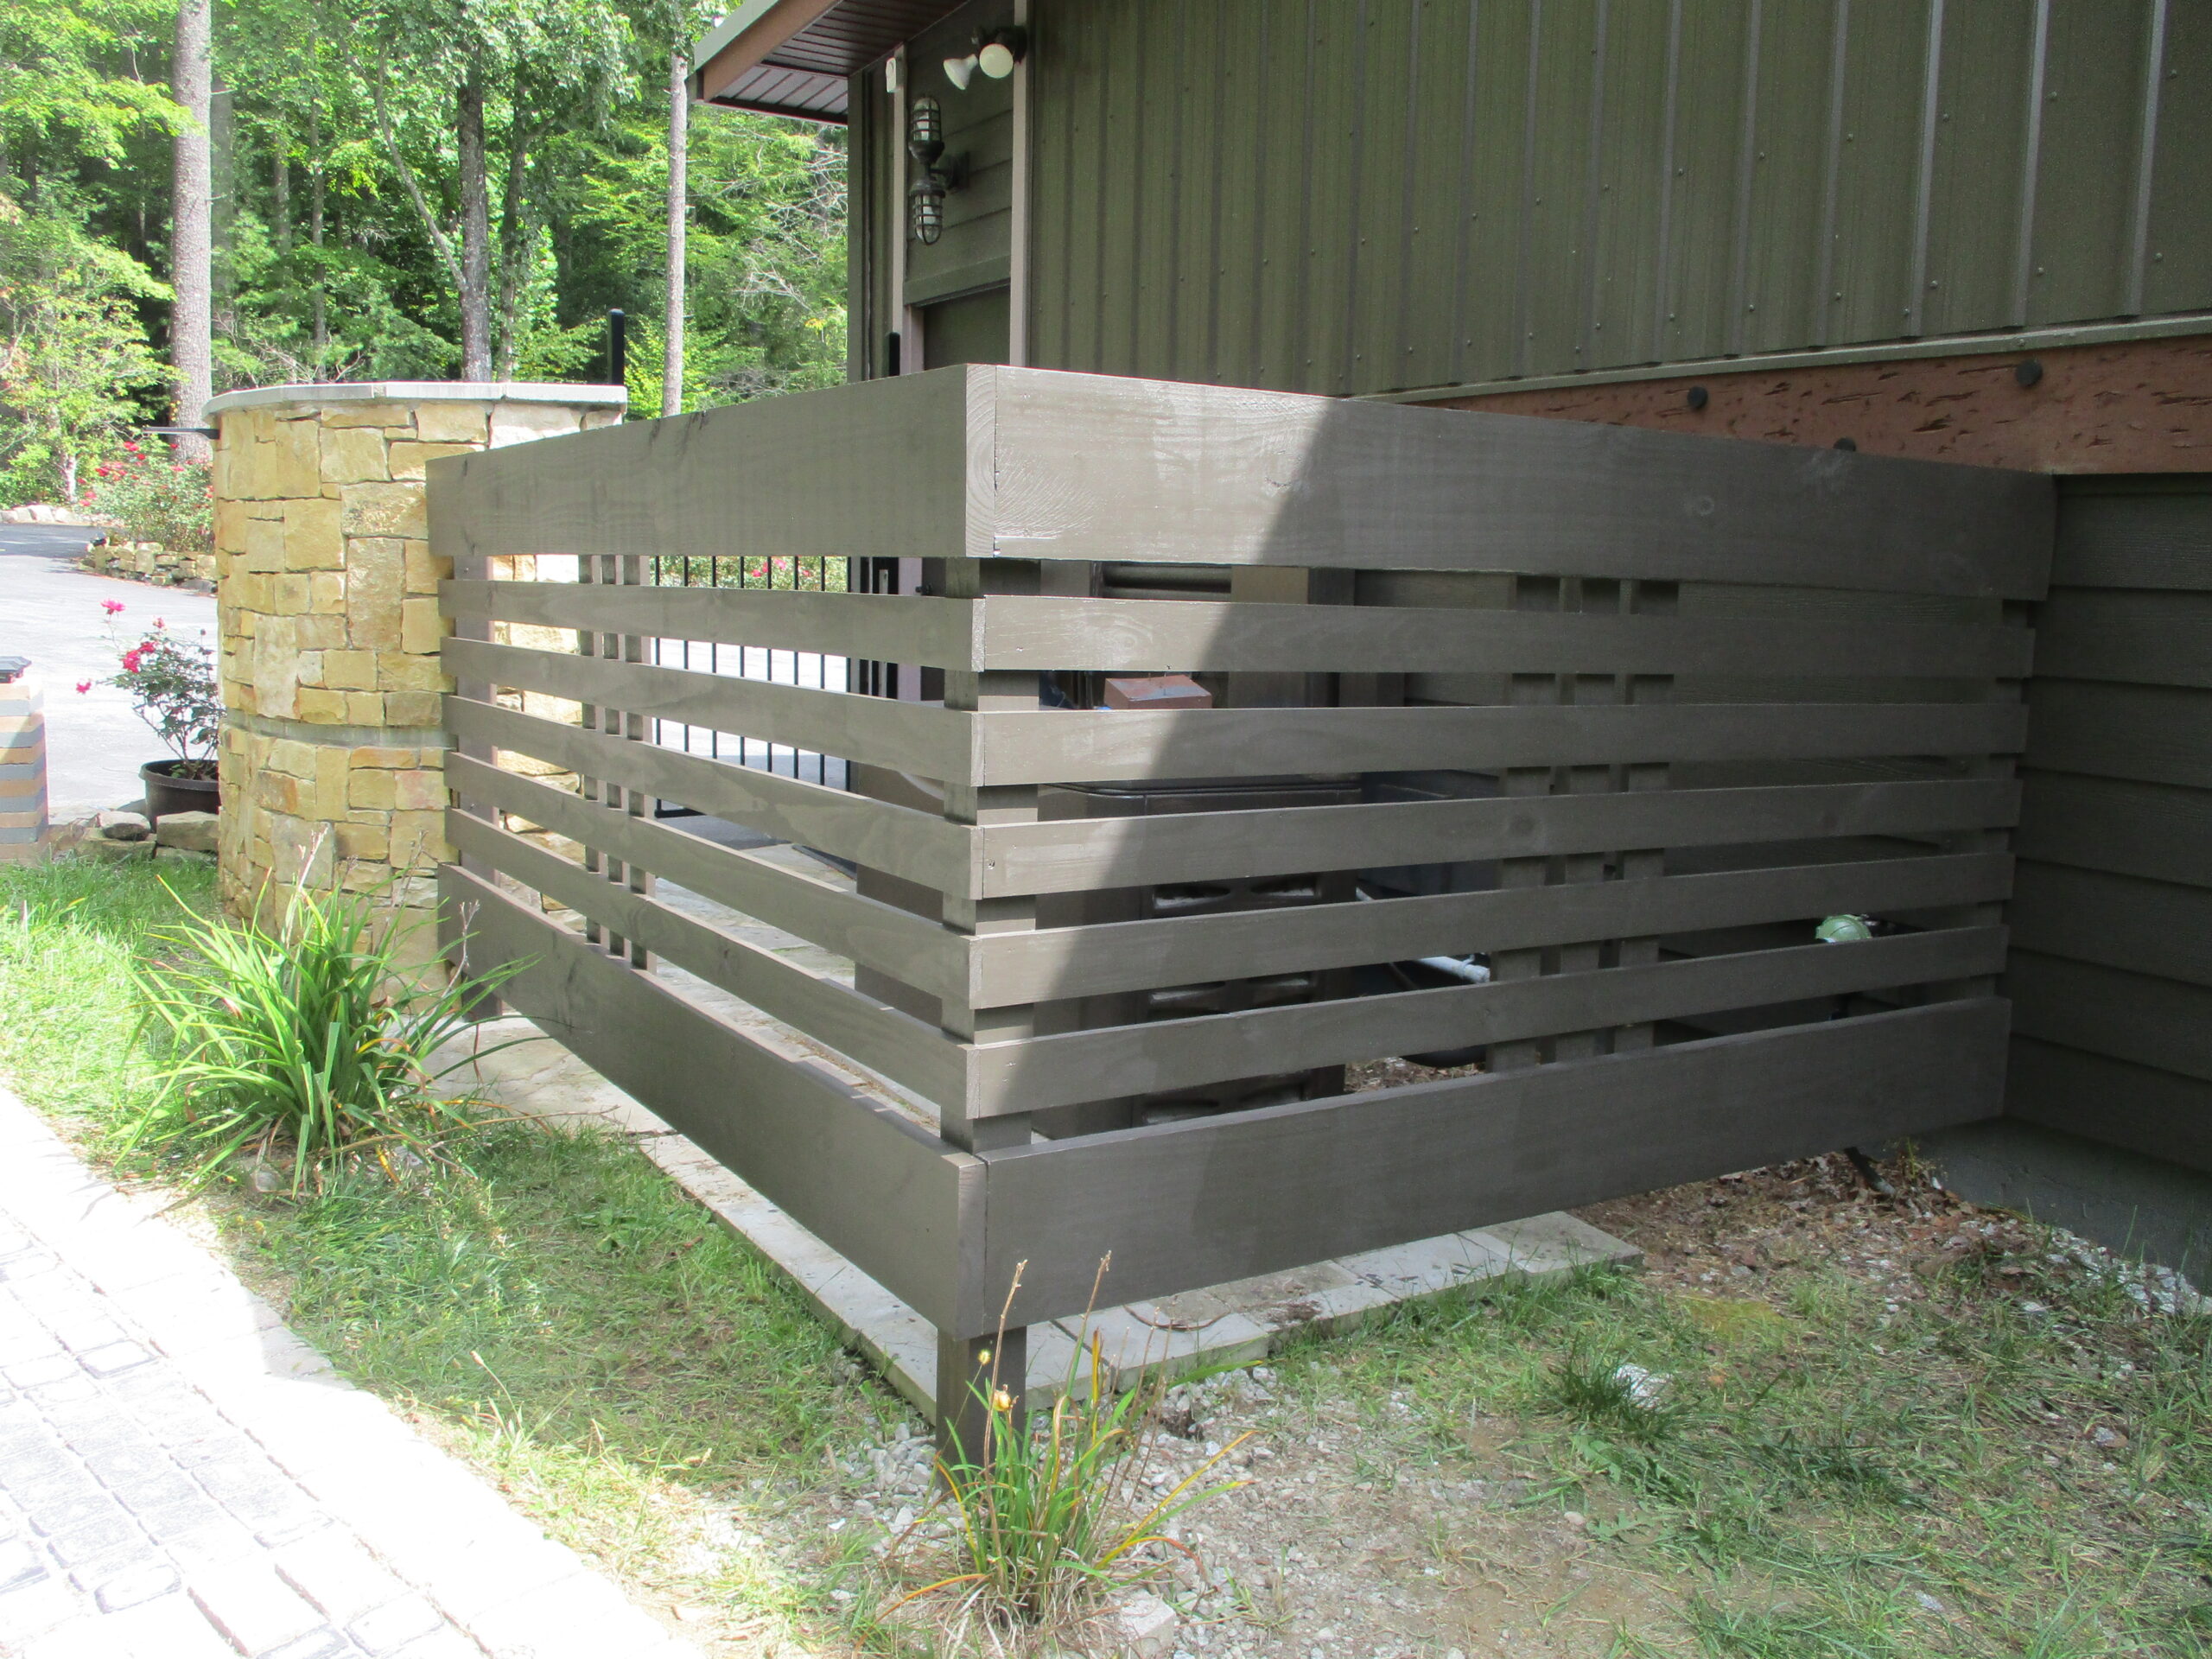
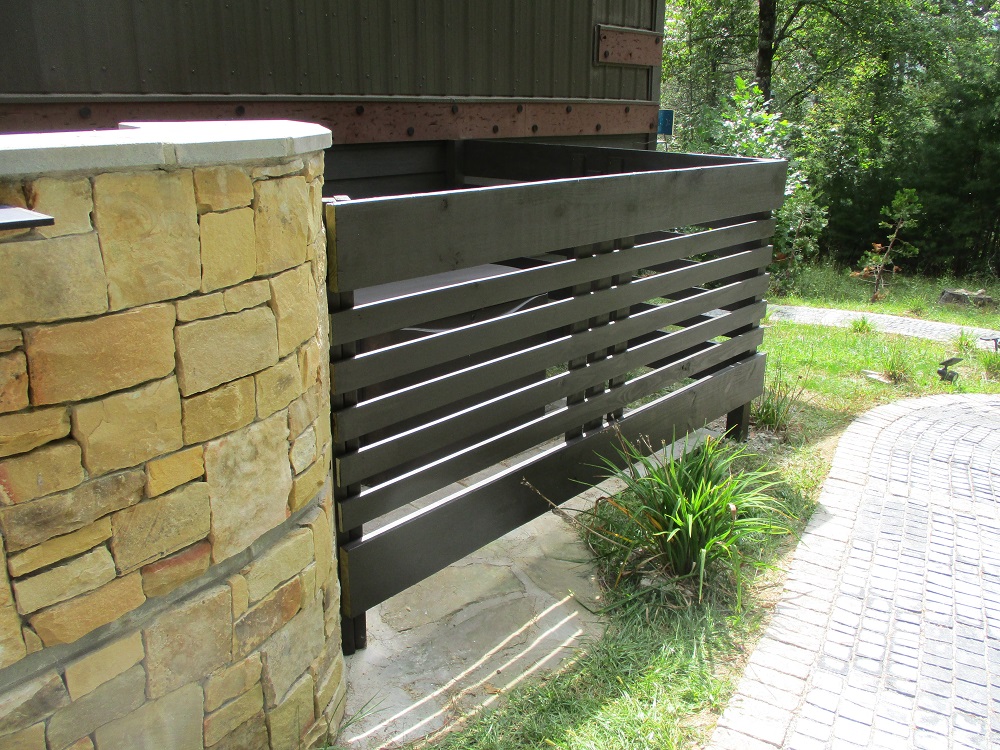
Above, you can see the finished product.
Below, you can see the step by step process from the beginning to the end.
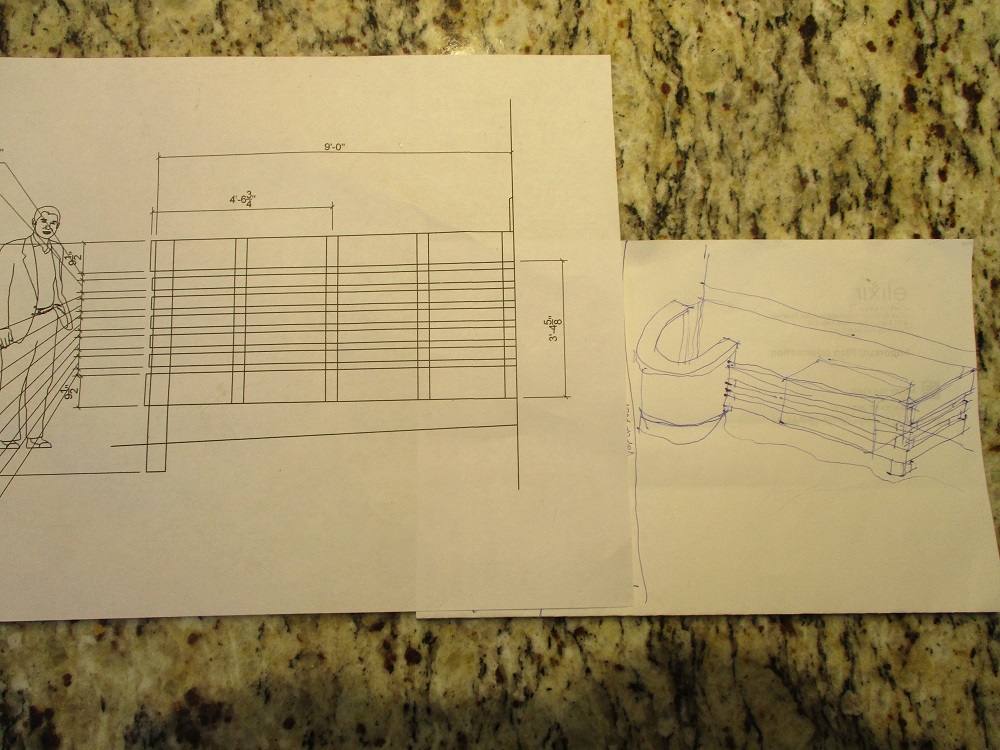
DESIGN
Architect’s minimal documents and sketch:
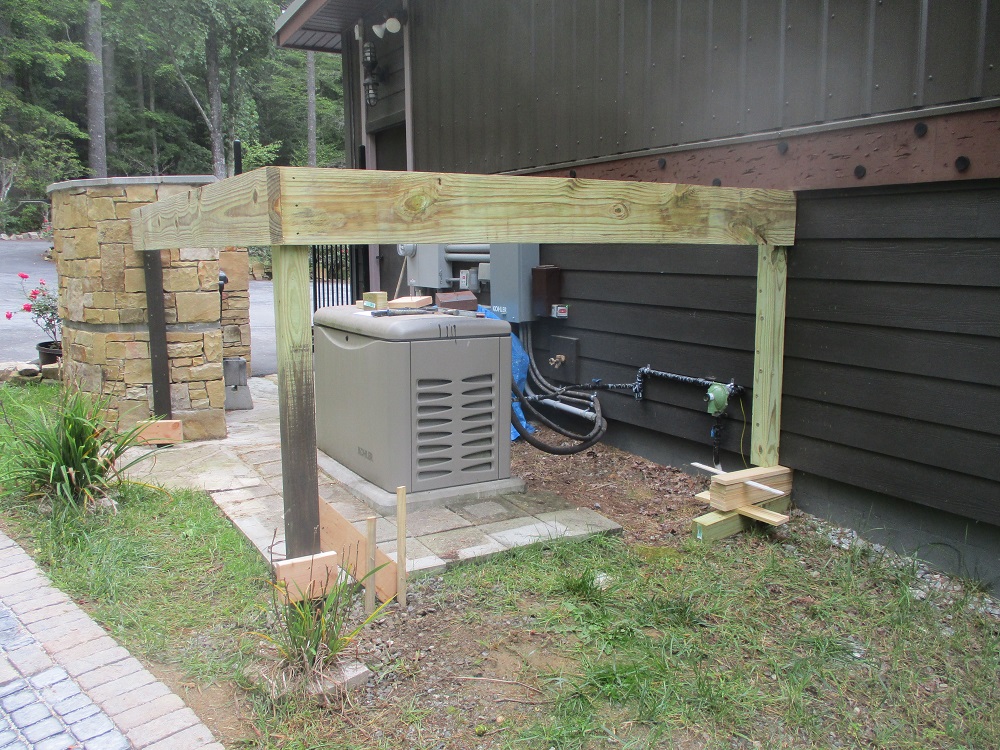
POSTS AND BOARDS
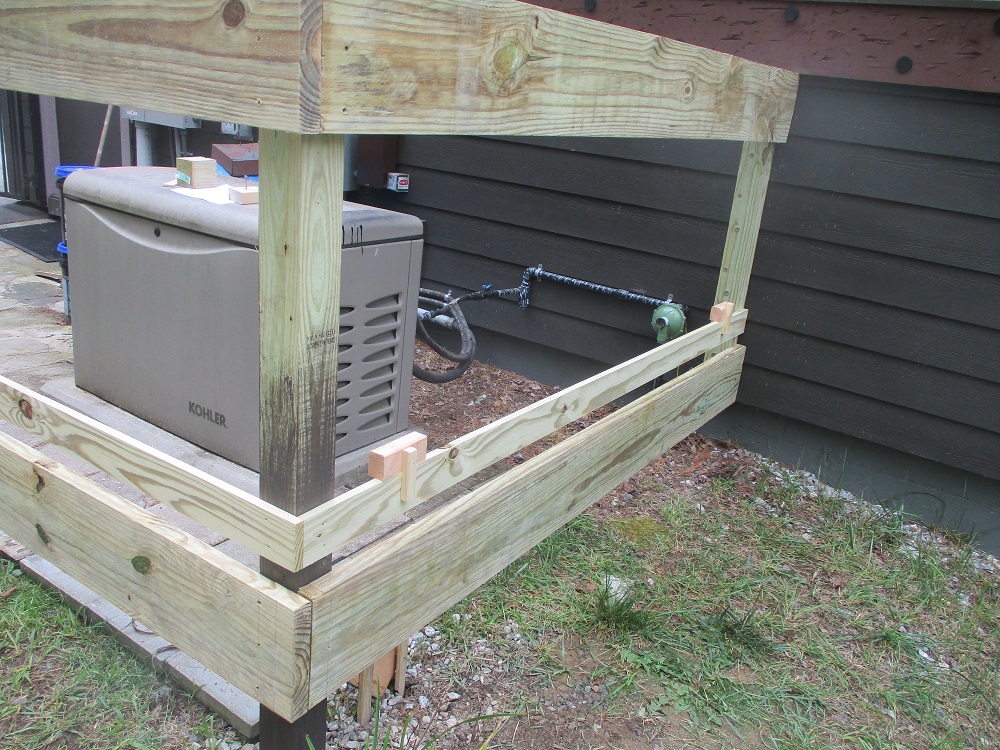
First, the corner posts were set and braced with stakes, then the top and bottom boards were cut in the machine shop. Then the top and bottom boards attached (using hex screws with recessed heads).
ATTACHMENTS:
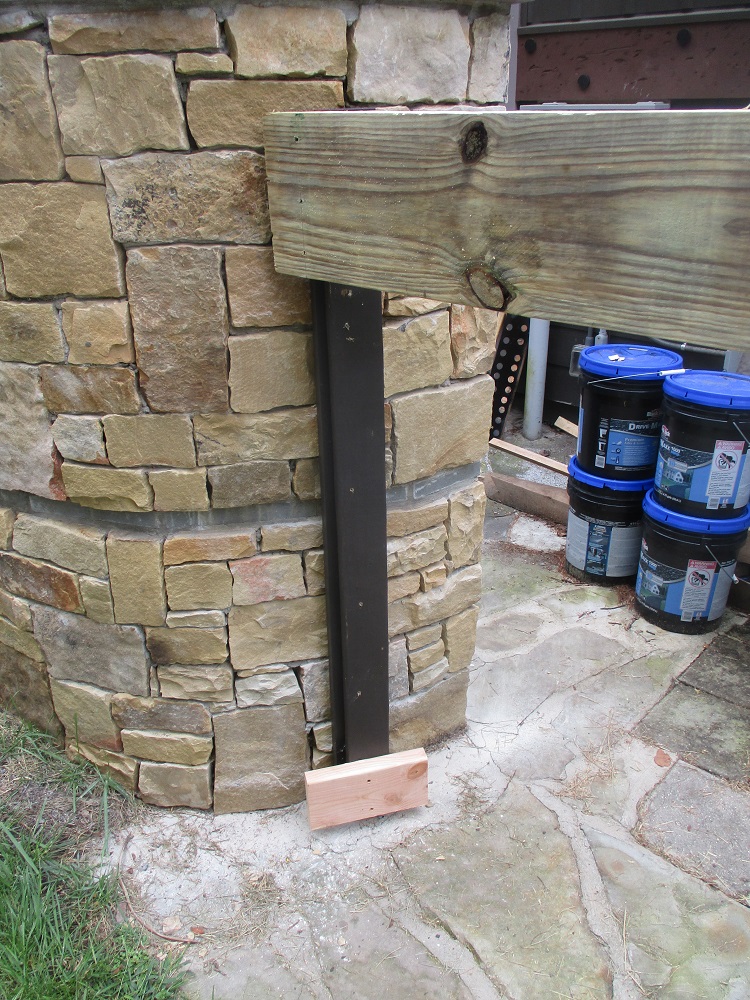
The post on the main house wall was first, because the studs had to be found for the long screws.
Then the corner post, because there is an existing walkway, pavers and planting. Then the post at the existing field stone wall (tapcons). And a word about the tapcons: initially, 5/16″ masonry bit was used, then 3/8″ tapcons installed. However, this large of a masonry screw fractured the stone. Oops. So they were removed and the new tapcons (3/16″) were set in other heights on the stone wall side. Worked much better.
Blocks of wood were screwed to the sides of the posts and set perfectly level (using a line-level) and at the same height, so that when the horizontal boards were installed, they would be at the correct locations.
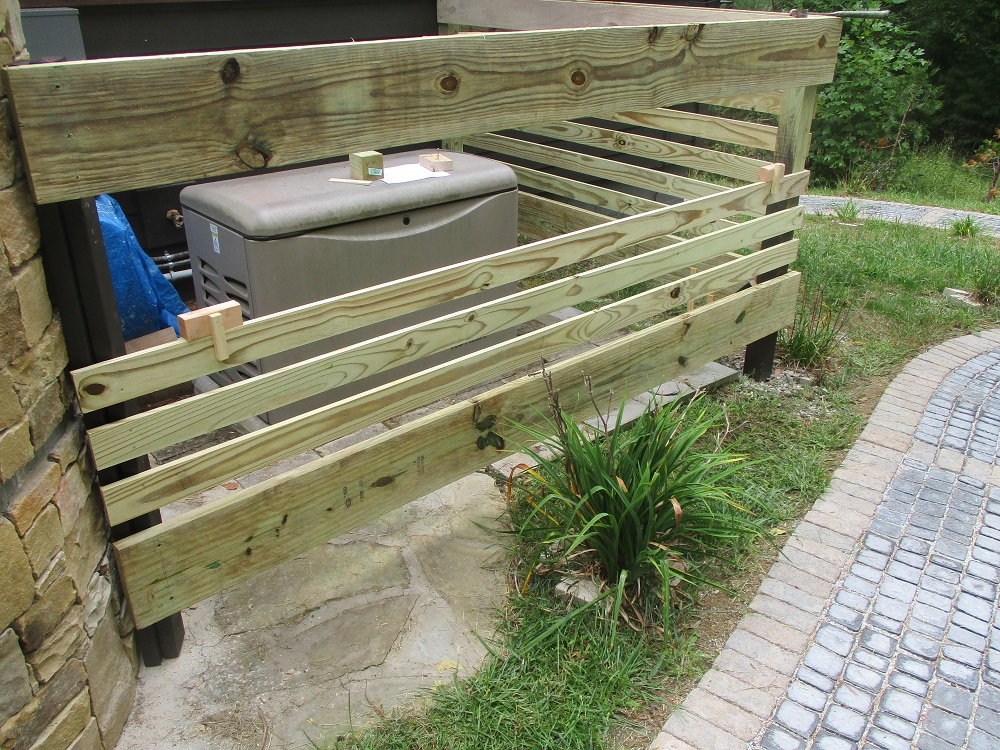
Special jigs were made in the workshop with horizontal and vertical legs to hold the boards at the exact proper spacing for both ends of the horizontal boards (see below):
These jigs were then moved to each course to hold the level and spacing correctly for the next course.
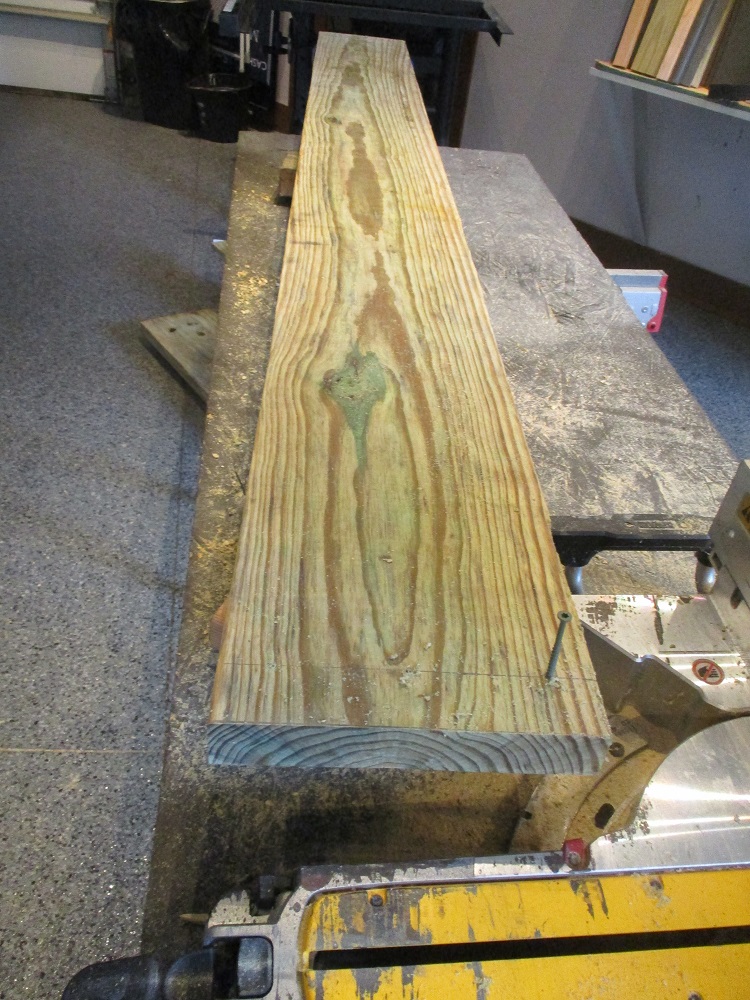
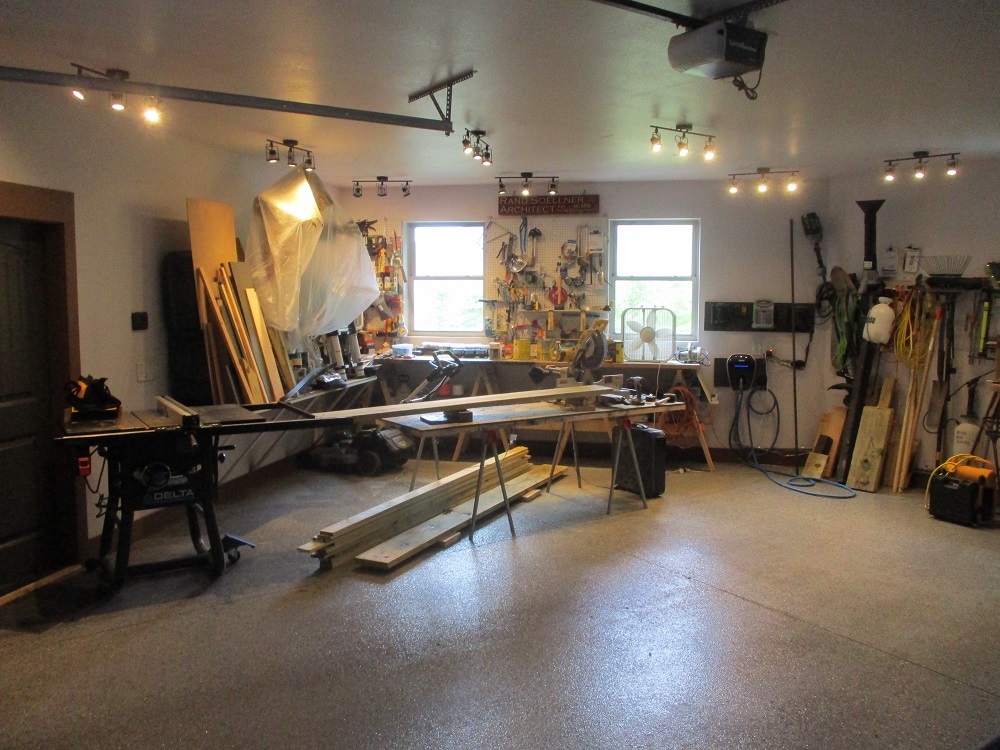
The boards were all custom cut in a workshop that looked like this:
(ignore the Halloween wolfman under the plastic sheet)
The Architect added 3 center vertical boards along the rear 2 faces as bracing for the thinner boards to prevent warping over time (and hopefully prevent bears from sliding into this utility space):
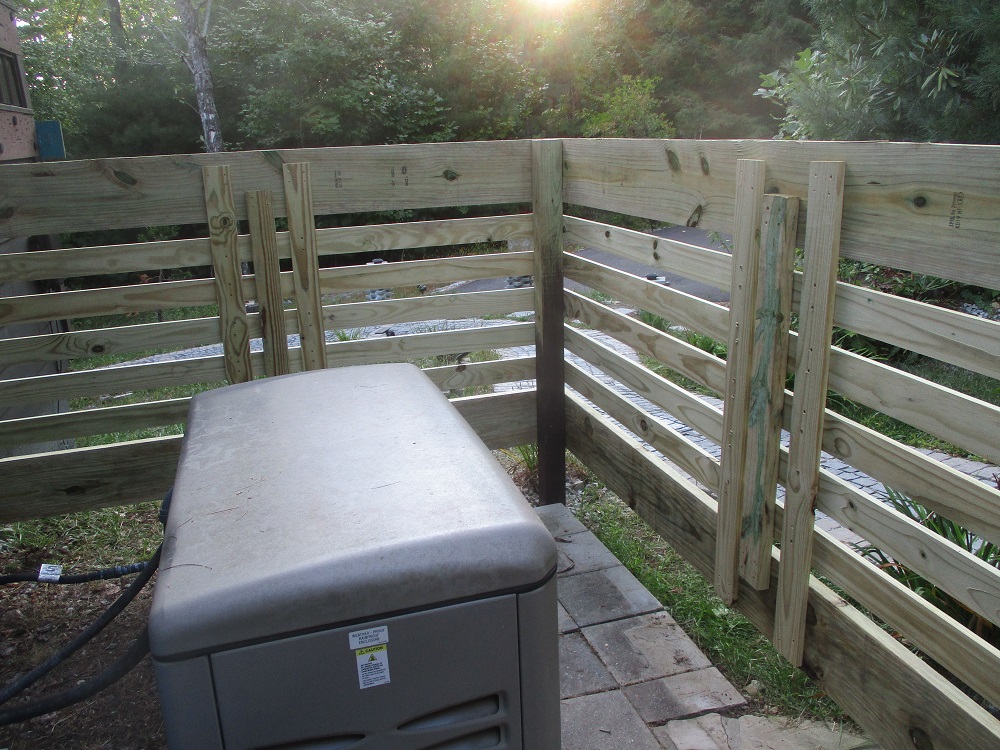
A minimum of recessed screws (Torx type) were used on the front face for the 2x10s, and stainless steel siding ringshank nails for the 1x4s, then 1-1/4″ long recessed screws from the rear through the vertical braces into the boards, remaining concealed from the front face.
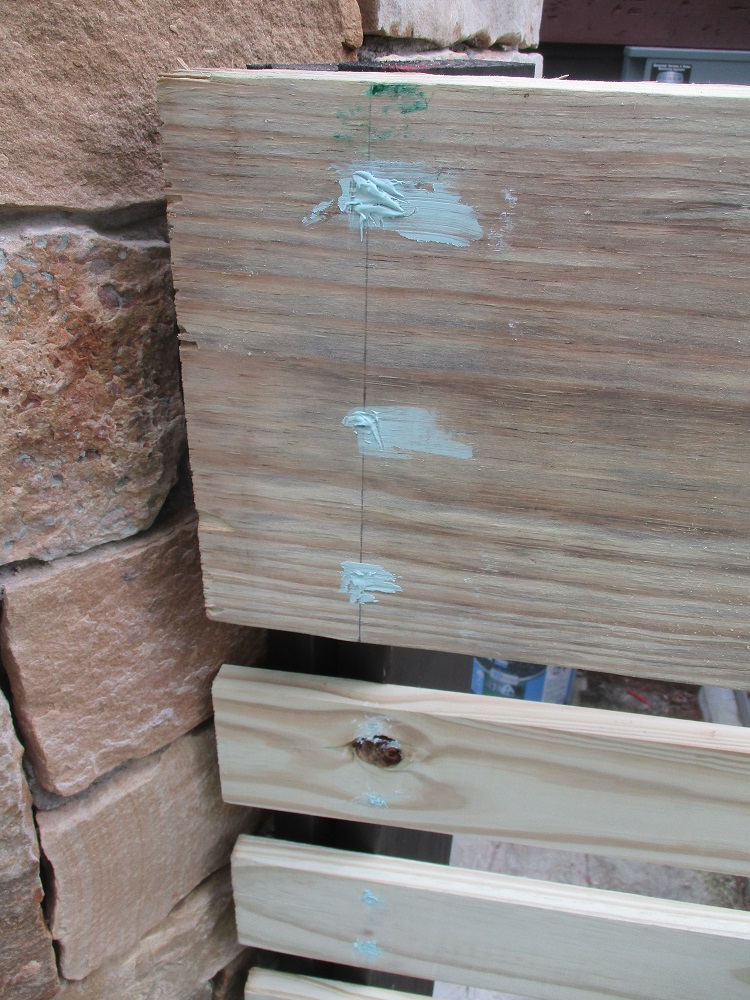
Then, automotive Bond-o was used to conceal the exposed fastener holes on the front (exposed) face of the wood. After drying, this was then sanded with 220 grit sandpaper. Worked well.
Then water base exterior solid acrylic stain was painted on with roller on the exposed side.
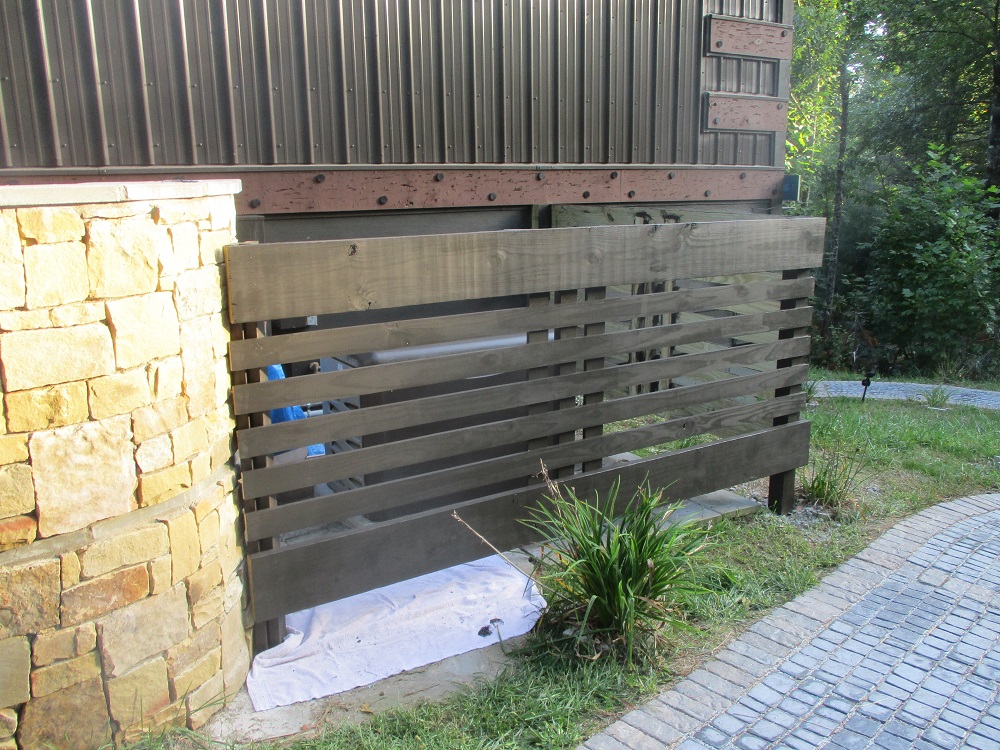
It was originally planned to call it quits there. However, the interior of the utility area was still visible through the exterior face (see photo above).
And so, the Architect painted the interior of the fence using a wide brush, AND also all of the electrical panels and conduits, the generator housing, and even the trash can. The result: magic: the utility gear vanished. THIS IS A MAJOR LESSON LEARNED WHEN BUILDING A UTILITY SCREEN/FENCE: PAINT OUT WHAT IS INSIDE THE UTILITY AREA AND IT ALL VANISHES BECAUSE IT’S ALL THE SAME COLOR. See below:

Magic. See below:
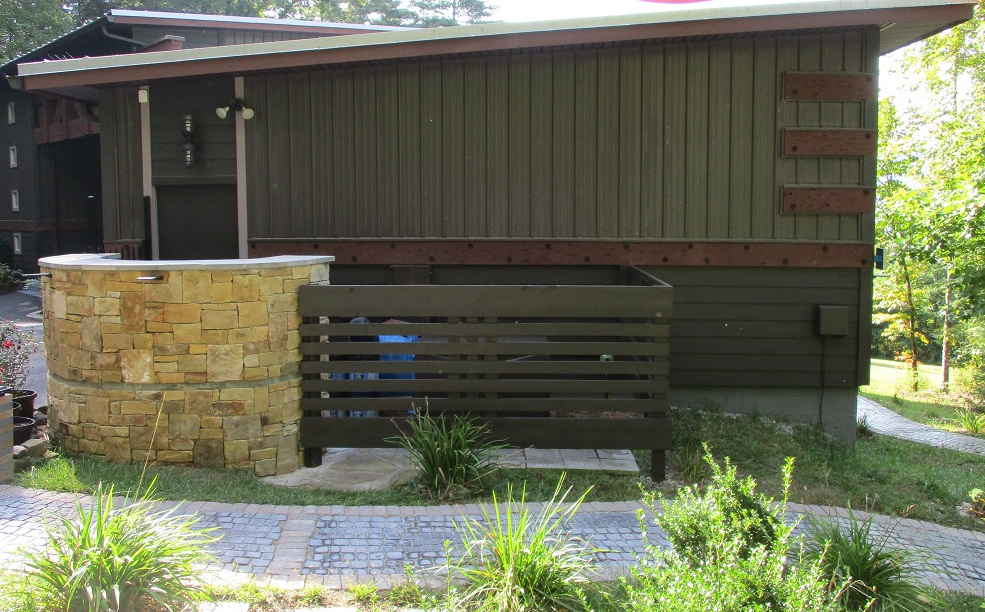
The only thing still visible is a blue tarp. Everything else has disappeared.
A successful utility fence / screen wall.
So successful, that the 20kW generator is actually difficult to see, because it blends in with the color of the screen fence.