Heat Pump Hot Water Heater Install is about how this Architectural company had the best heat pump hot water heater installed. 50 gallon unit.
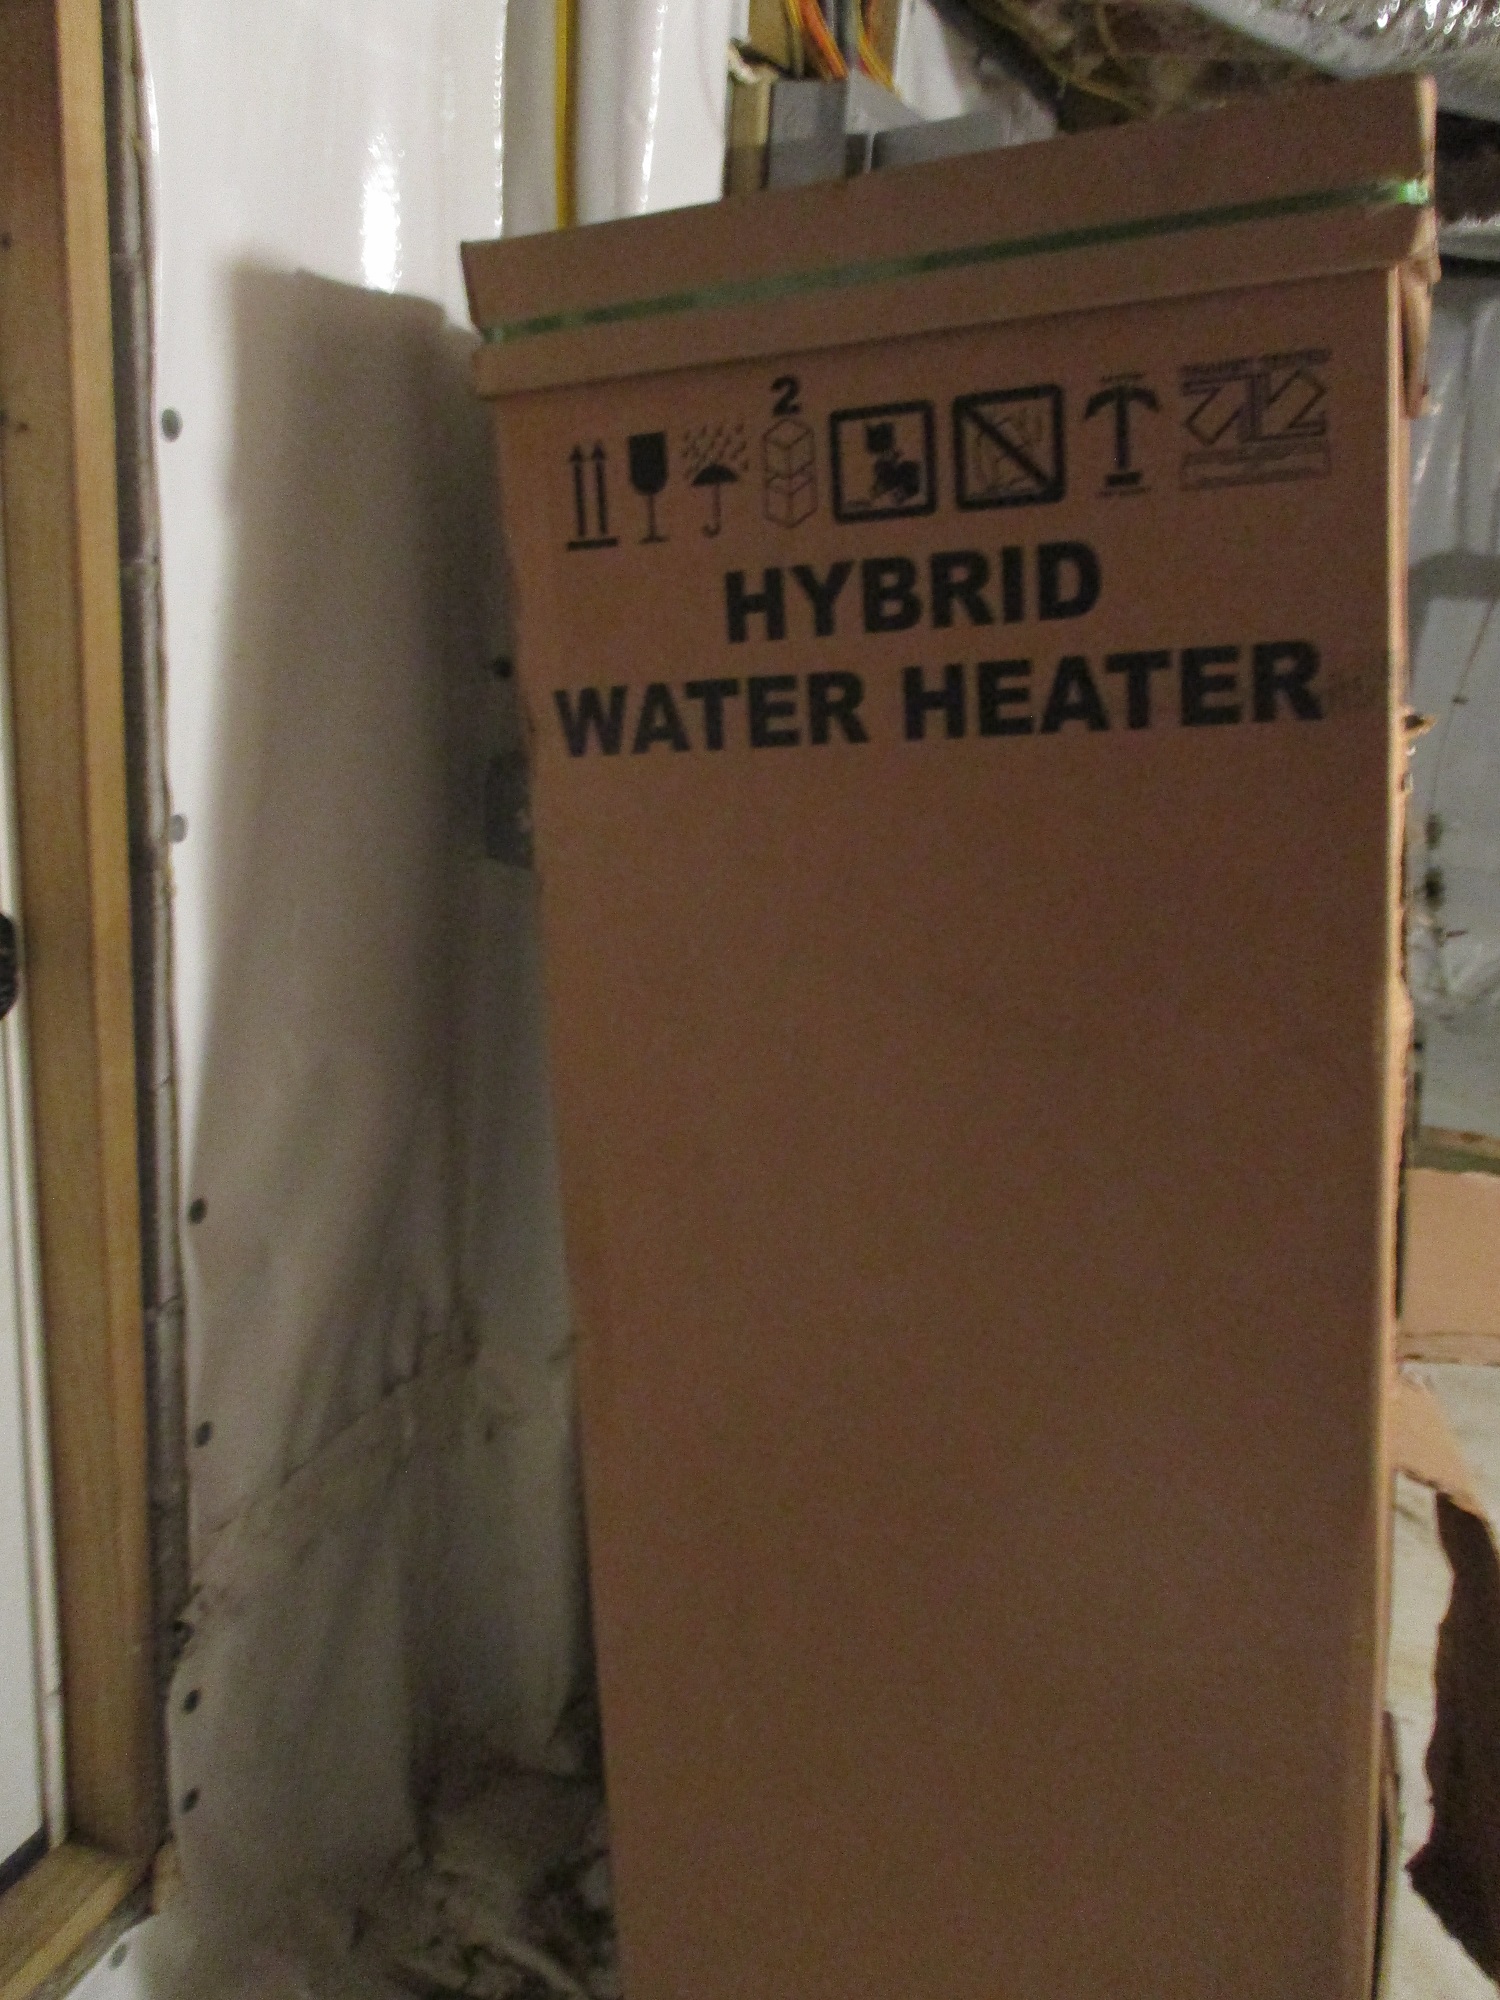
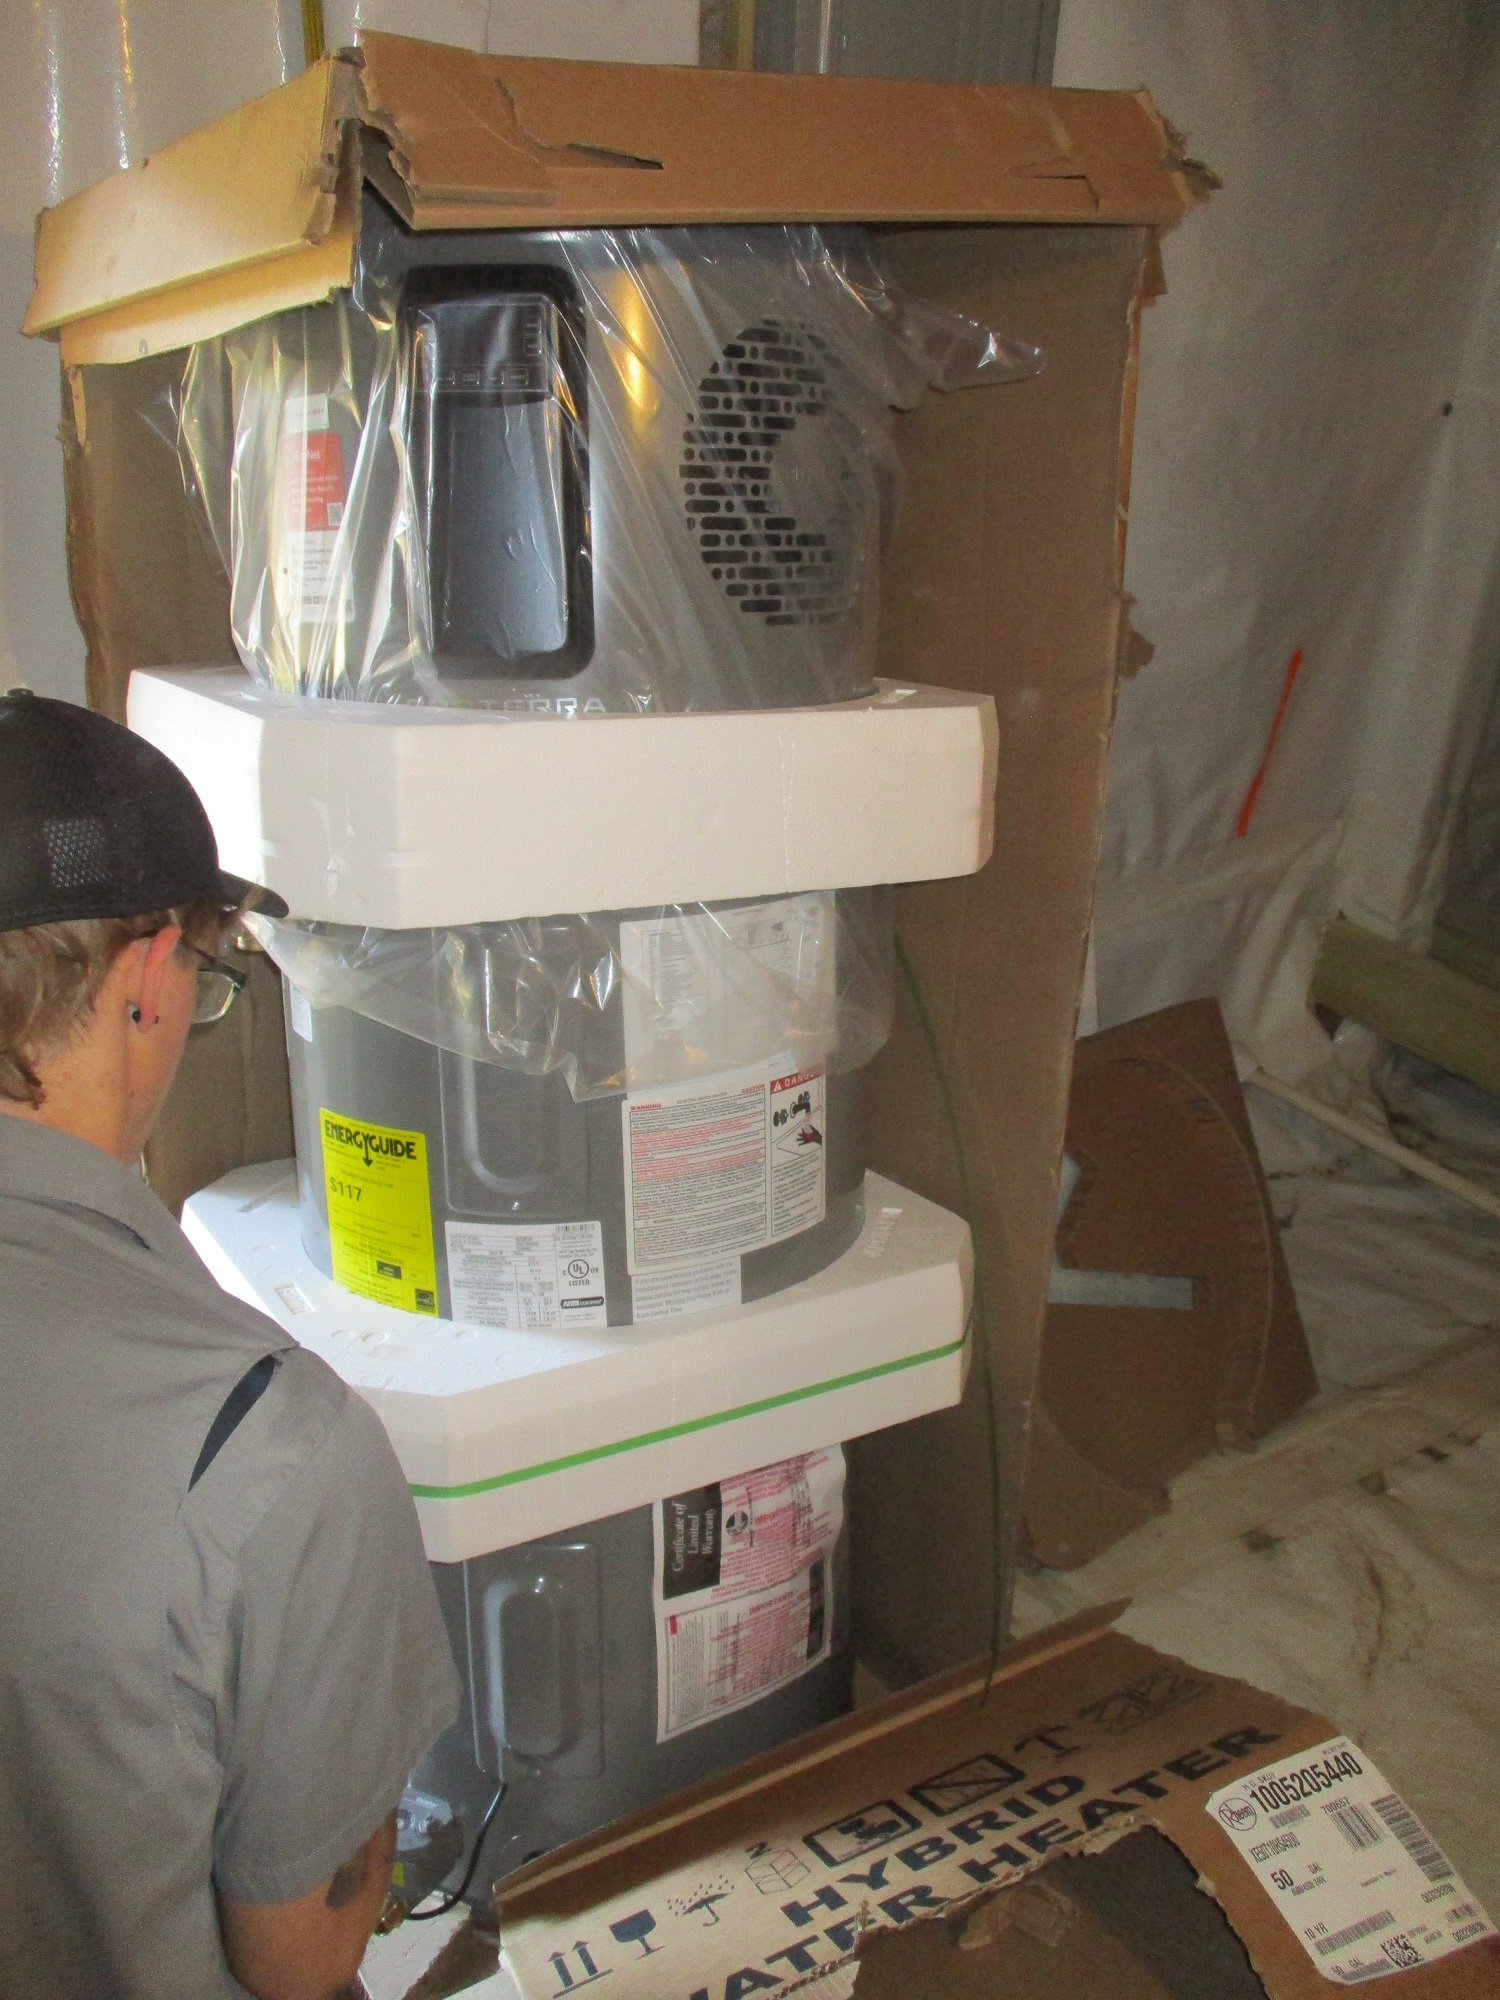
1. DELIVERY BOX
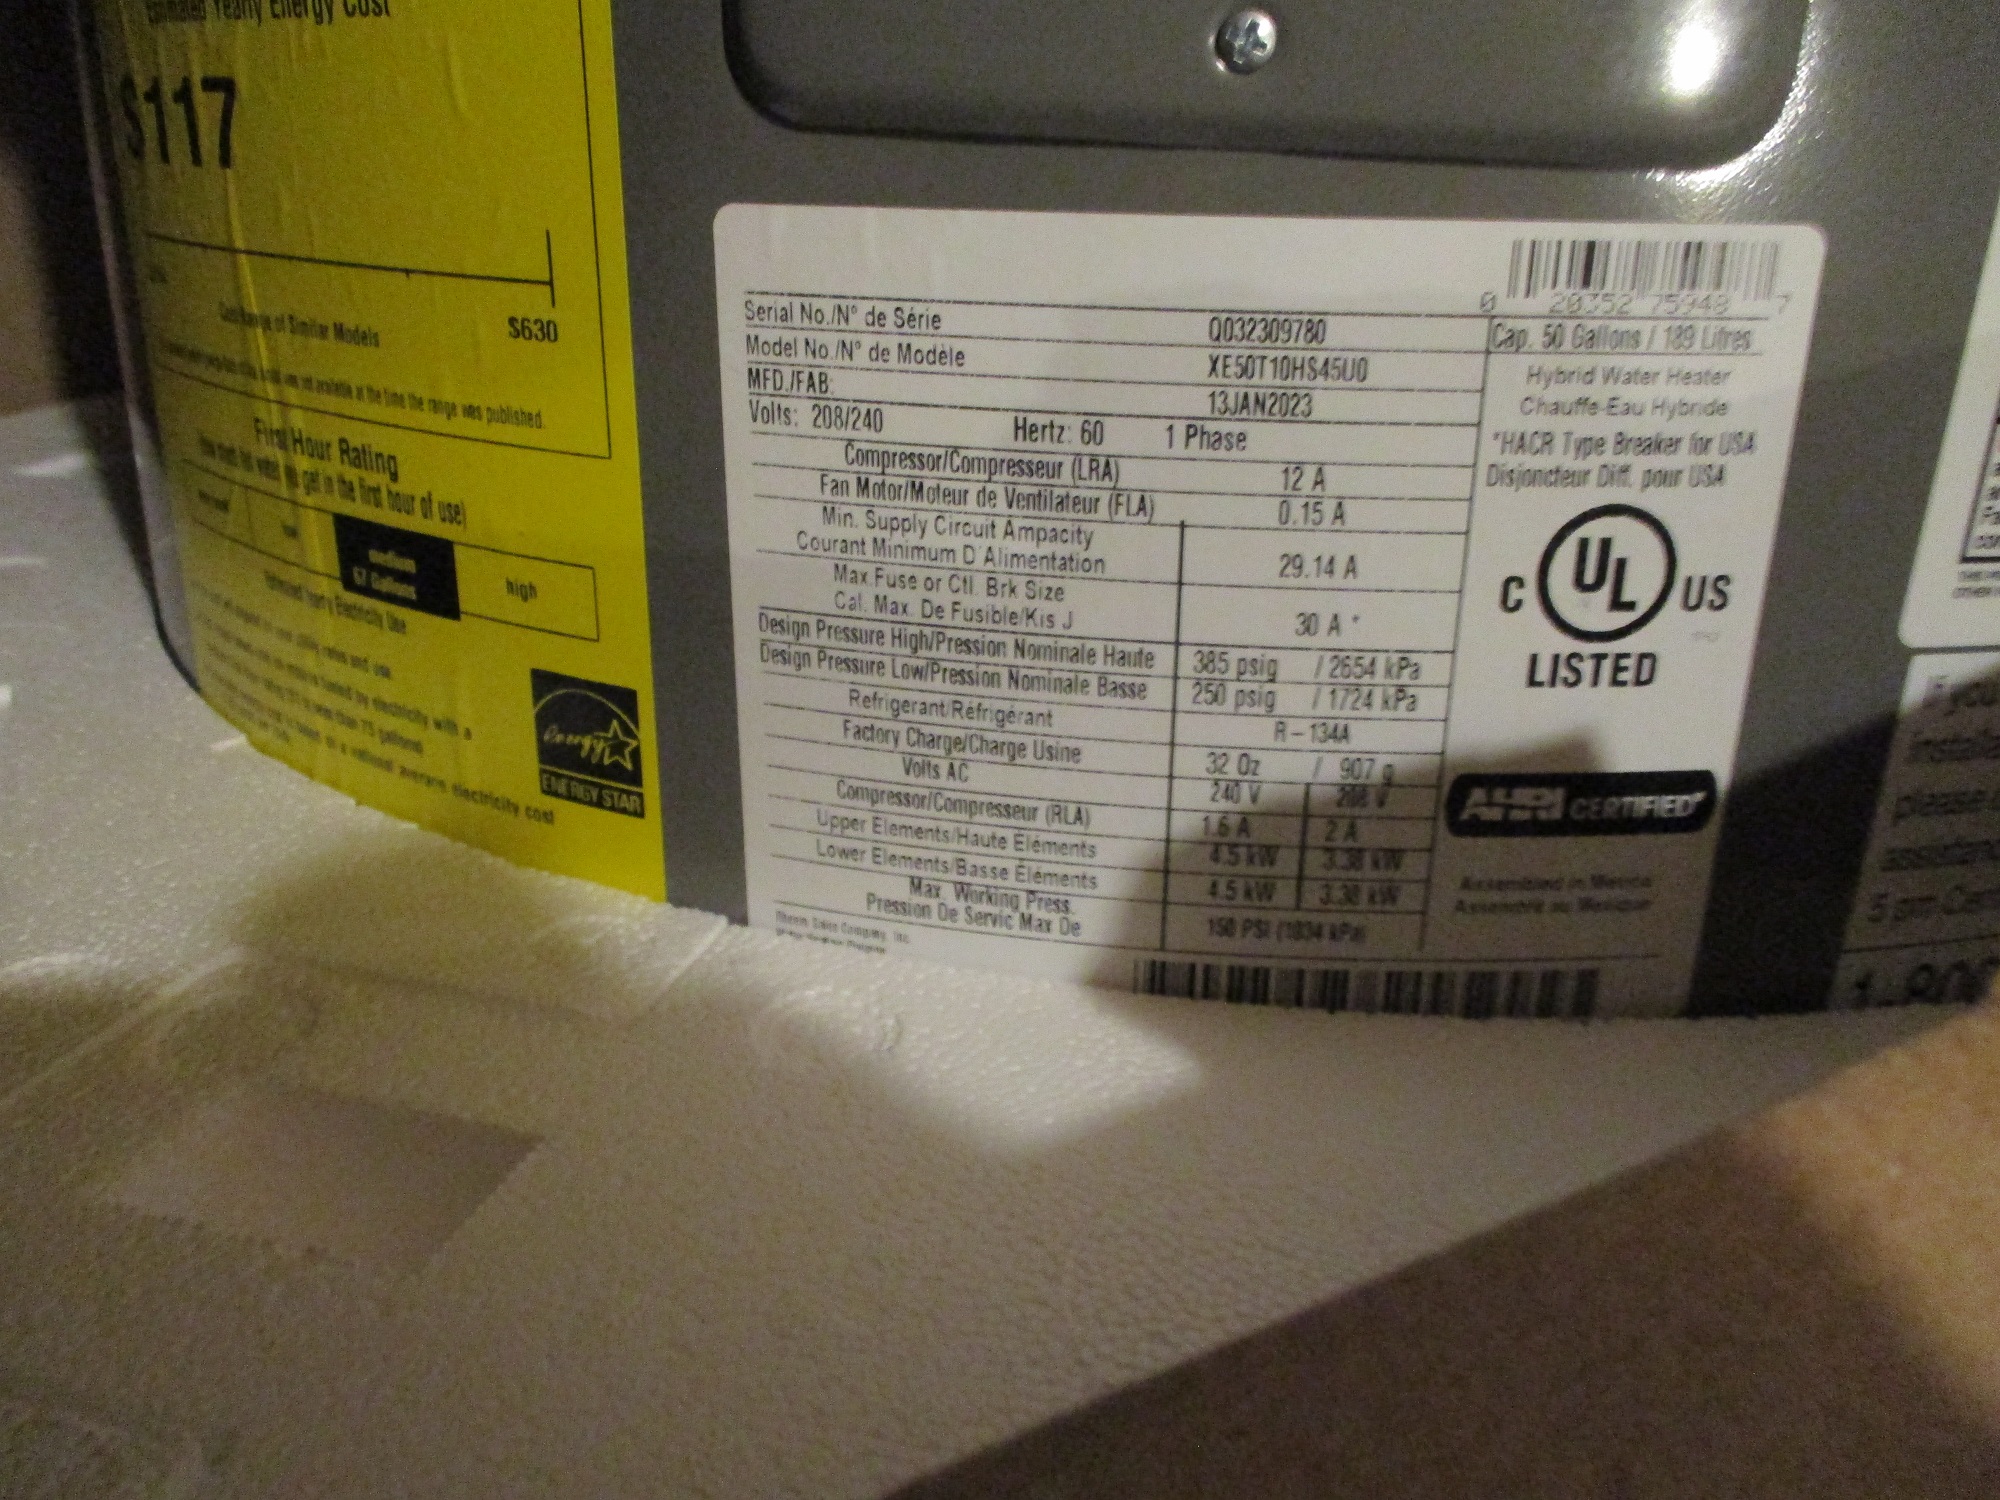
What’s inside this is a brand new 2023 Rheem hot water heater hybrid with a heat pump primary means of heating the water, with a secondary electrical 4400 watt element (that only comes on after the heat pump portion of the heater gets the water as hot as it can). As the yellow side energy sticker illustrates (below), this newer type of energy efficient hot water heater is supposed to only use $117/year of electricity (about the same as a 100w light bulb).
2. EXISTING HOT WATER HEATER (HWH)
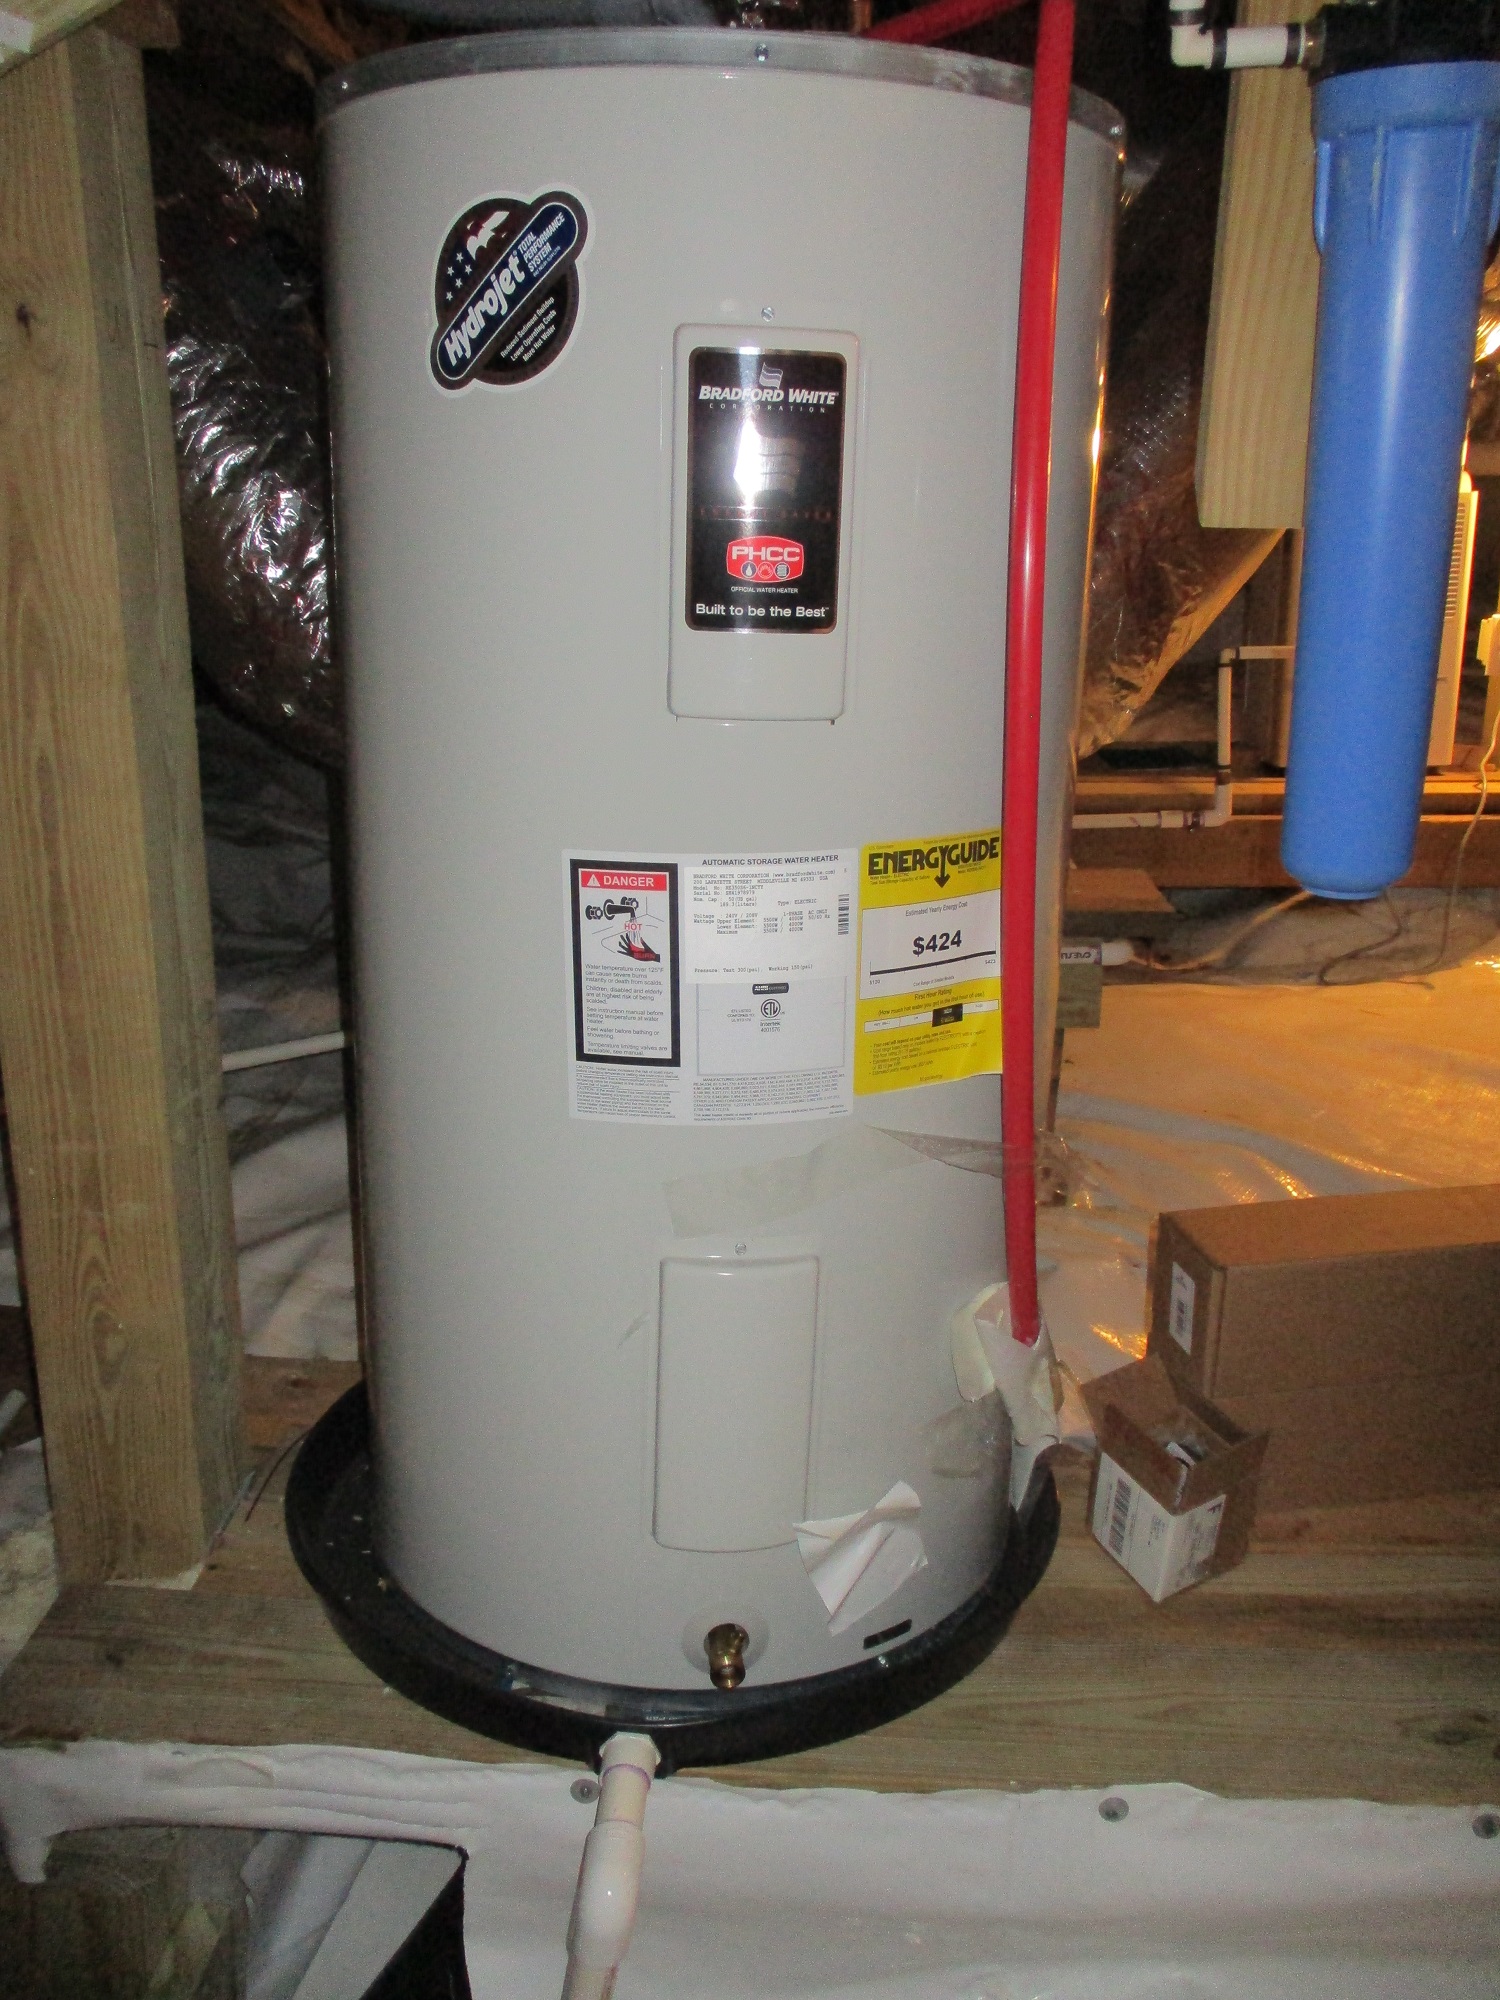
This is the existing 4 year old HWH.
So why replace it? Several reasons: even though it does continue to heat water effectively:
A. as the yellow energy sticker on the right side indicates, it consumes about $424/year in electricity.
B. At 4 years of age, now is the time to hire a Plumber to both drain this unit and to change out the sacrificial anode rod. That’s not free. So some maintenance costs were overdue. Probably several hundred dollars. Rather than put good money after bad, might as well change up to a better unit that will provide longer life and better efficiency.
3. PROVIDE SUITABLE BASE FOR NEW HWH
Owner used two 2×8 PT SYP joists to make a double beam, with 2×12 planks on top. Use what your Engineer specifies. Make sure there is adequate space above the new HWH so that the new work can be accomplished. This means that the base on which the HWH sits may need to be lower than usual. See manufacturer’s dimensions, which are taller than most other normal type HWHs.
5. TURN THE ELECTRICAL BREAKER OFF AND REMOVE EXISTING HWH.
4. UNBOX NEW HEAT PUMP HWH (leave the breaker off)
 Make sure your box knife doesn’t damage the HWH when you are cutting off the box.
5. MOVE THE NEW HWH INTO PLACE, WITH A PLASTIC DRAINPAN UNDER IT
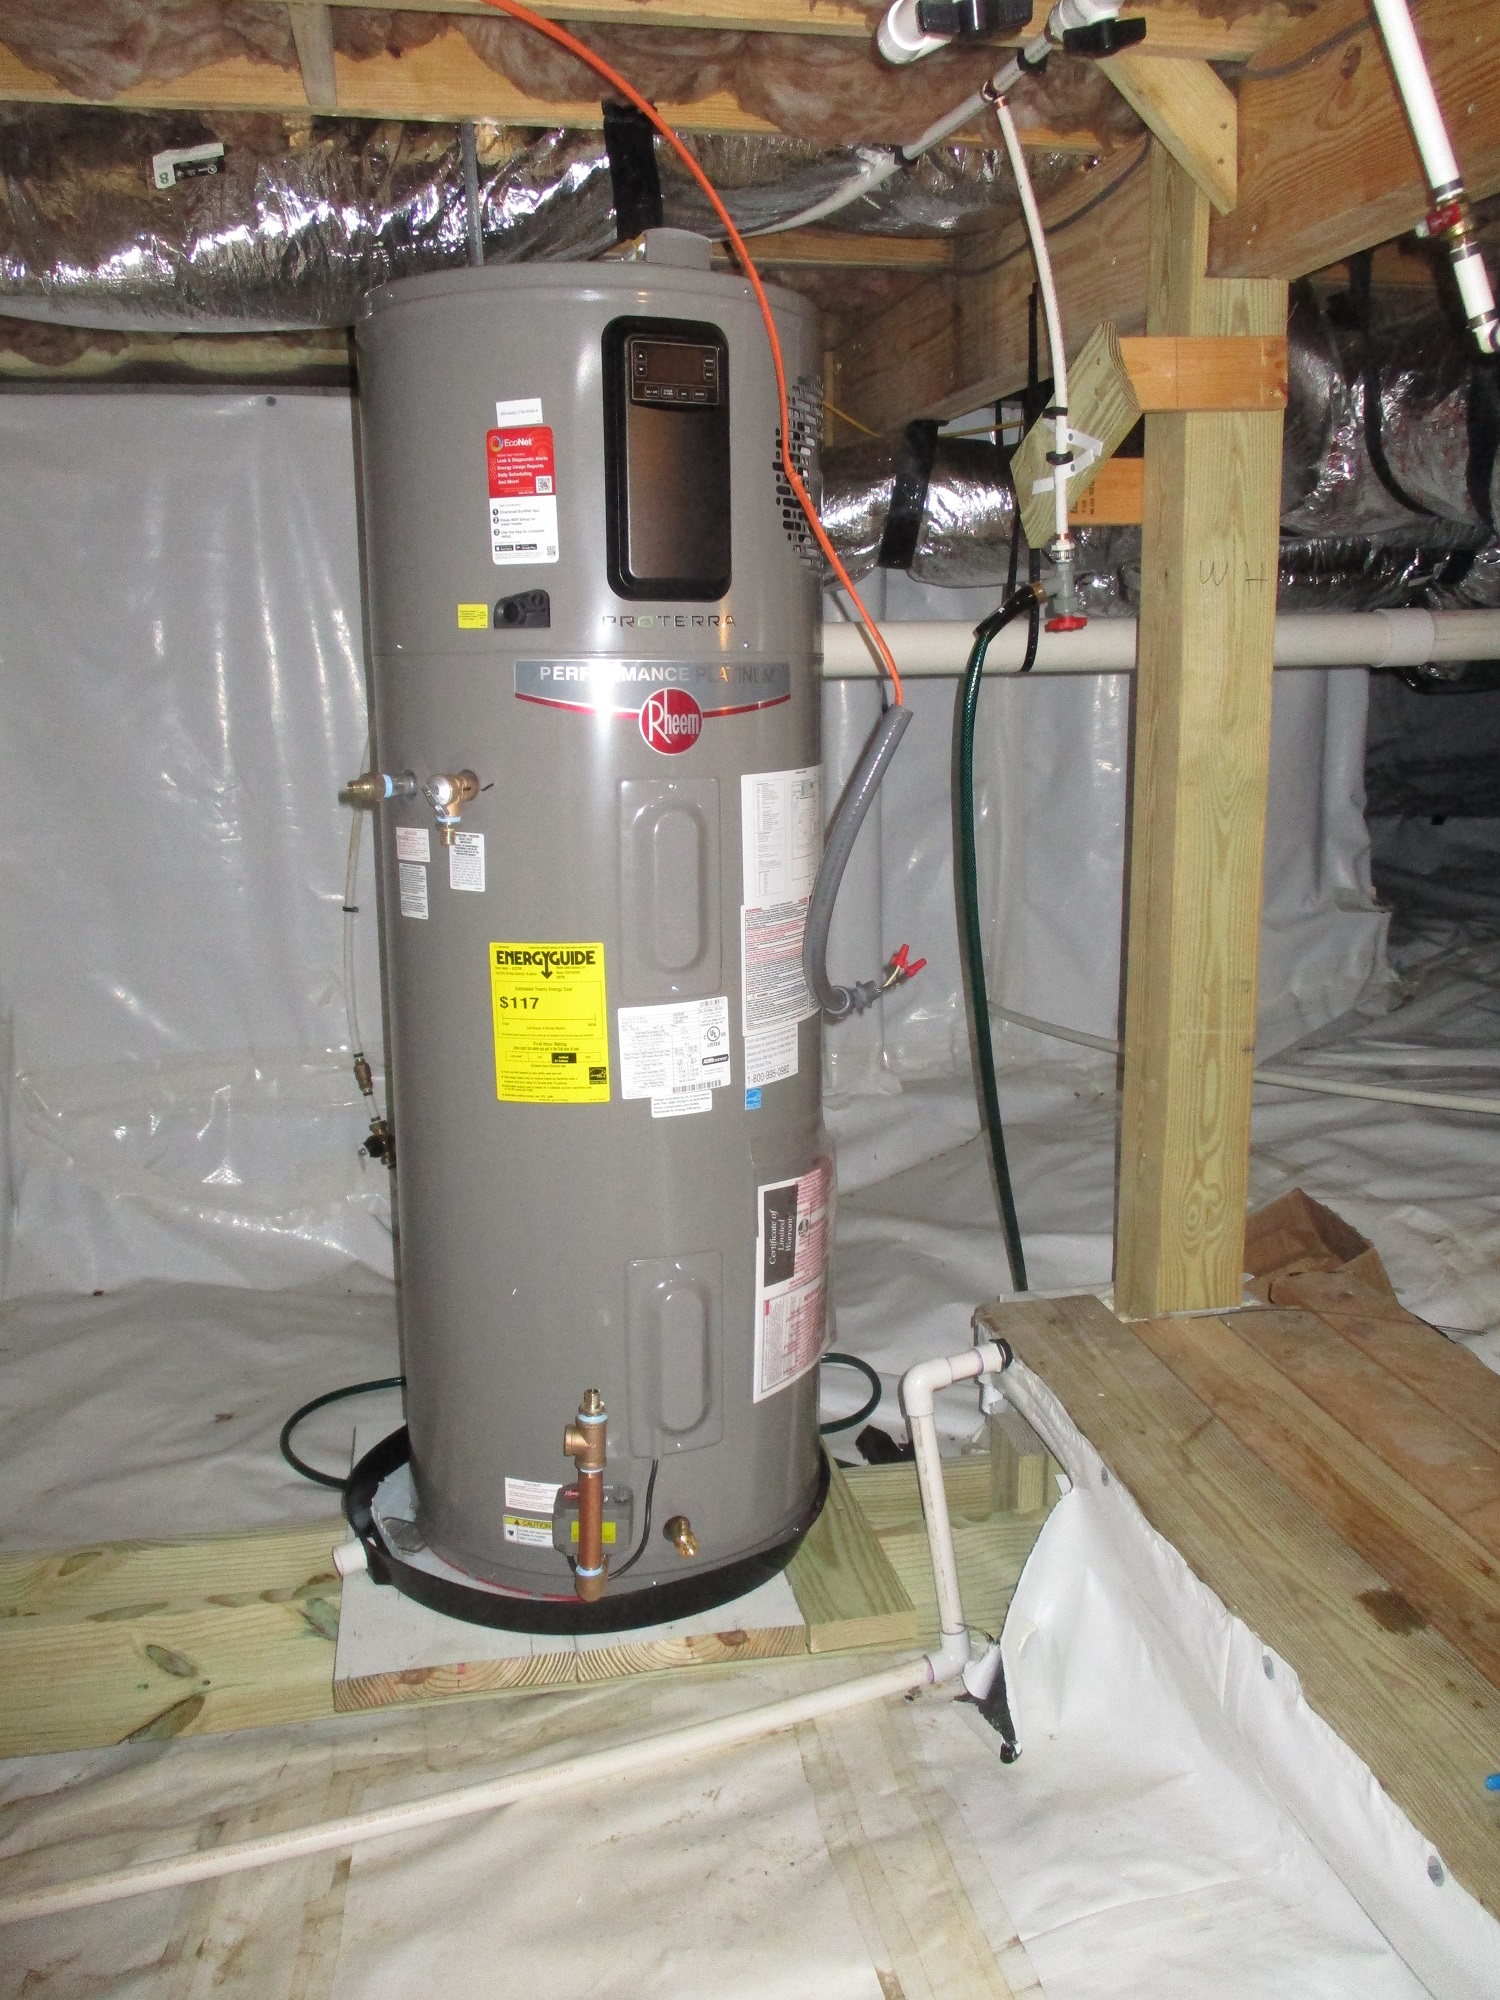
According to the manufacturer, this unit weighs 214 pounds. Two big, strong people (or more) need to handle this, with the special Plumber’s “interlocking hand grip” that the guys showed the Architect, while lifting this unit into place.
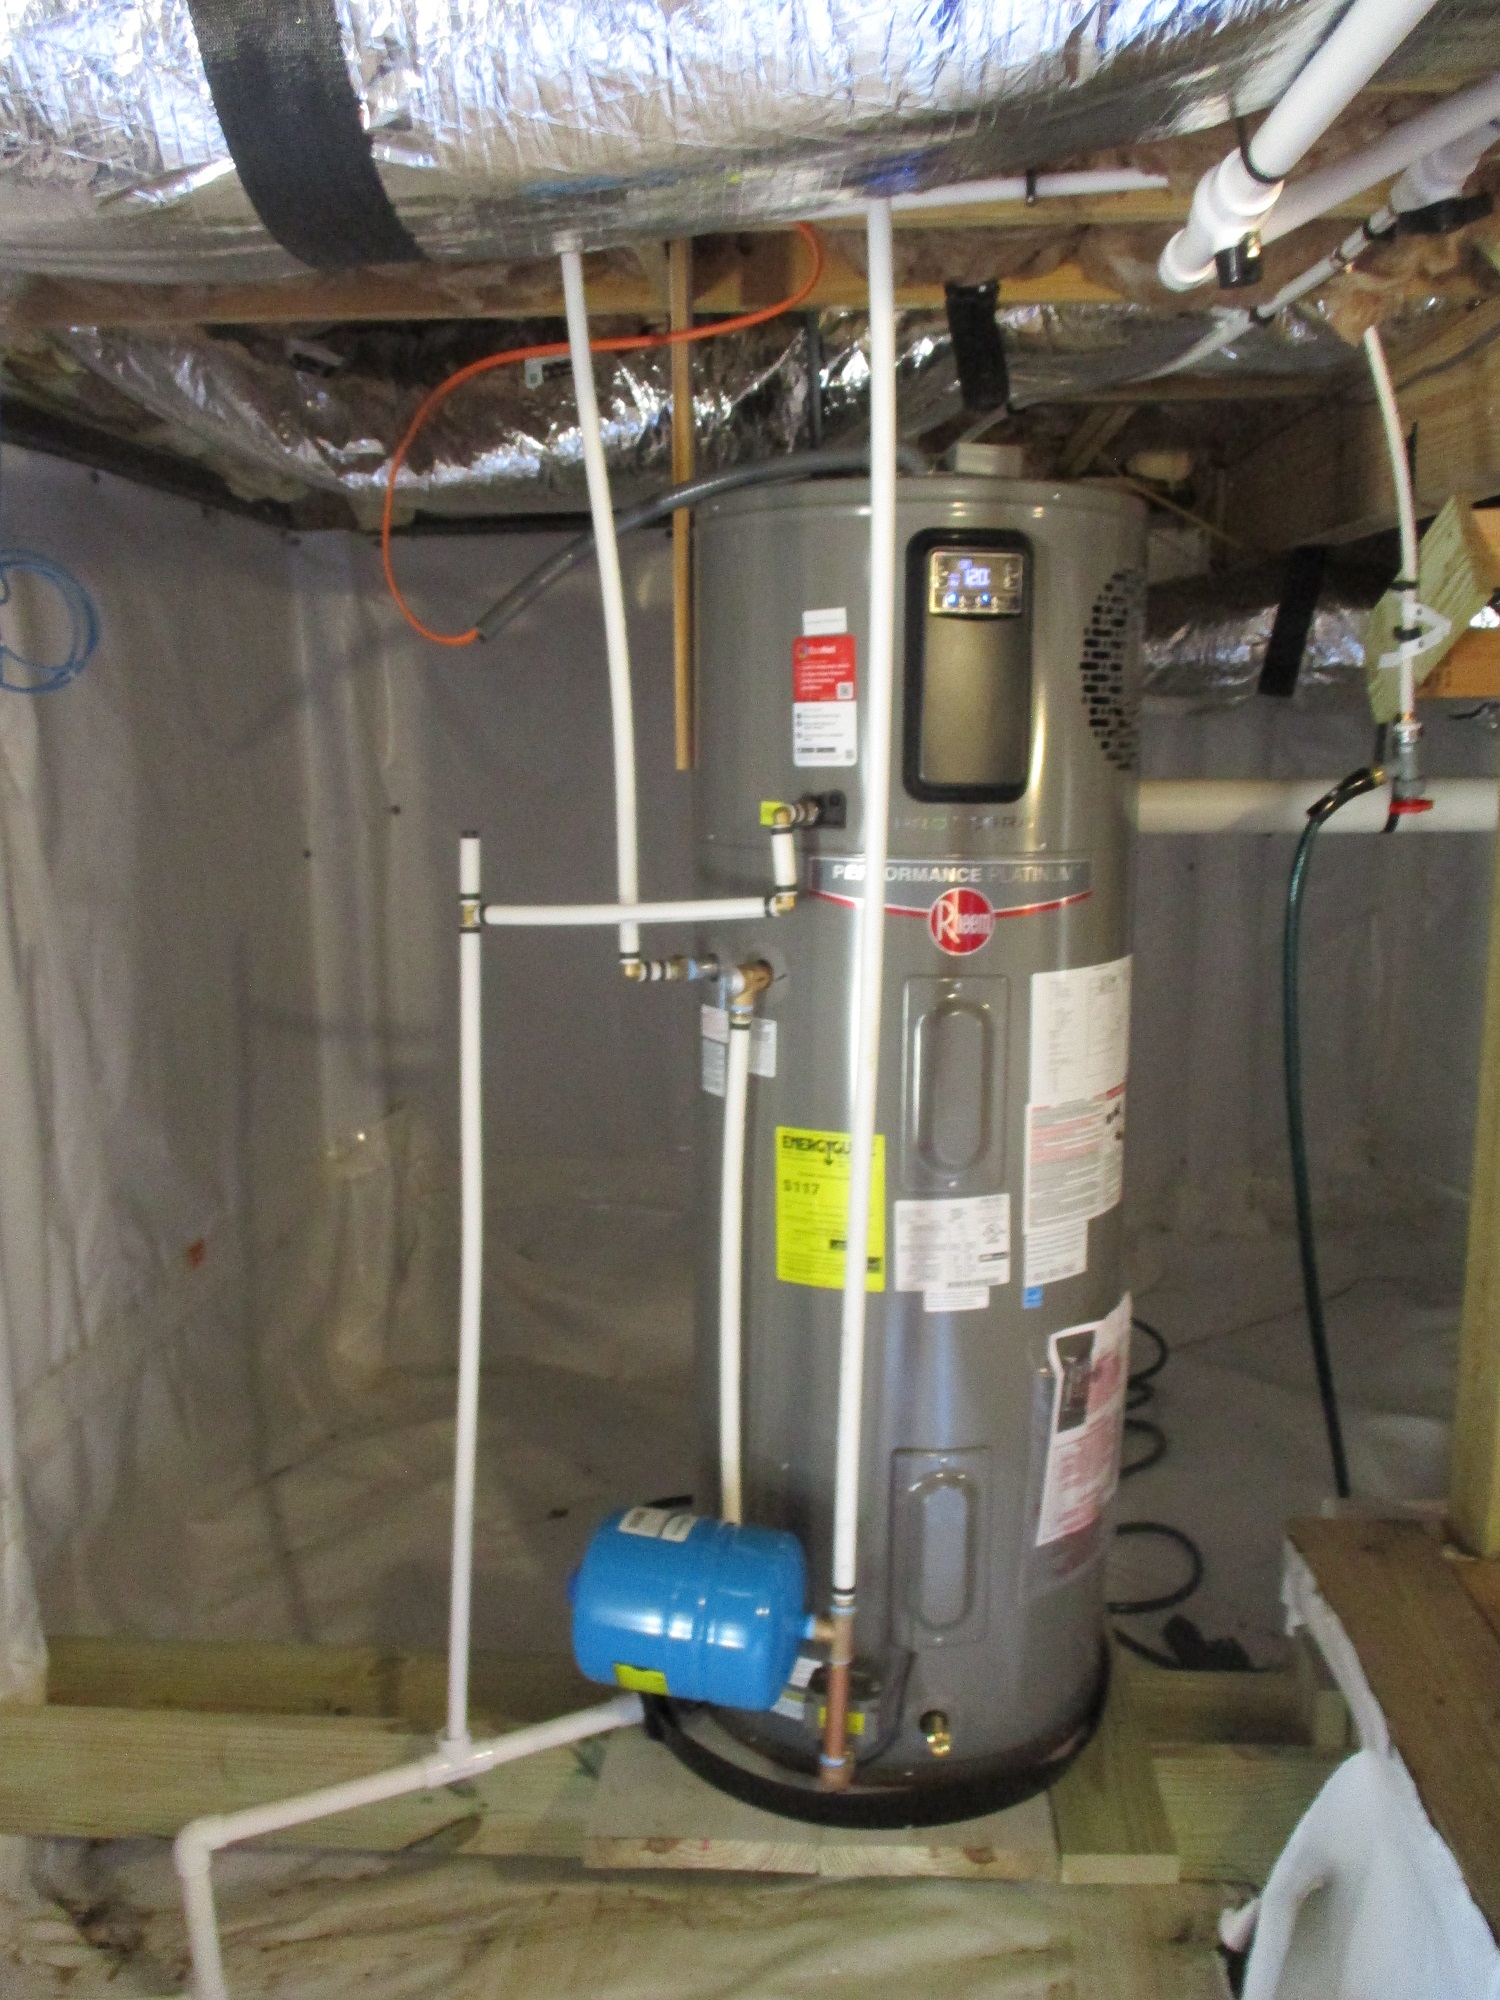
Note 1: Look closely: Architect specified a 1″ thick rigid blue styrofoam insulation sheet under the HWH (in the drainpan) to keep the bottom of the HWH from rusting should any water get into the drainpan and remain there for a length of time.
Note 2: Also look at the top side of the unit. The ventilation opening. The manufacturer indicates that if the space you have this HWH in has at least 700 CF (Cubic Feet) that it doesn’t need to have ventilation ducts to the exterior. In this particular case, there are about 3,000 CF, so it was determined that intake and exhaust vents were not necessary, particularly since this is an all-electric unit (no gas).
Note 3: Interesting note: the heat pump at the top of this special HWH produces cold air around it. However, if there is sufficient CF, as in this case, it is believed this should not be an issue.
Note 4: Architect added a vertical 1×4 screwed to the floor structure above, down for about 8″along the left side of the HWH. Then the Architect applied plastic strapping all around the top of the HWH and over the face of the 1×4 then installed a screw through the face of the strapping and the 1×4 brace. This serves to brace the HWH so it doesn’t wobble or possibly fall over in seismic events.
6. ATTACH ALL REQUIRED PIPING AND WIRING BEFORE TURNING THE BREAKER ON
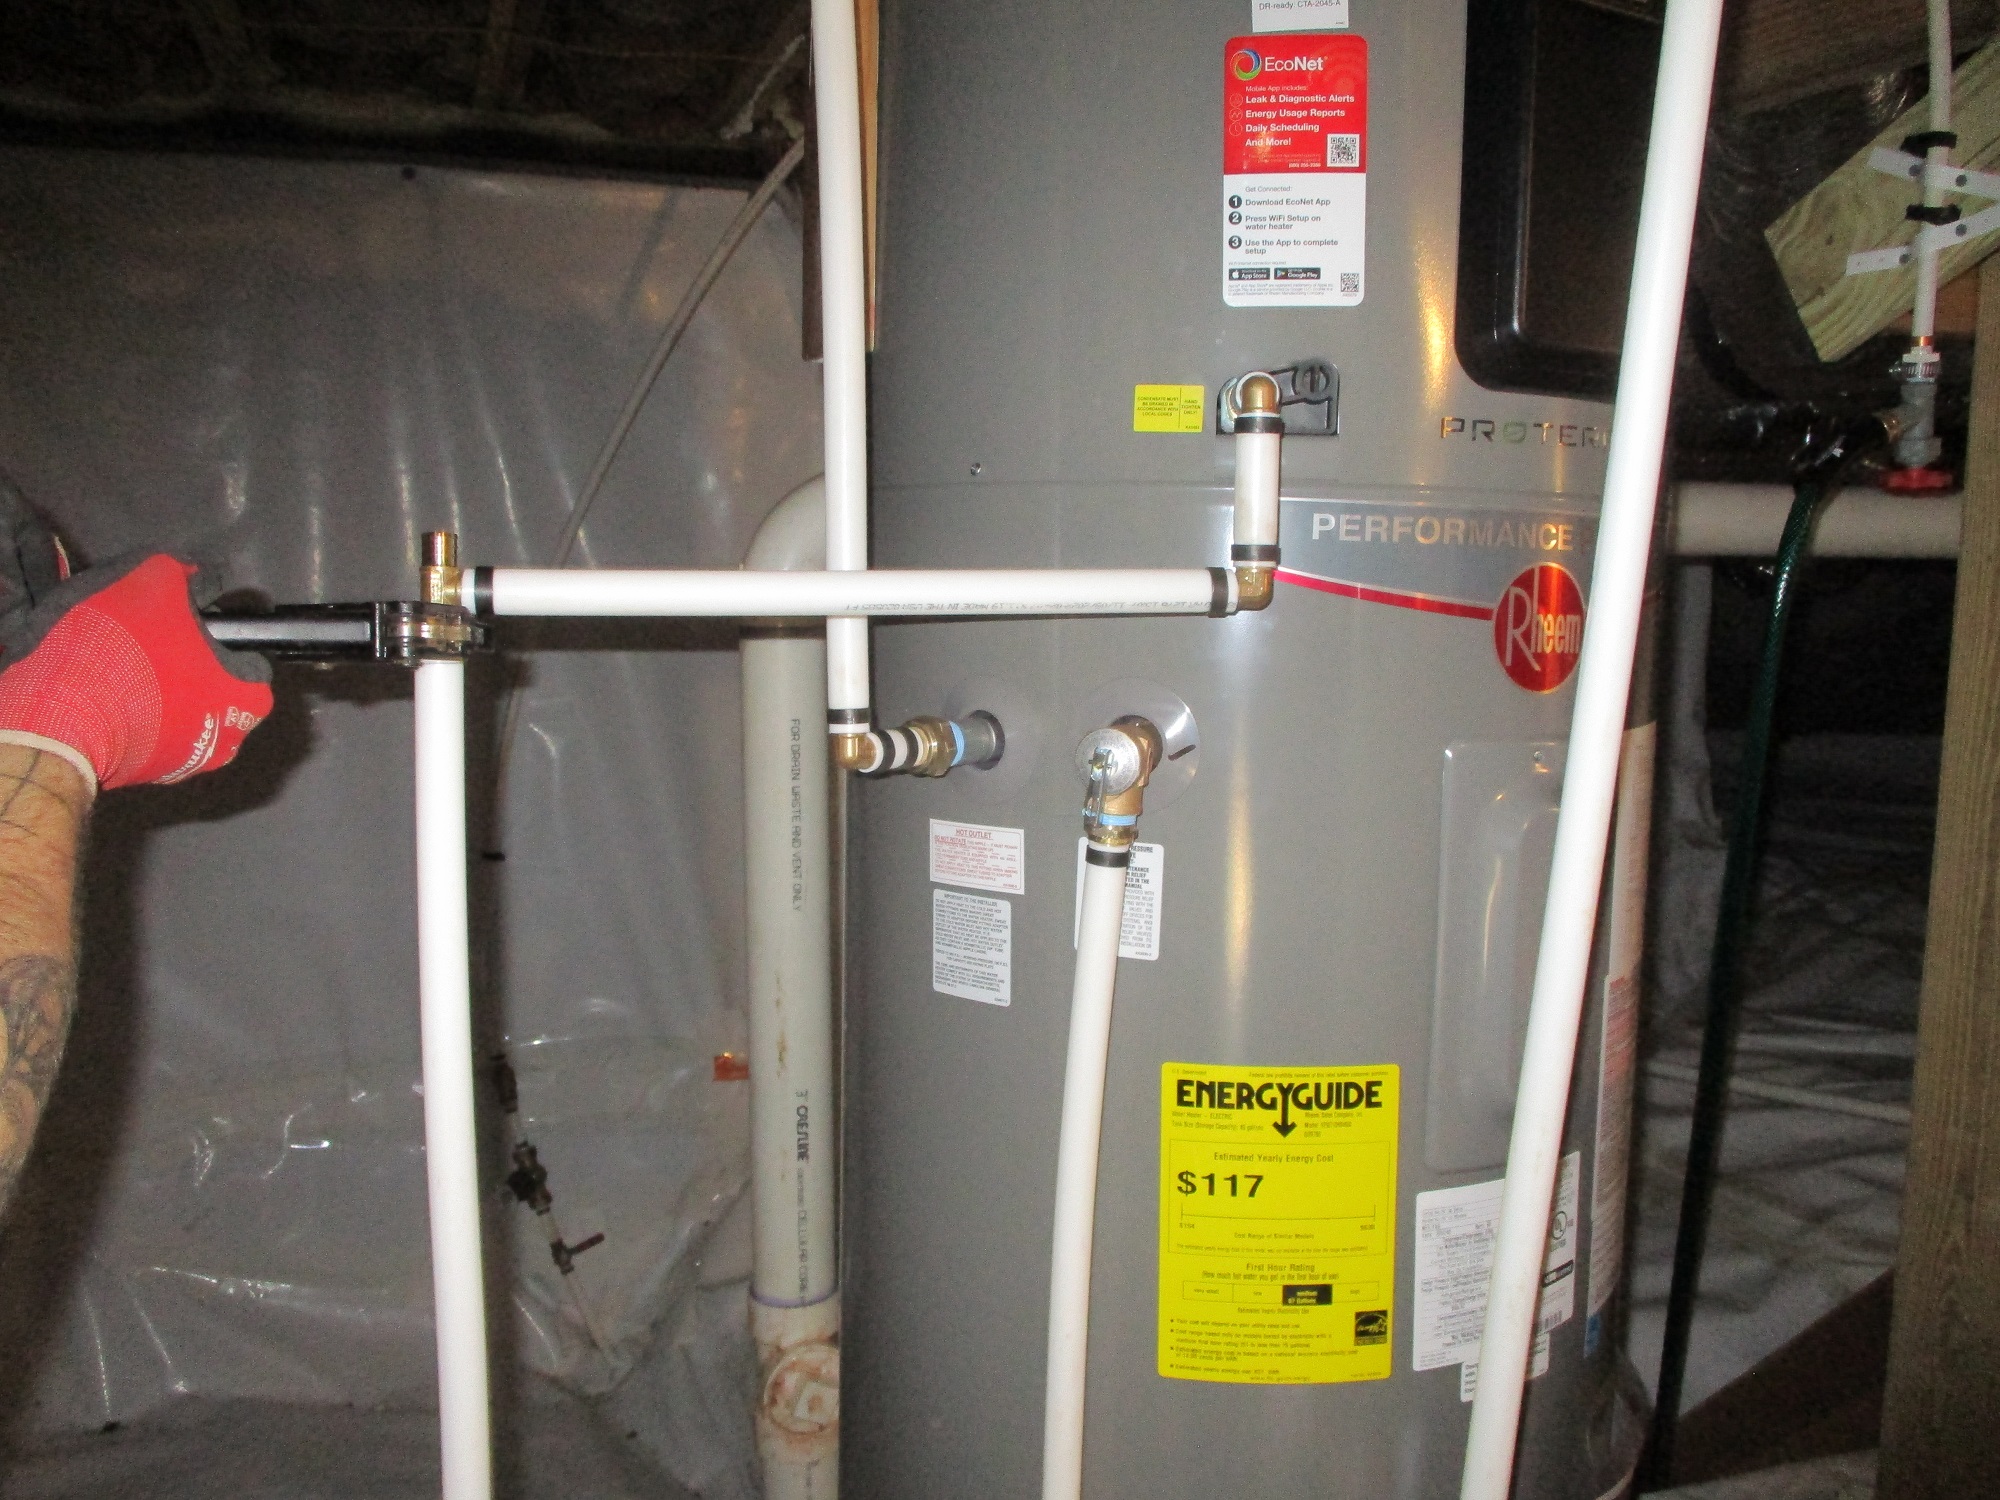
Note the very unusual condensate drain (the one the Plumber is piping in the photo). Because this is a HEAT PUMP HWH. That moisture has to be controlled and drained to a planned, specific location.
Note also the PRV (Pressure Relief Valve) in the side middle of the tank with a white plastic drain going down into the drainpan.
The HW supply line is to the left of the PRV, going up to the underside of the floor joists above and attaching to the previous HW supply piping in the existing house.
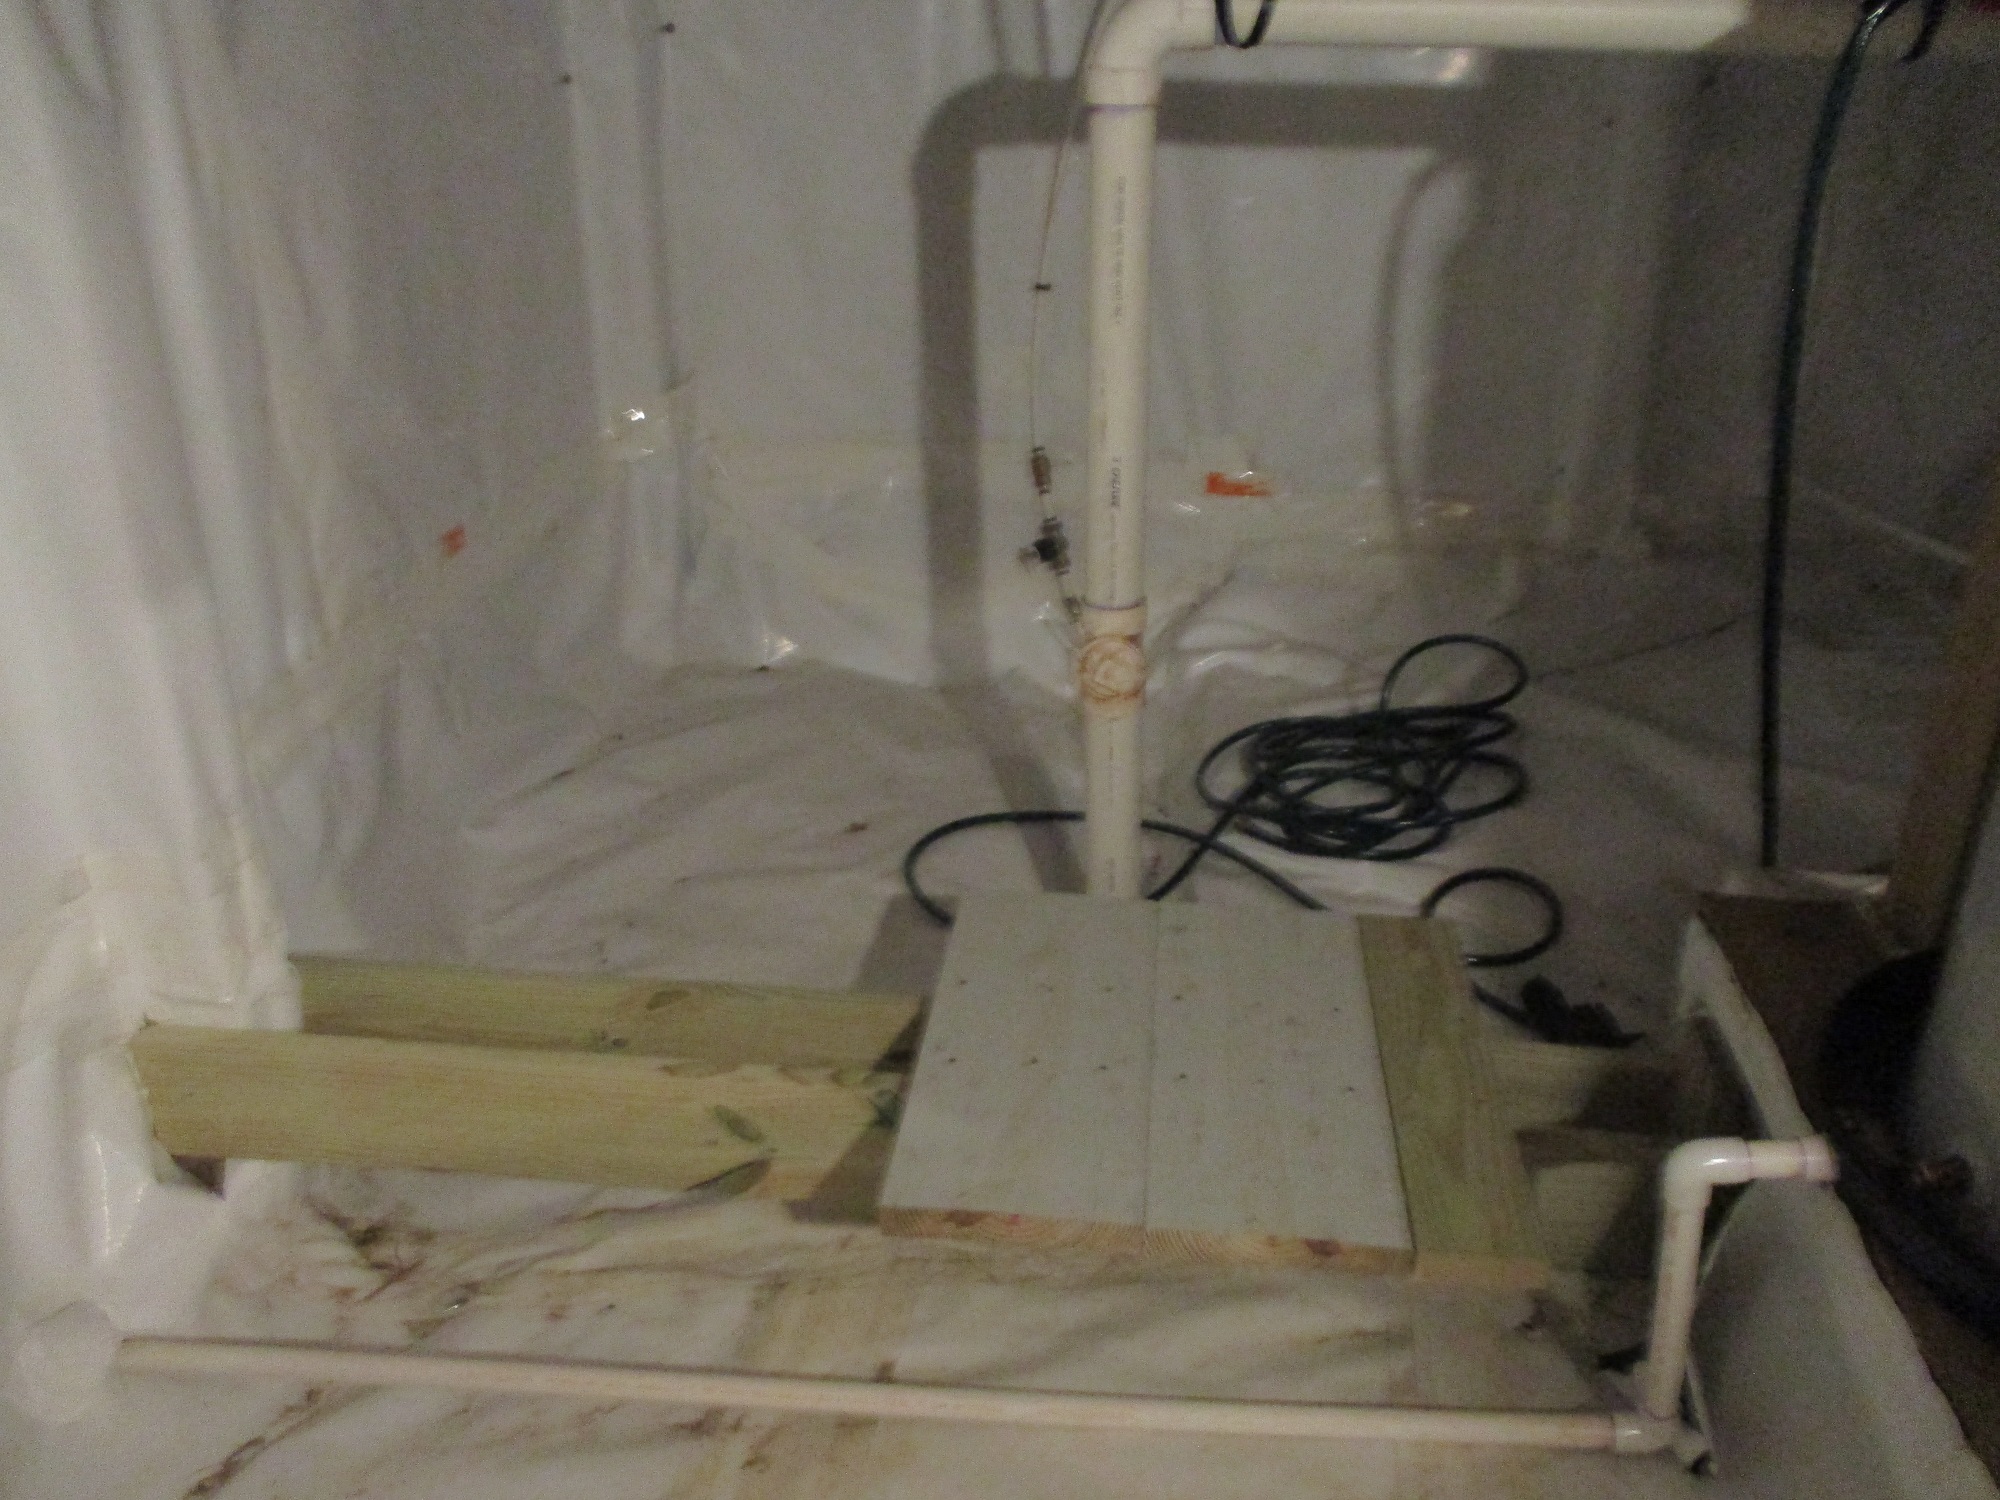
Since 2006, it has been a requirement that HWHs have a small expansion tank to relieve everyday pressure in the HWH. Some old school Plumbers scoff at this, but it is required by Code and will likely extend the life of the HWH. Here (below) is the small blue) bladder expansion tank having its pressure adjusted before being attached to the HWH:
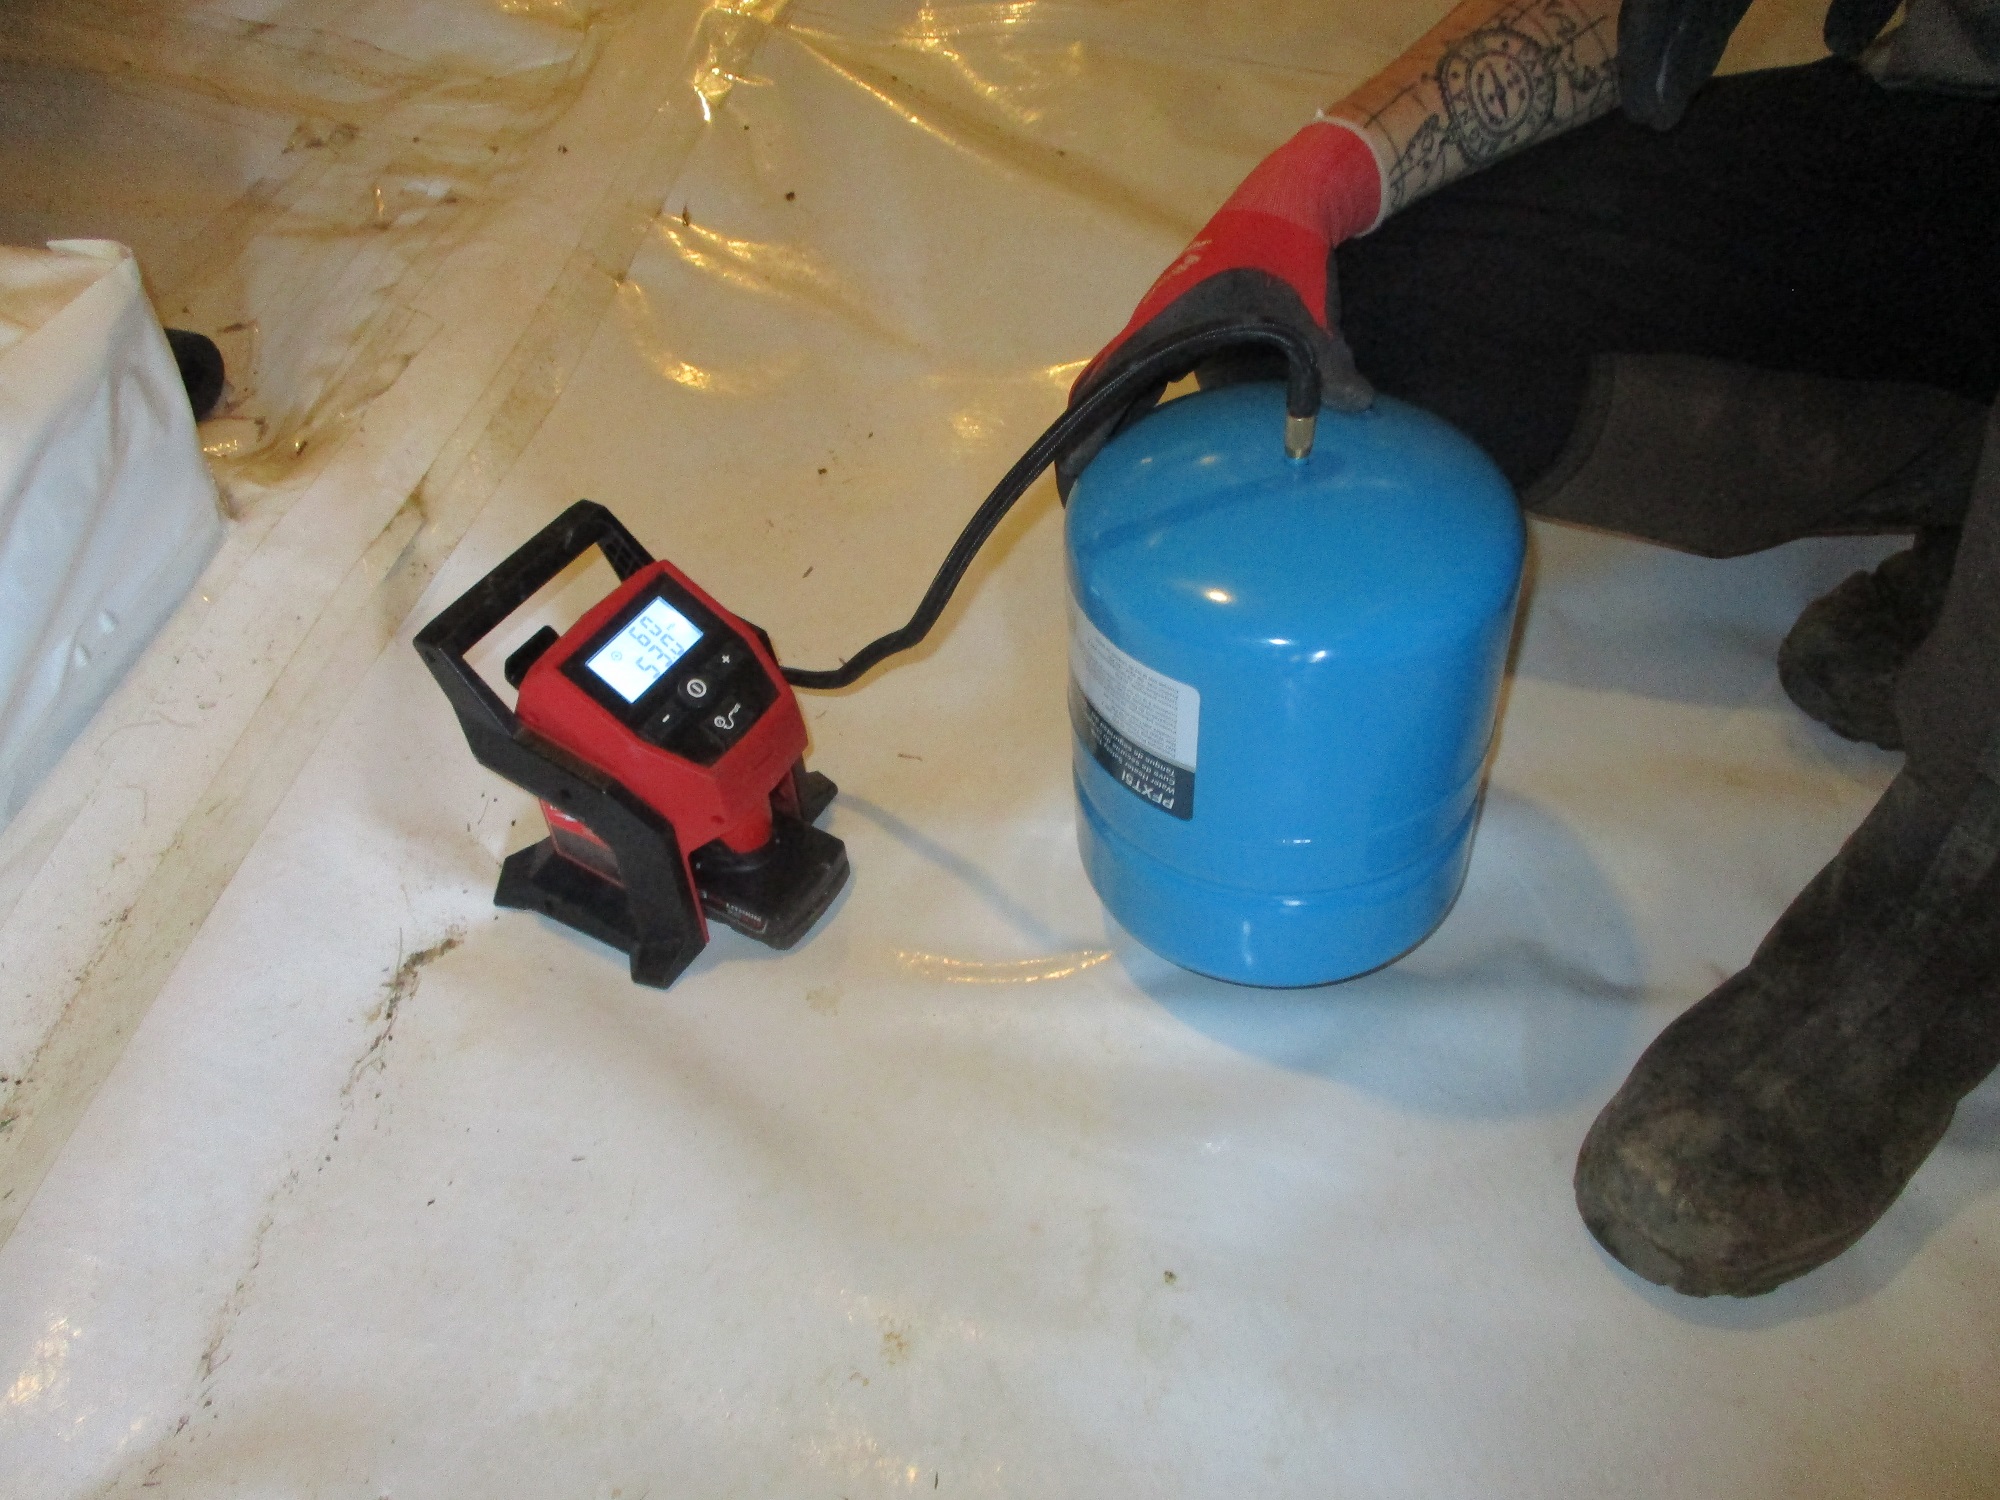
This is just one of the reasons why the old school rule of thumb of $500 for the Plumber to install your HWH that you have bought no longer applies. This small expansion tank, for instance, adds a little more than $300 labor & parts to the installation. Without it, your HWH could blow the PRV, causing additional repairs.
Plumber is attaching the drainpan side discharge into the existing PVC drainline that drains through the side wall of the crawlspace.
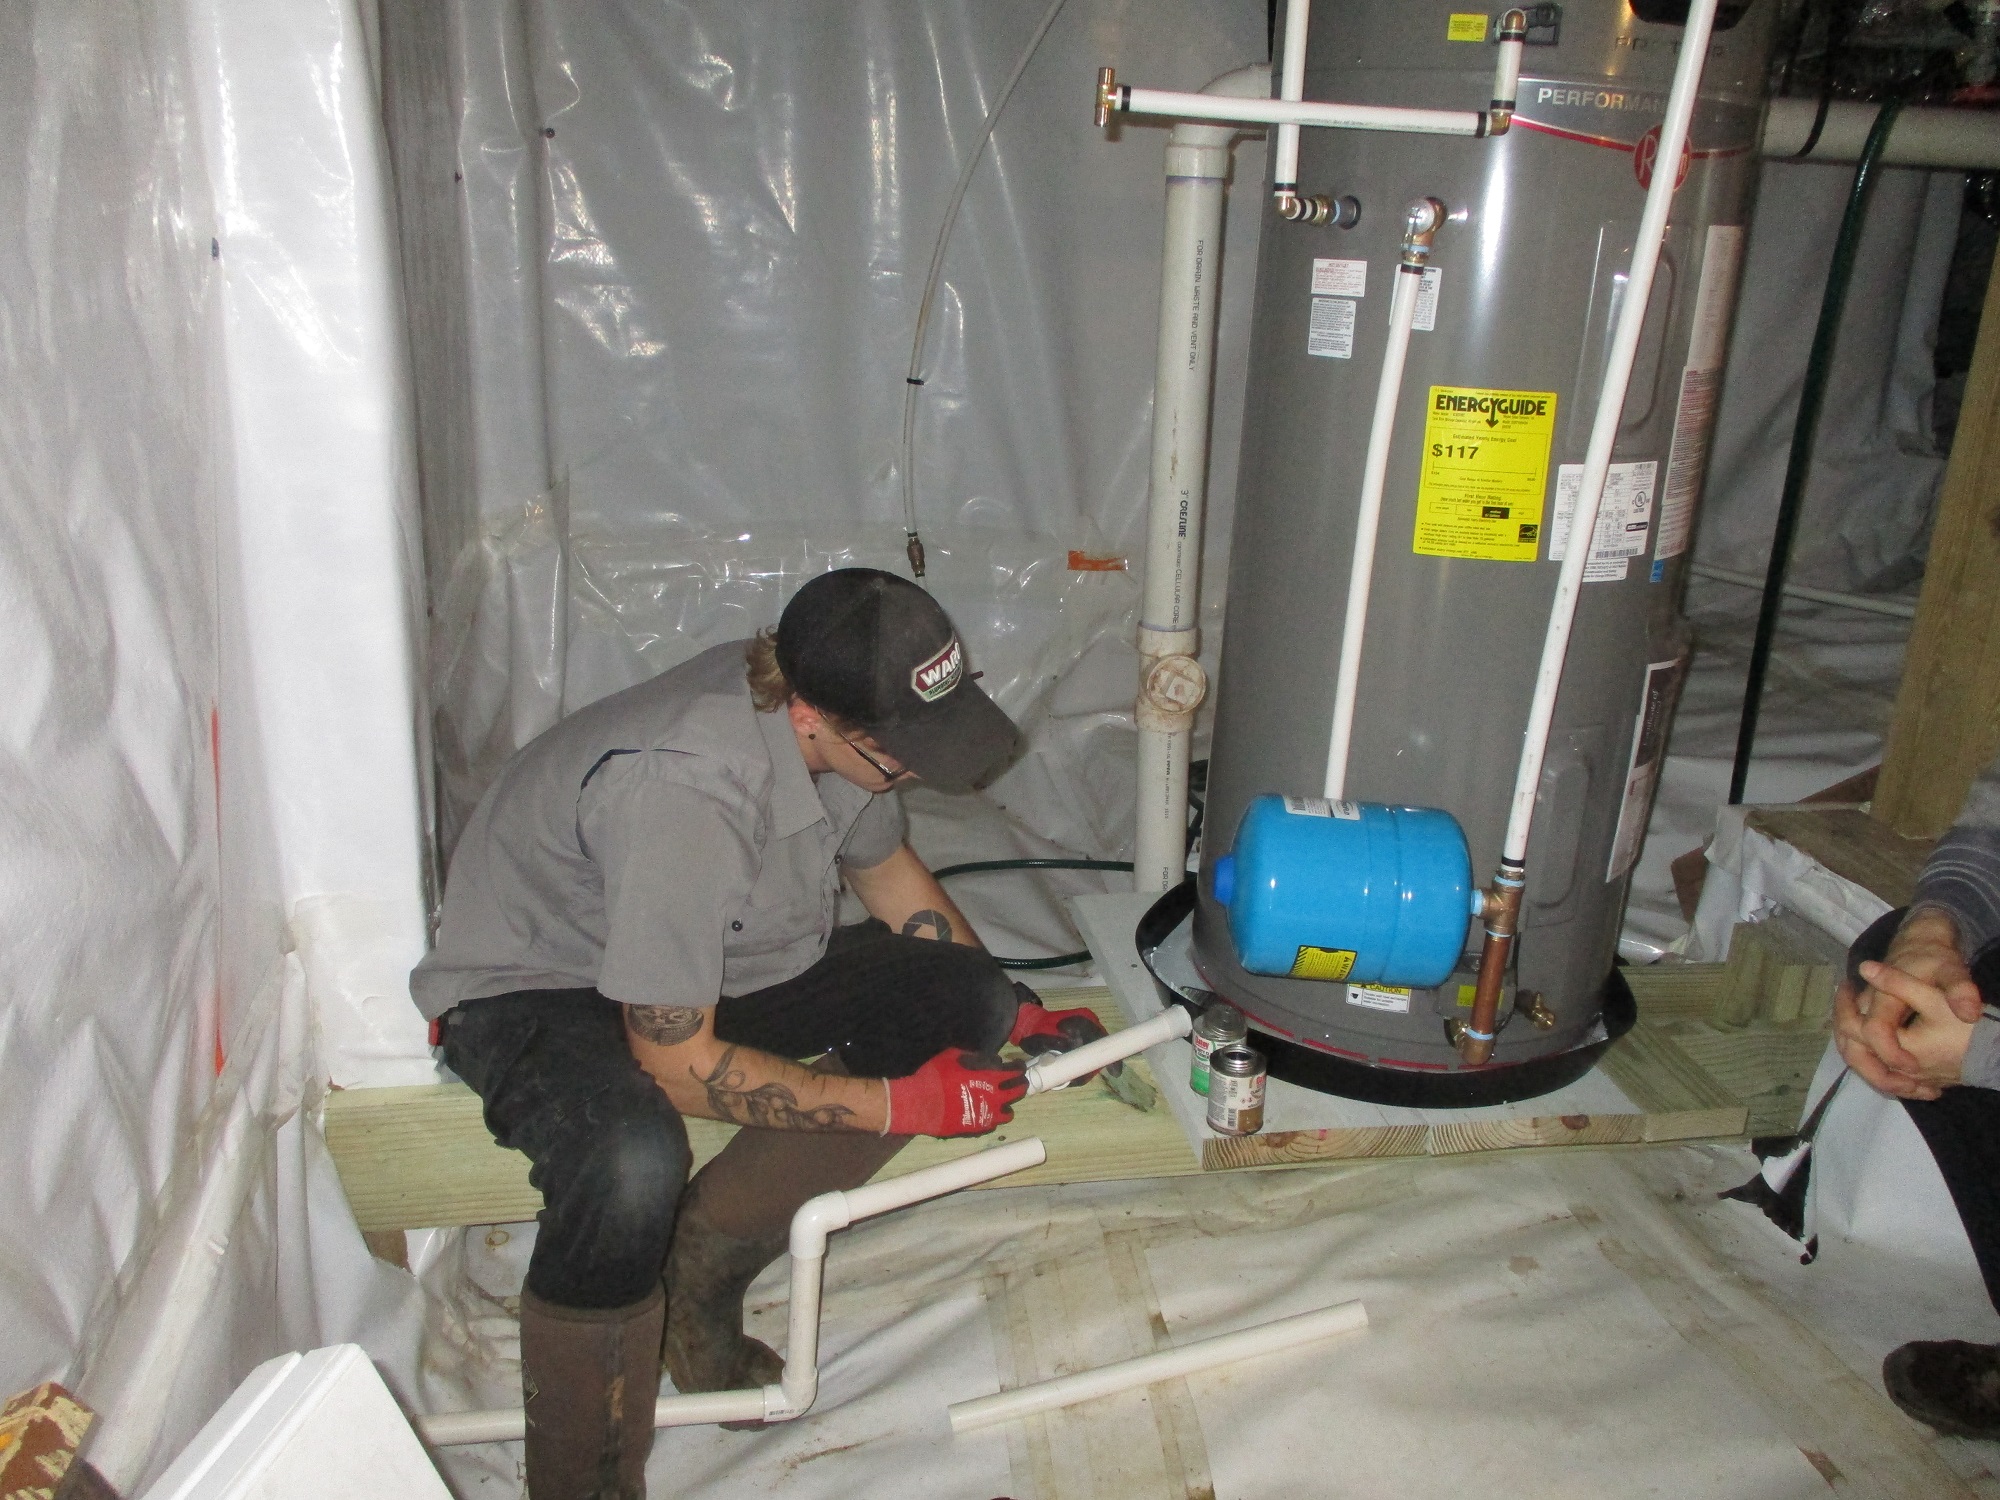
All pipes and wiring have been installed:
7. ENERGIZE THE HWH (turn on the breaker at the power panel)
Set the temperature at no more than 120*F (otherwise you risking scalding people and pets).
Set the LED control panel MODE to ENERGY SAVER. This will combine the Heat Pump first, heating the water using the air around the HWH, then use the electric heating element to raise the temperature to the final required temperature. There are other heating modes, but this is the one you should use most of the time.
NOTE: do NOT get any water down in the drainpan or on the styrofoam while installing the HWH.
Why: Because this type of HWH has an automated valve that will turn off the incoming water if the red sensors on the bottom of the HWH tank detect moisture.
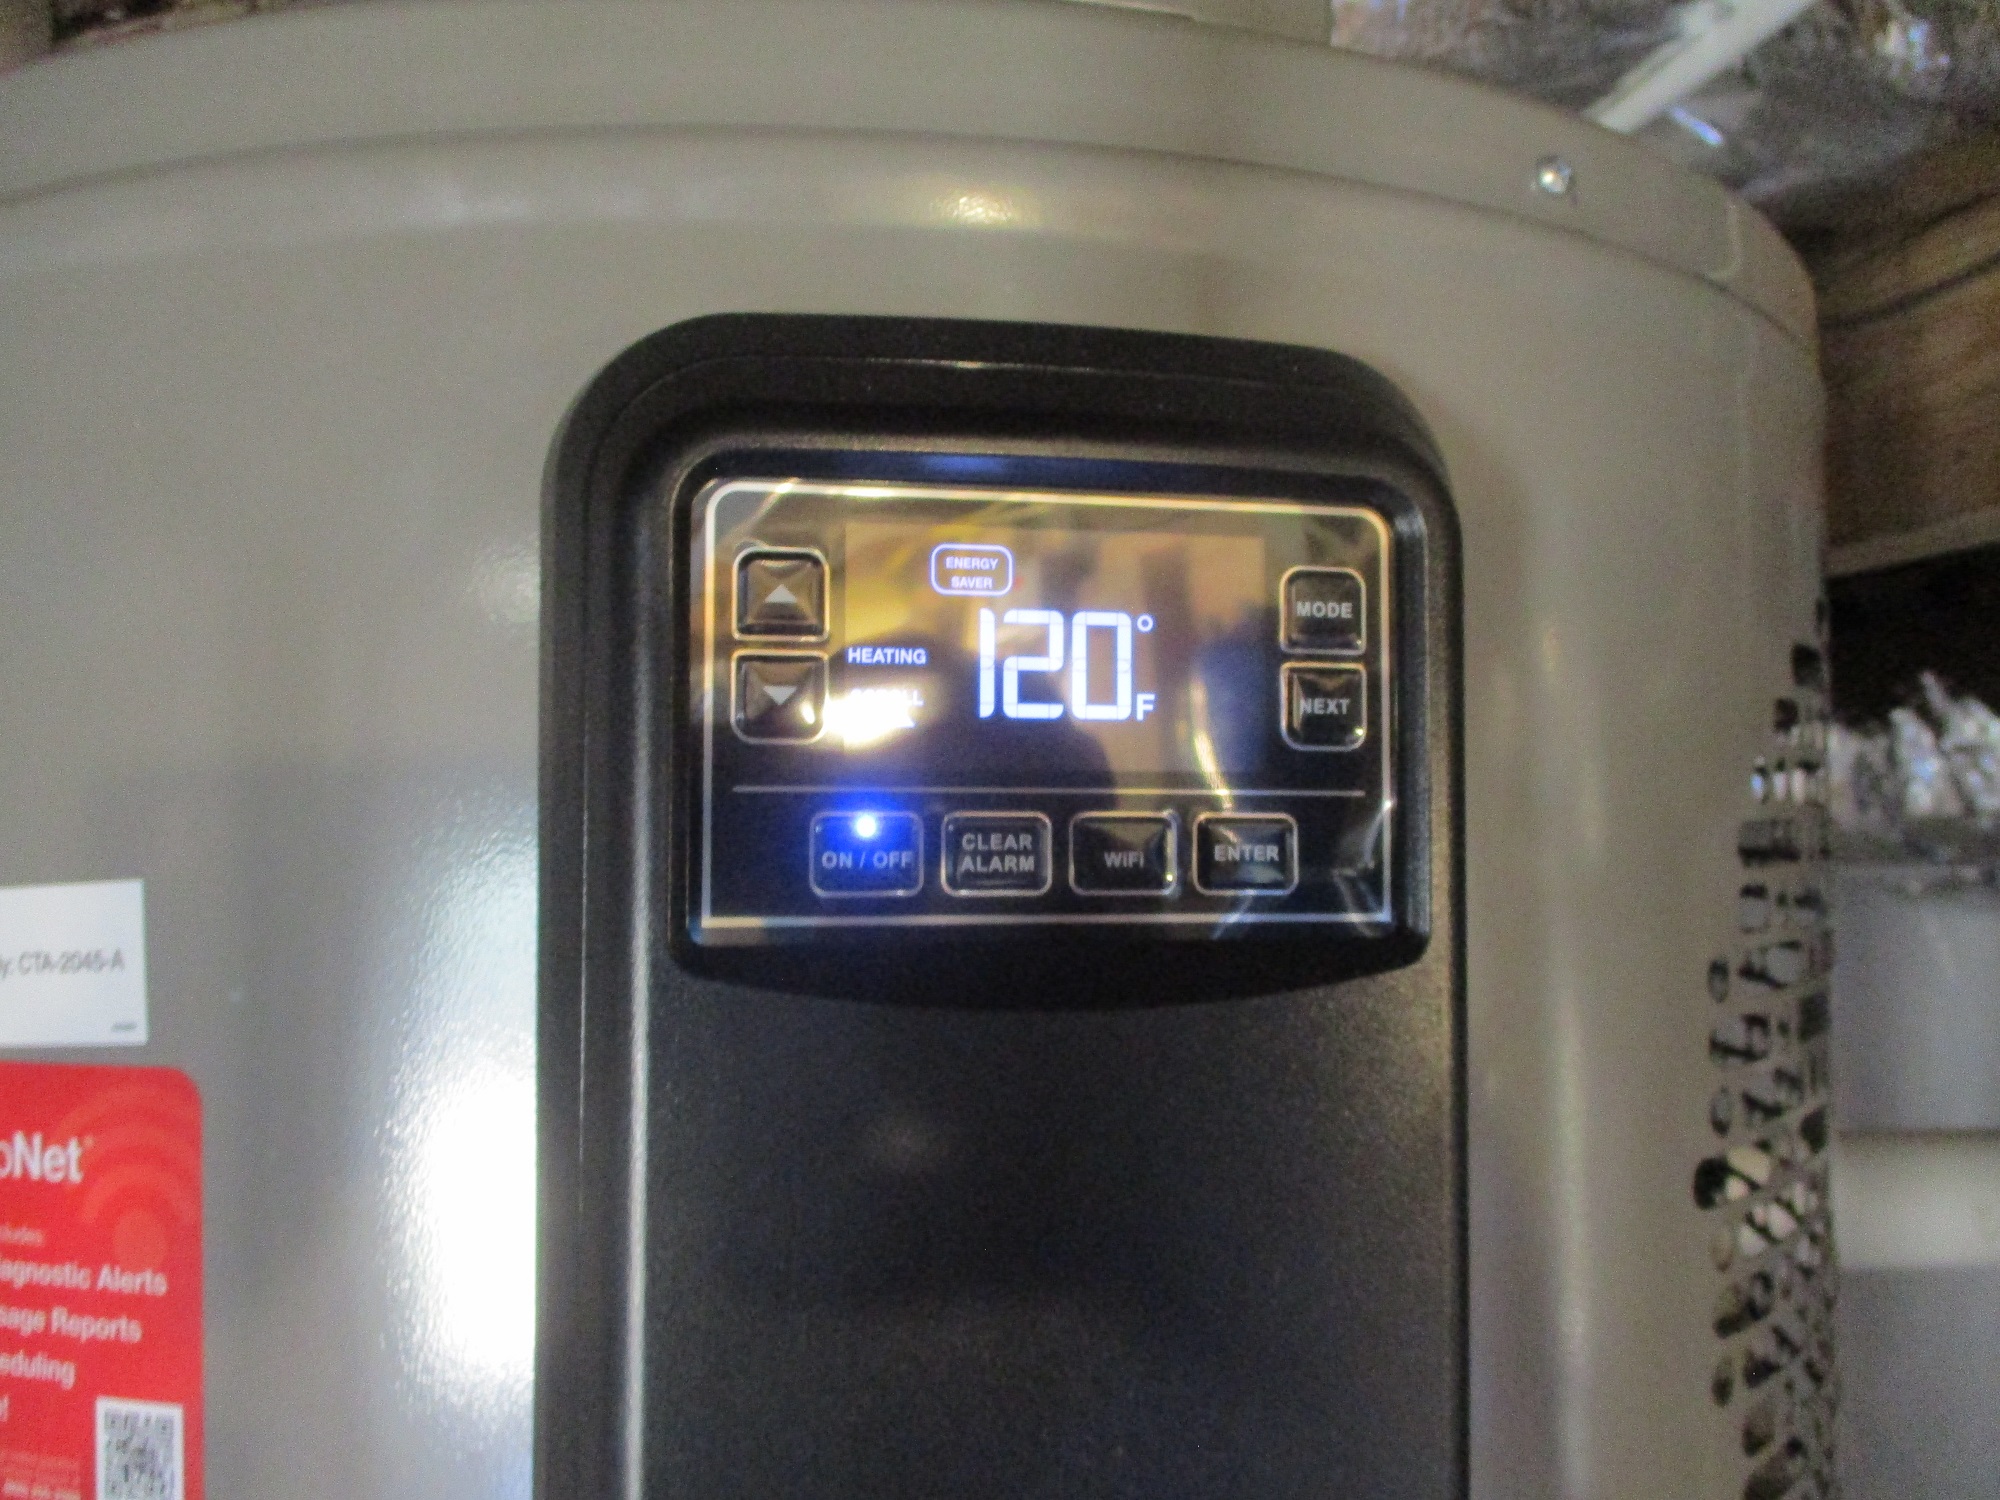
What to do: if your Plumber does get water around the bottom of your HWH, you can override the automatic valve shutoff by pressing the LED control panel CLEAR ALARM for 5 seconds. This will allow the auto valve to open up and the HWH to once again heat the water for 24 hours. In the intervening period, have a box fan blowing on the base of the HWH to evaporate any residual water there. Keep doing this once every 24 hours if the alarm turns back on, until the water is gone. Normal operation should be restored after that water under the tank has evaporated.
8. COSTS/ ECONOMIC ANALYSIS
Cost to accomplish the above is significant:
$1,710 to Home Depot to deliver and pay local tax on the HWH.
$1,853. to local Plumbing company to install the new high-tech HWH, remove the old HWH, install the new expansion tank, changeout electrical connections, changeout supply piping to the new HWH for both HW and CW, attach the HWH to a condensate drain, and setup the operation of the unit and make a return trip to fix alarm mode.
$3,563 total cost.
-300 Duke Energy rebate
——————————
$3,263 total cost after local power company rebate.
$307/year power savings, however, the cost of electrical power continues to escalate. Let’s assume that the average savings over the next 10 years is really more like $500/year average over that time period.
Therefore, 10 years x $500= $5,000 power savings.
Or:
$3,263/$500= 6.5 +/- years to break even. And after that, over $300/year LESS in ongoing future power bills.
So, even though the capital expenditure is significant, the rebate and power savings payback in a little more than 6 years.