Polyaspartic Garage Floor Coating is an online “post” article about how an Architect had his own concrete garage floor improved.
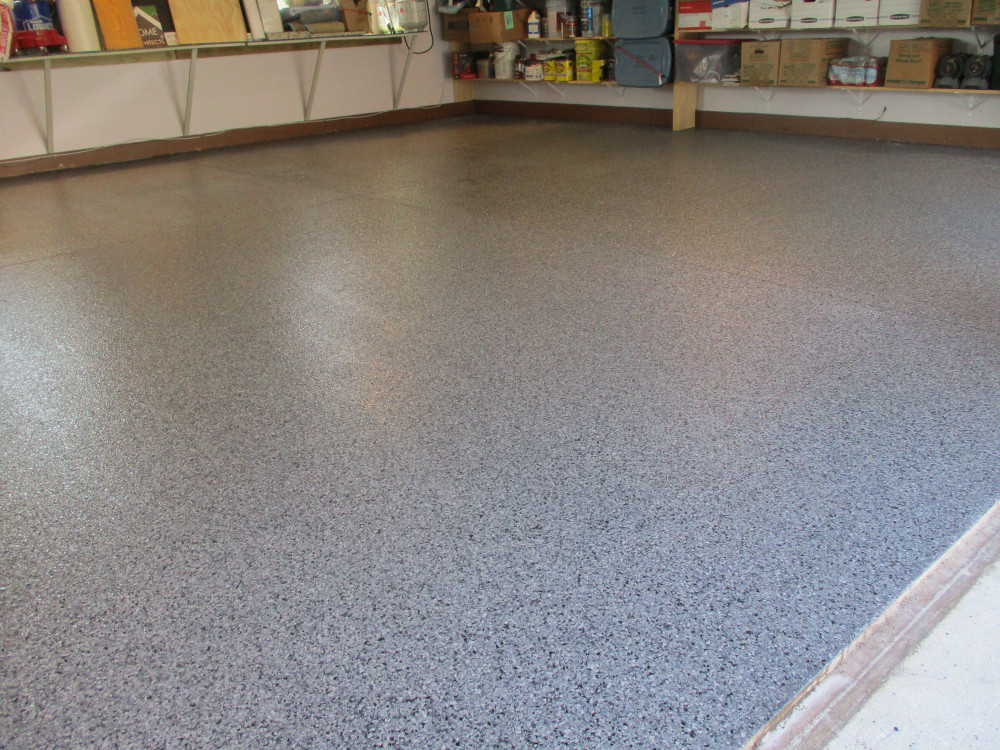
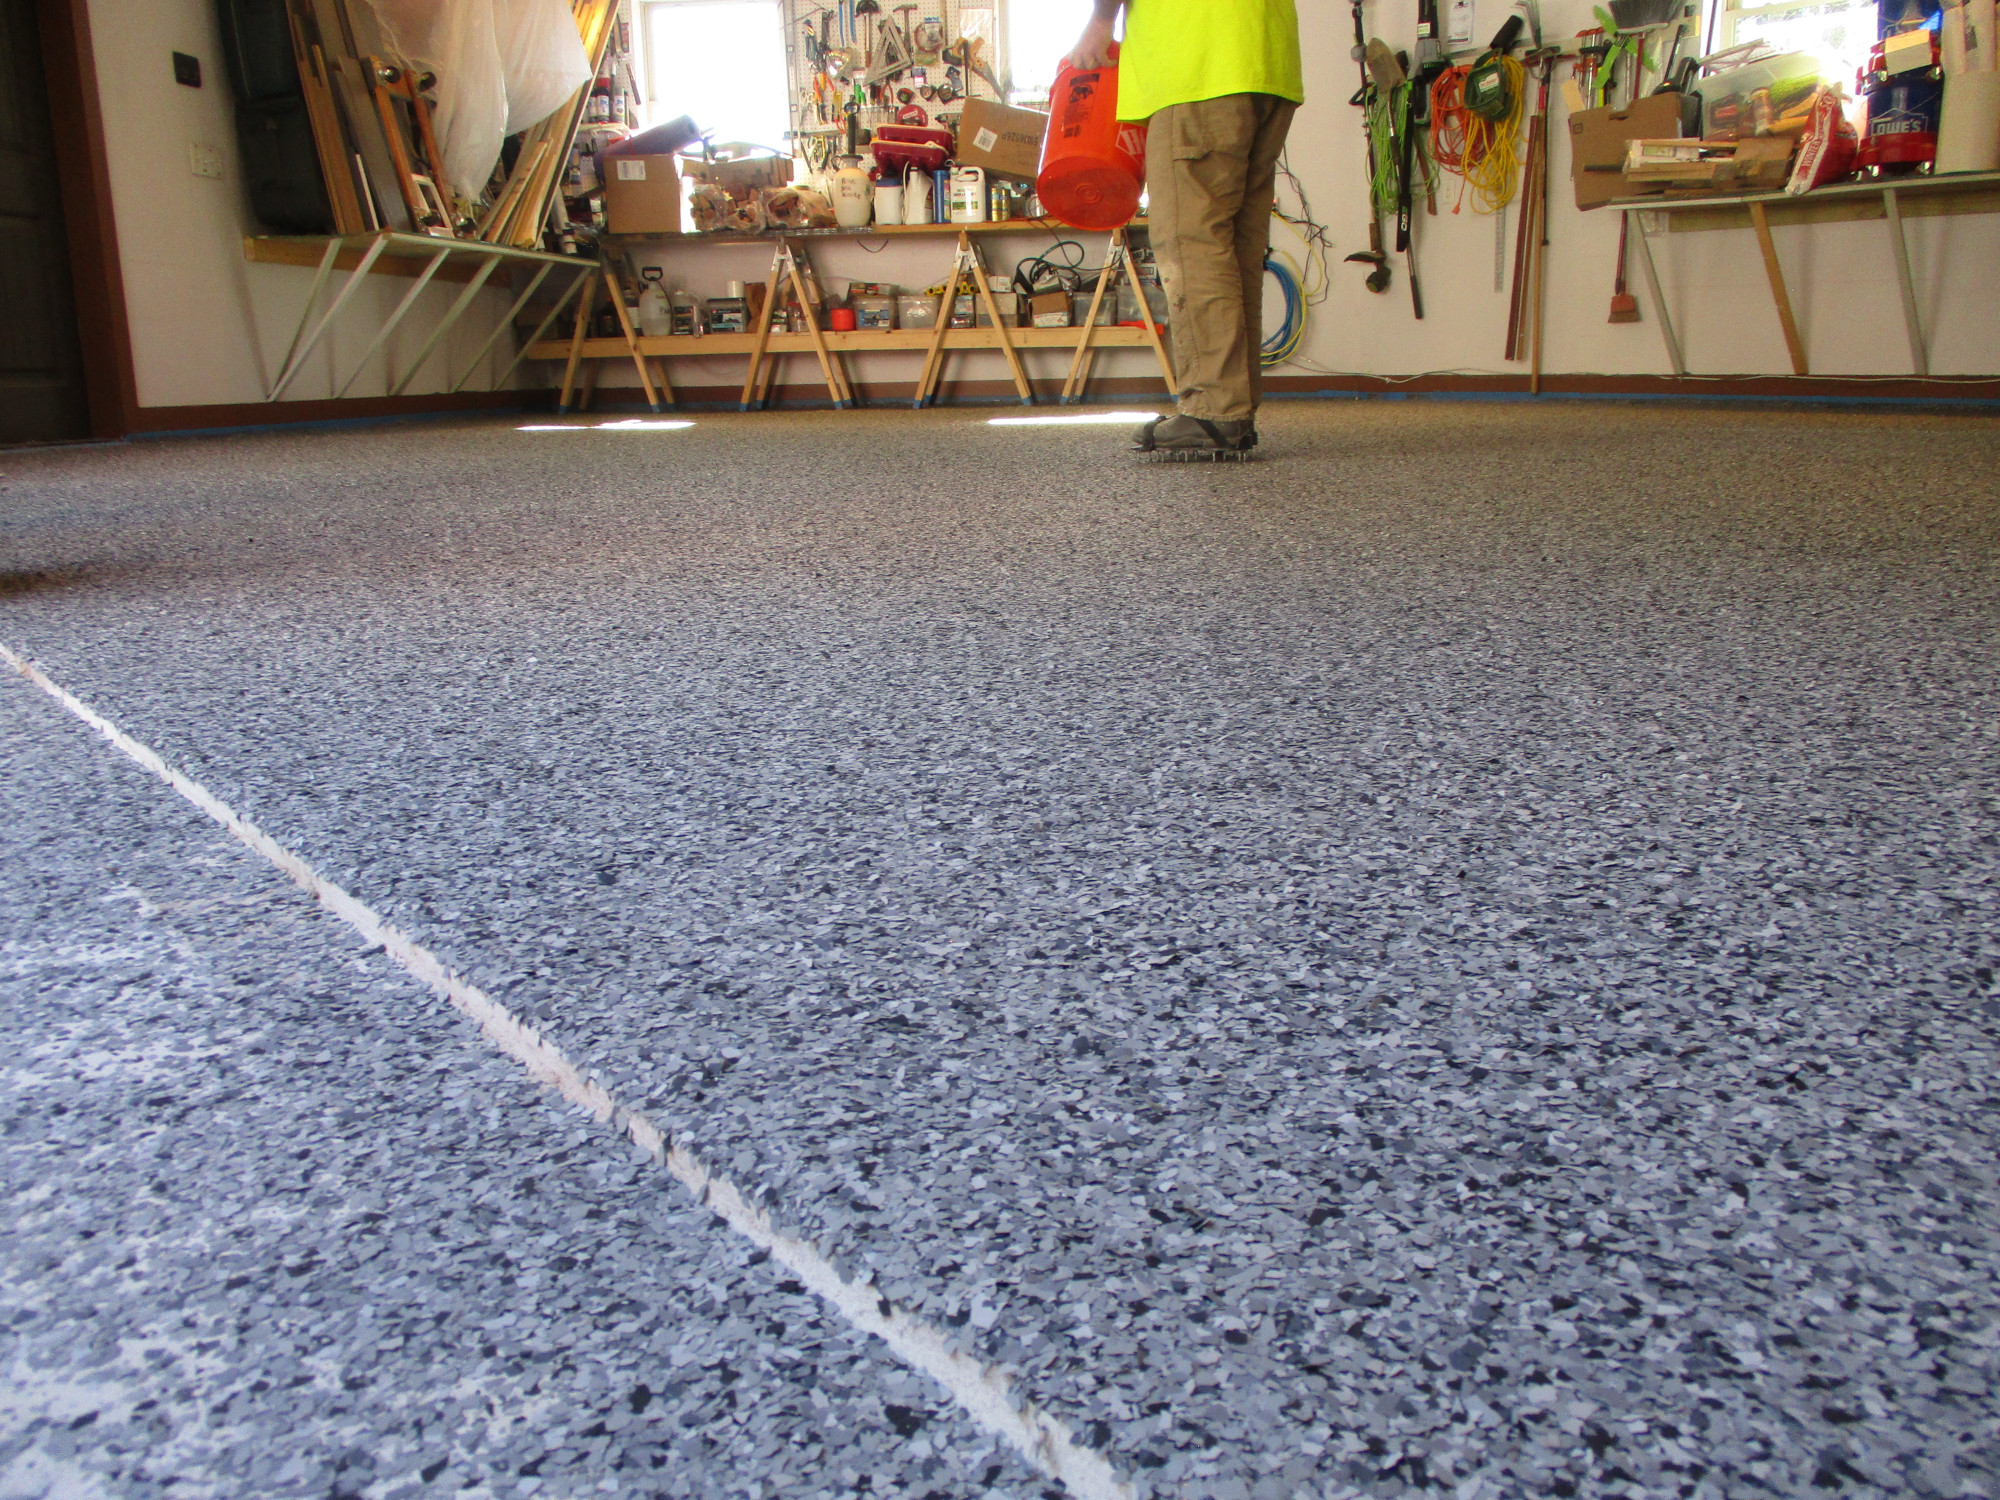
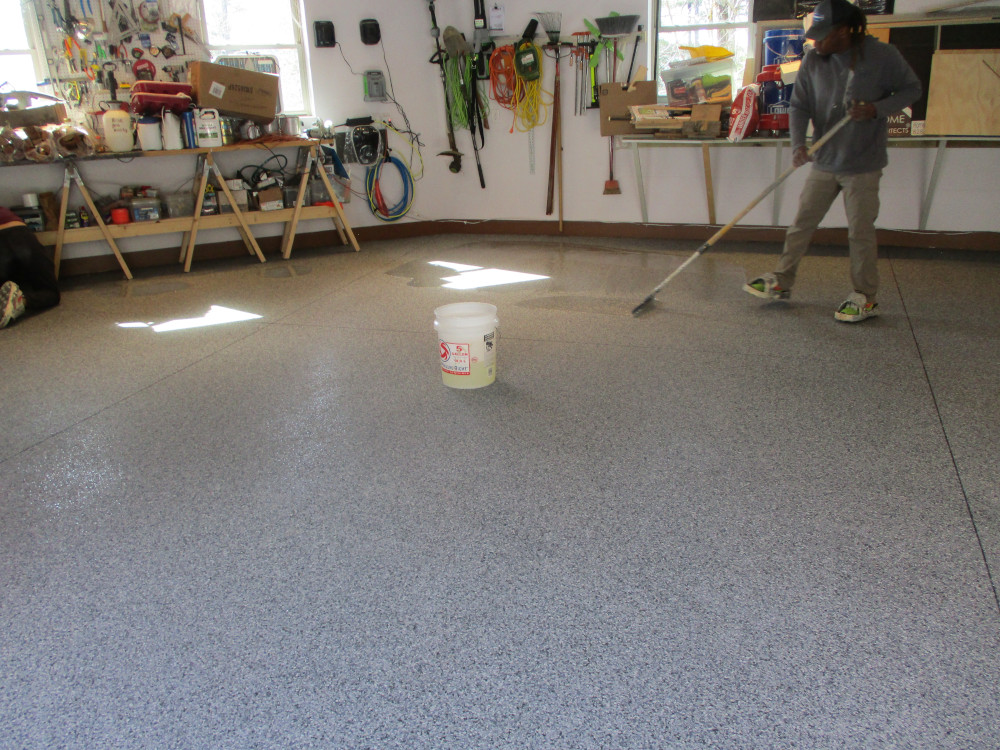
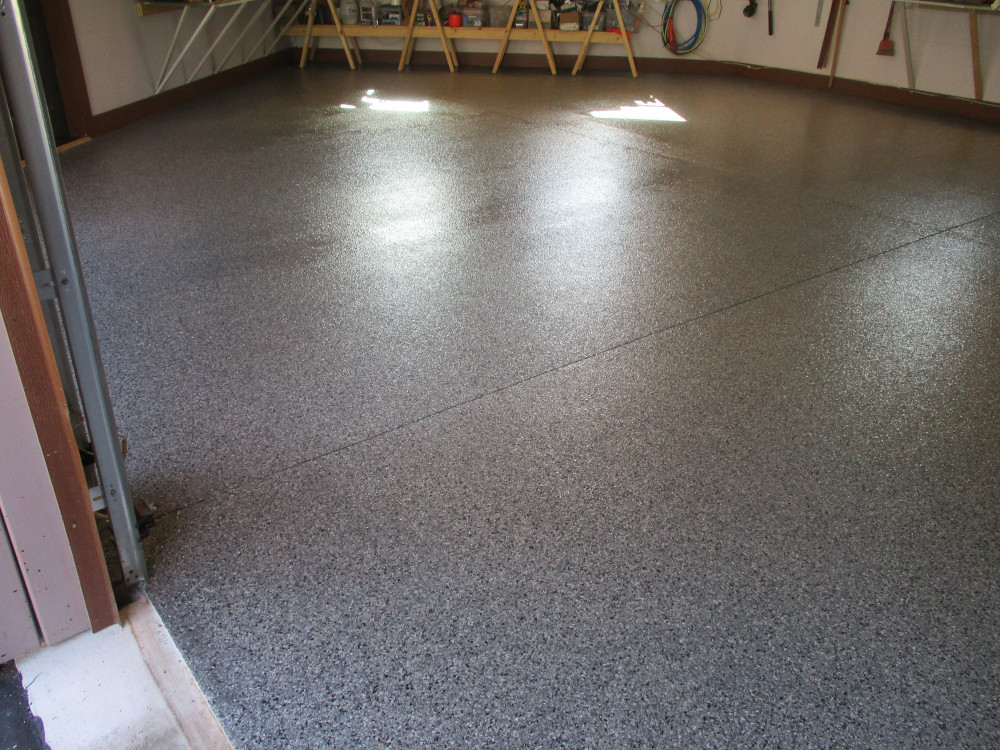
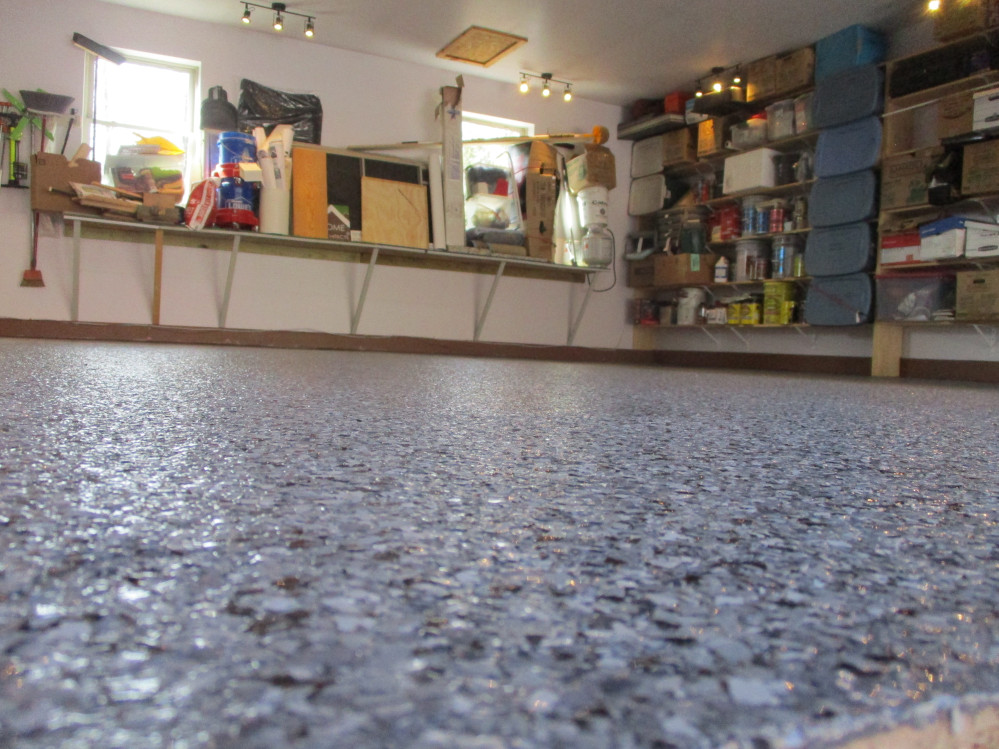
Above photo shows the final finished product. It sort of looks like a high-end terrazzo floor. The final Polyaspartic clear coat is glossy, which makes it easy to clean (and when slightly sloping as above, hopefully mainly self-cleaning) but the surface is slightly bumpy, which means that it is less likely that you will slip and fall on it, unlike epoxy, which is typically very slippery when wet.
And yes, most people think of EPOXY when they imagine finishing their garage floors. However, epoxy garage floor coatings are not only typically dangerously slippery when wet, but also do not last forever. POLYASPARTIC resin coating has a lifetime warranty through SURFACE BELLA, the Greenville, SC specialty company that provided this installation.
To answer questions that you may have, please read below to see the entire process of preparing and coating a garage floor to have the above outstanding beautiful result:
1. EXISTING GARAGE FLOOR
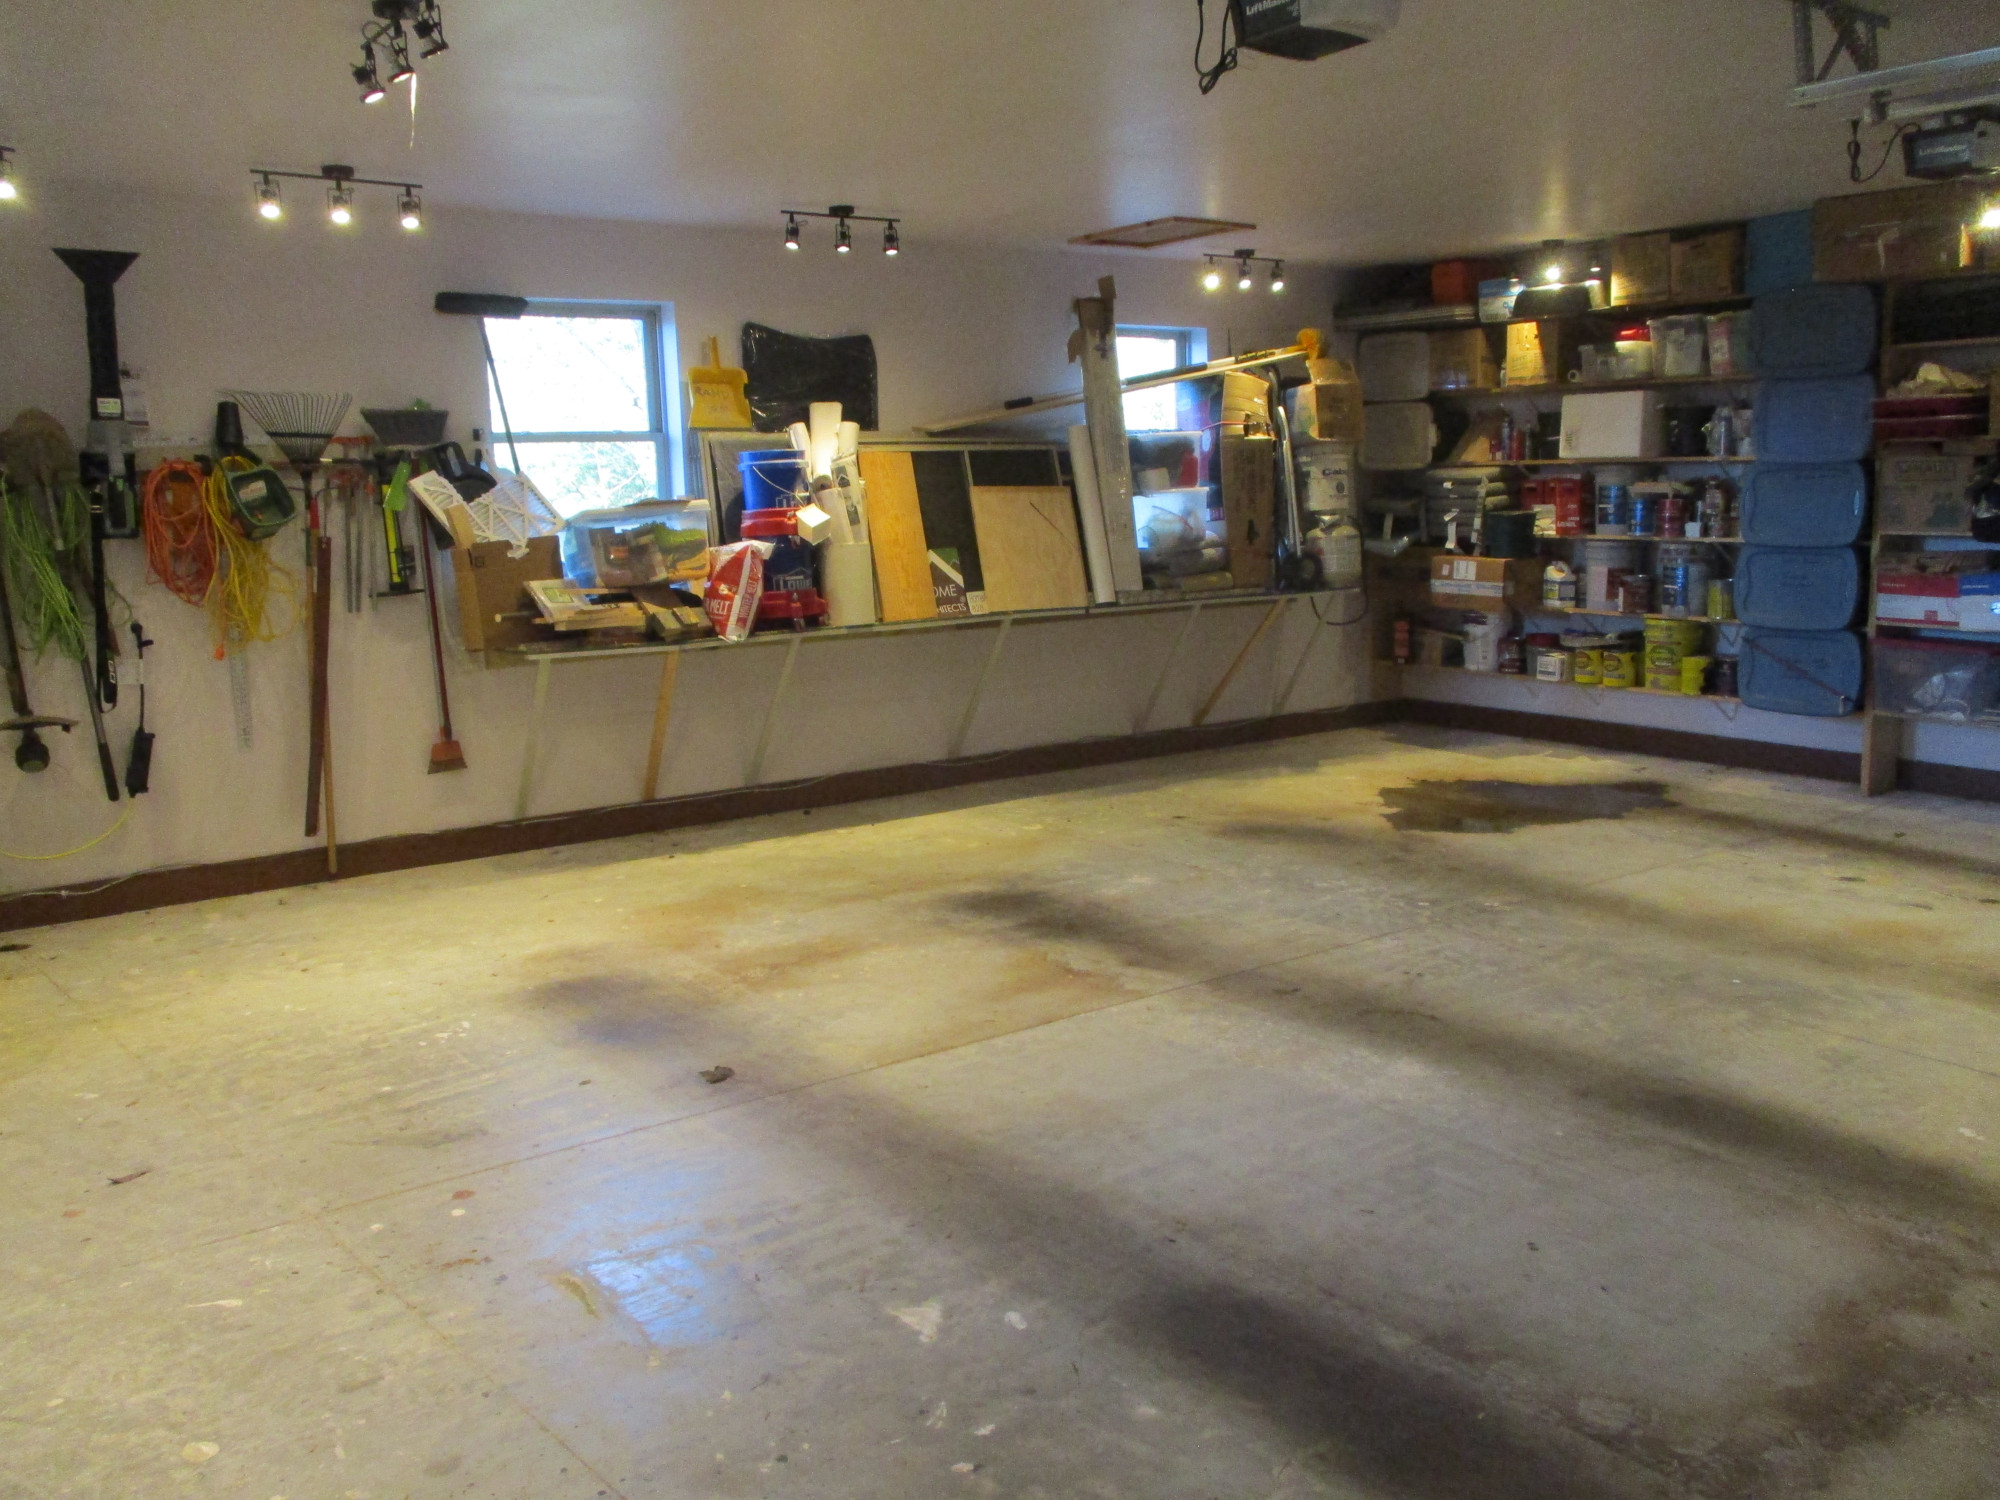
The Architect’s home is 4 years old. He has always wanted to have a quality floor finish applied to his garage, because with just raw concrete, not only does it stain and look unsightly, it also collects and holds onto dust and dirt, which means when the Architect and his family walk across it and then into the connected house, the dust and dirt transfers to the bottom of their shoes, and gets tracked into the house. That’s not nice and adds to the housekeeping chores and makes it difficult to keep the house floors clean.
Furthermore, many small “birdbath” depressions exist in just about any cast in place concrete floor, which collect water when the vehicles stored in the garage drive in from the rain. Mold grows in those small pools which not only contribute to the dirt and debris issue, but also is not a healthy condition. In fact, you can see at least one large birdbath condition to the right rear, which always has ponded water under the Architect’s truck parking bay after the vehicle is parked there when it is raining outside.
To solve ponding like this, a fluid coating needs to be floated over these birdbaths, filling them with non-water 100% solids coatings, filling them up to the main surface of the concrete. Watch for this corrective treatment below in some of the photos. You can also see the 4 unsightly dark gray tire travel stains that are likely the result of asphalt driveway transfer to the vehicle tires, then laid down onto the garage concrete.
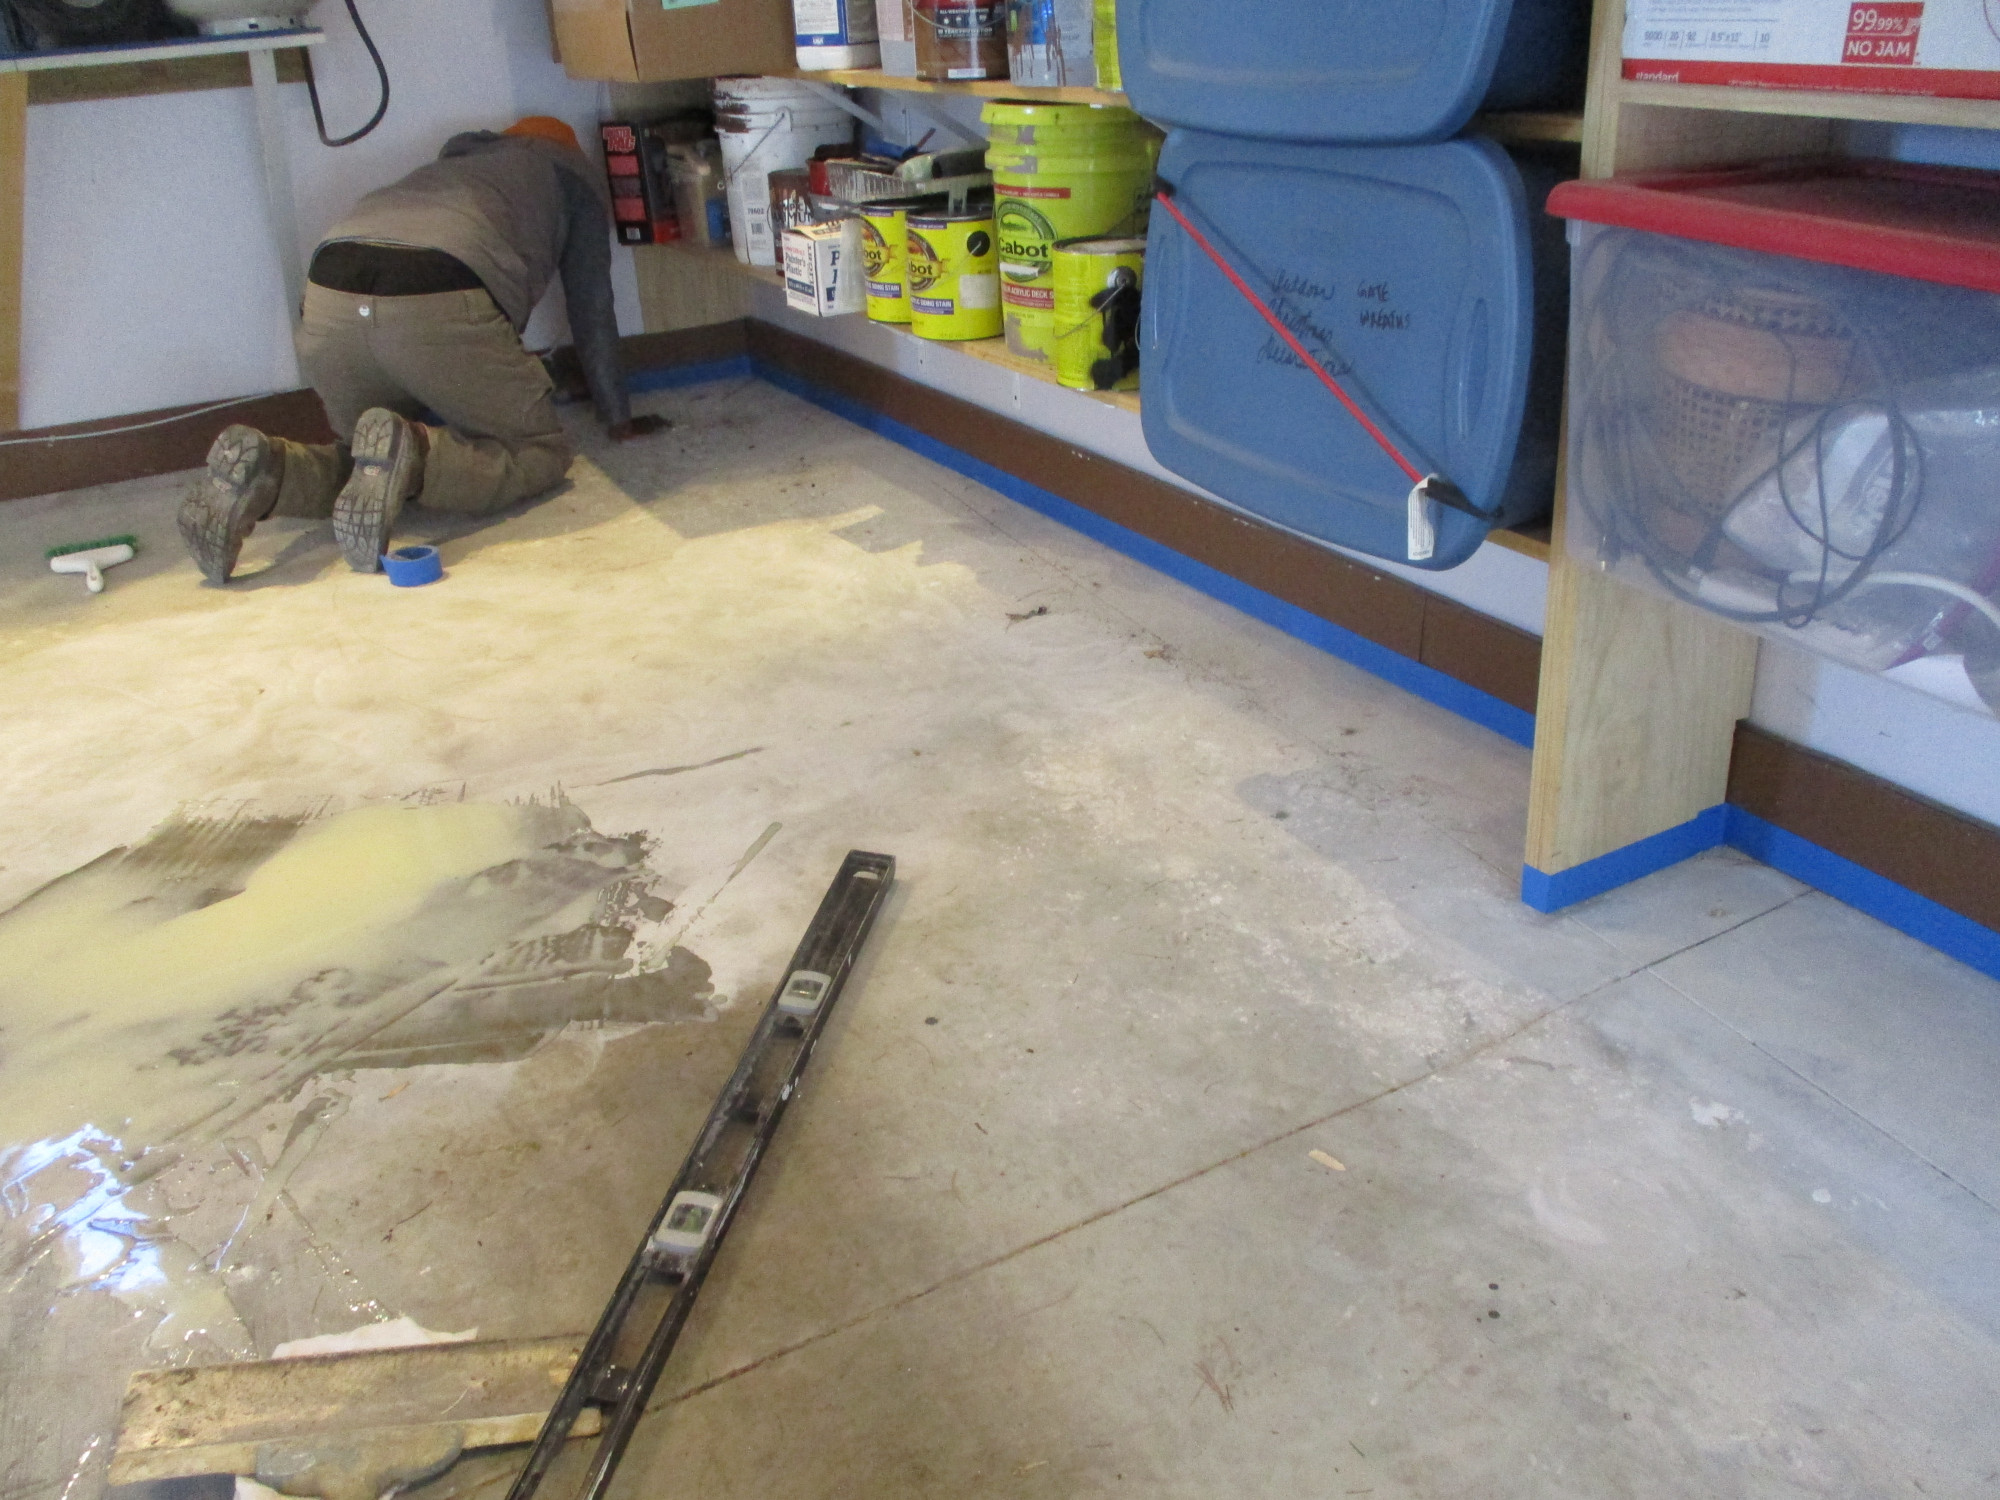
2. VACUUM STANDING WATER

The first corrective step in the process is to remove the standing water in the worst low spot. This industrial vacuum accomplished this job. Manager of the Surface Bella Floor Coating division also examined the depth of this birdbath.
3. GRIND BIRDBATH AREA AND FILL WITH NON-H20 QUICK CURING RESIN
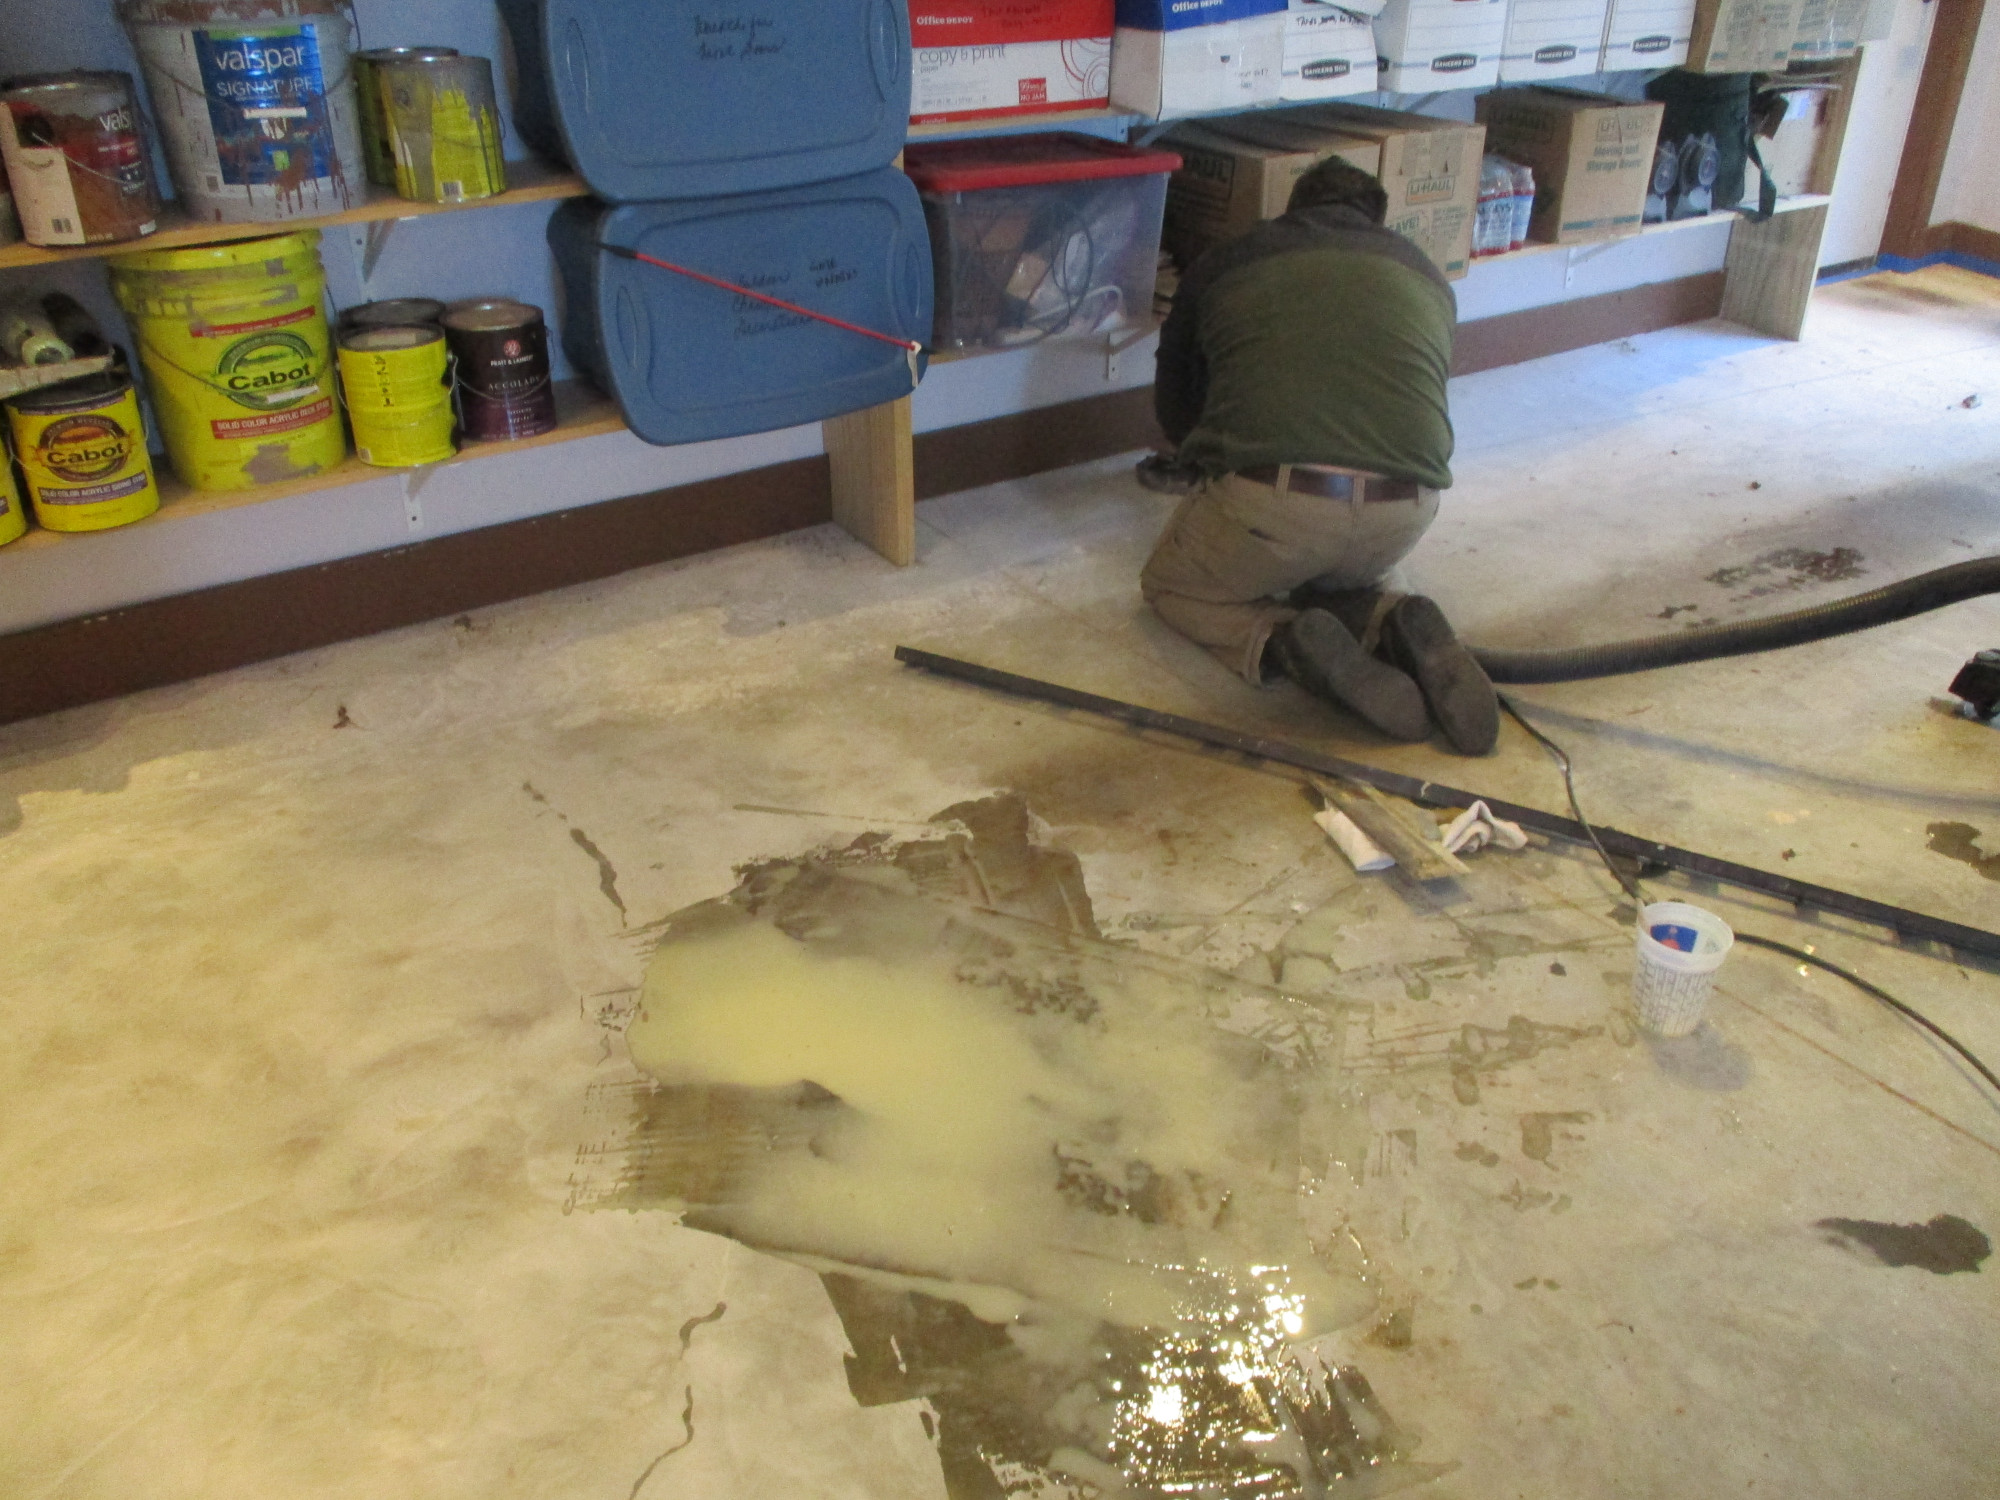
After diamond grit grinding of the concrete, the birdbath depression is filled with non-water 100% solids quick drying resin. It is critical that no water is mixed with any of the floor coatings, as when water dries from a substance, it leaves pores and pores allow future water penetration. Surface Bella only used high-end polyaspartic resins. This area is already curing, as can be seen by the yellowish milky area. Soon, it will be dry to the touch. The installer said this can help, but not necessarily 100% fix an existing area in an existing slab with a low defect.
4. GRIND CONCRETE SURFACE EDGE PERIMETER AND INSTALL PAINTER’S TAPE AT BASEBOARDS
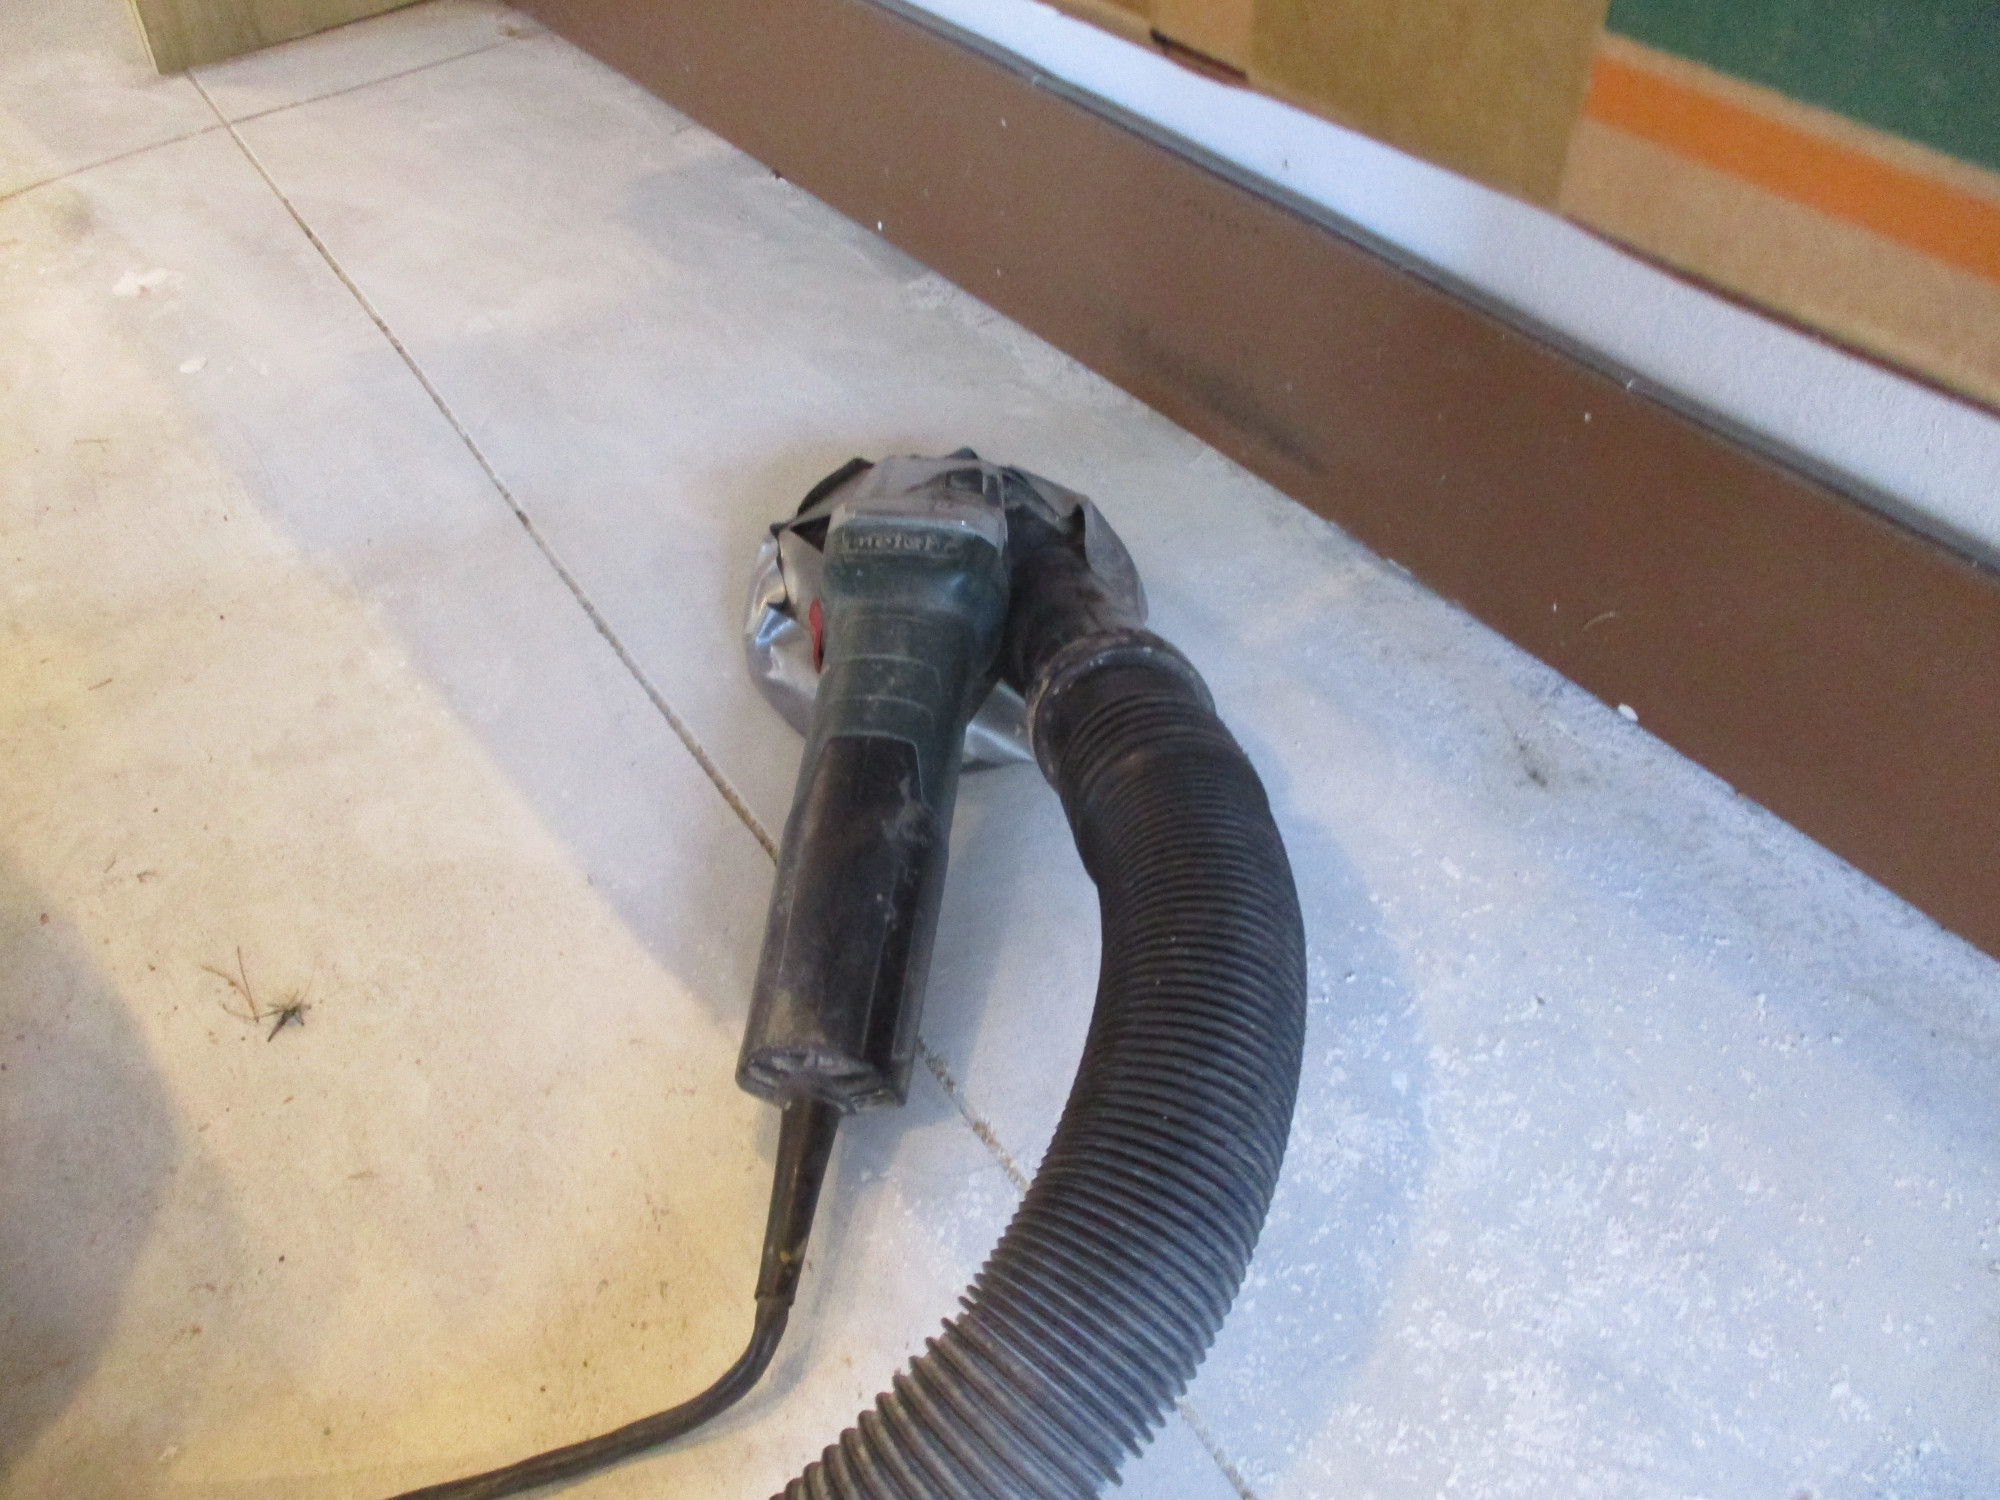
Using a hand grinder with diamond abrasive pads, the edge of the garage concrete floor is cleaned, so that the upcoming floor stain color coating permanently adheres. Also, it is hard to move the much larger industrial grinder (see photos below) close to the walls or under existing permanent shelving. And the blue painters tape protects the baseboards from the concrete stain soon to be installed. Note the vacuum hose attachment to the grinder tool, resulting in very little concrete dust in the garage.
5. LARGE HEAVY INDUSTRIAL DIAMOND GRINDER CLEANS AND STRAIGHTENS CONCRETE FLOOR
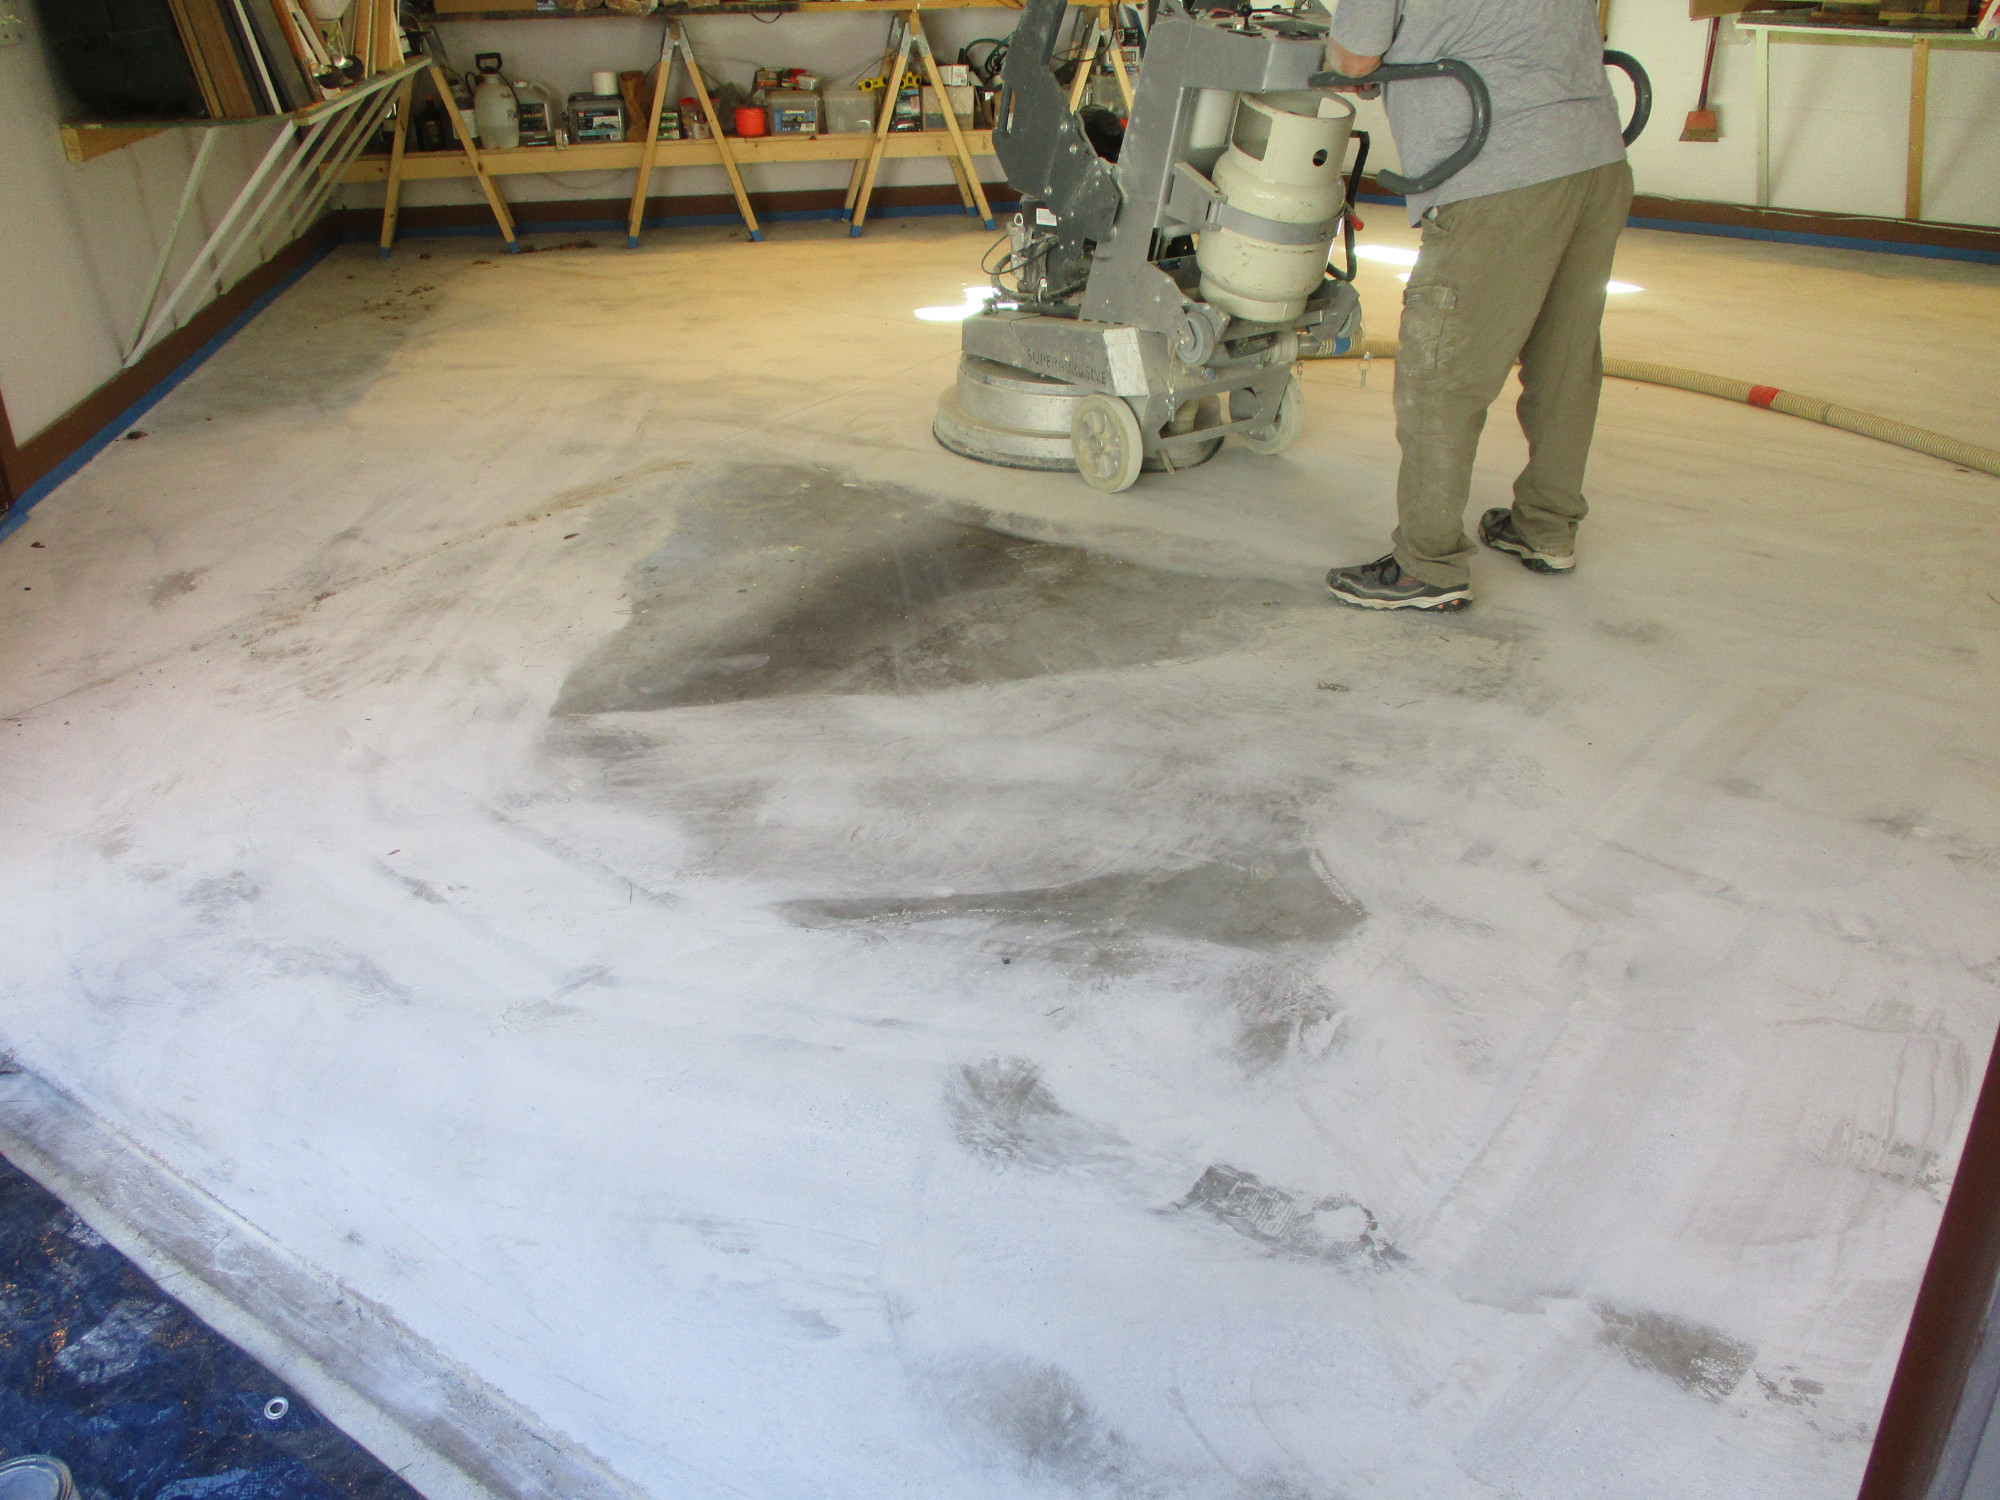
Here you can see the 850 pound monster grinding machine that removes most of the concrete slab’s imperfections. The cleaned concrete surface will allow the upcoming resin concrete colored stain to adhere permanently. No chemicals involved with the cleaning process. Just brute strength and expensive machinery to yield a superior result. And all the minor birdbaths are scraped smooth.
Below is the industrial large vacuum collecting about 80 pounds of ground concrete dust. This approach and investment in quality machines keeps the garage area relatively clean.
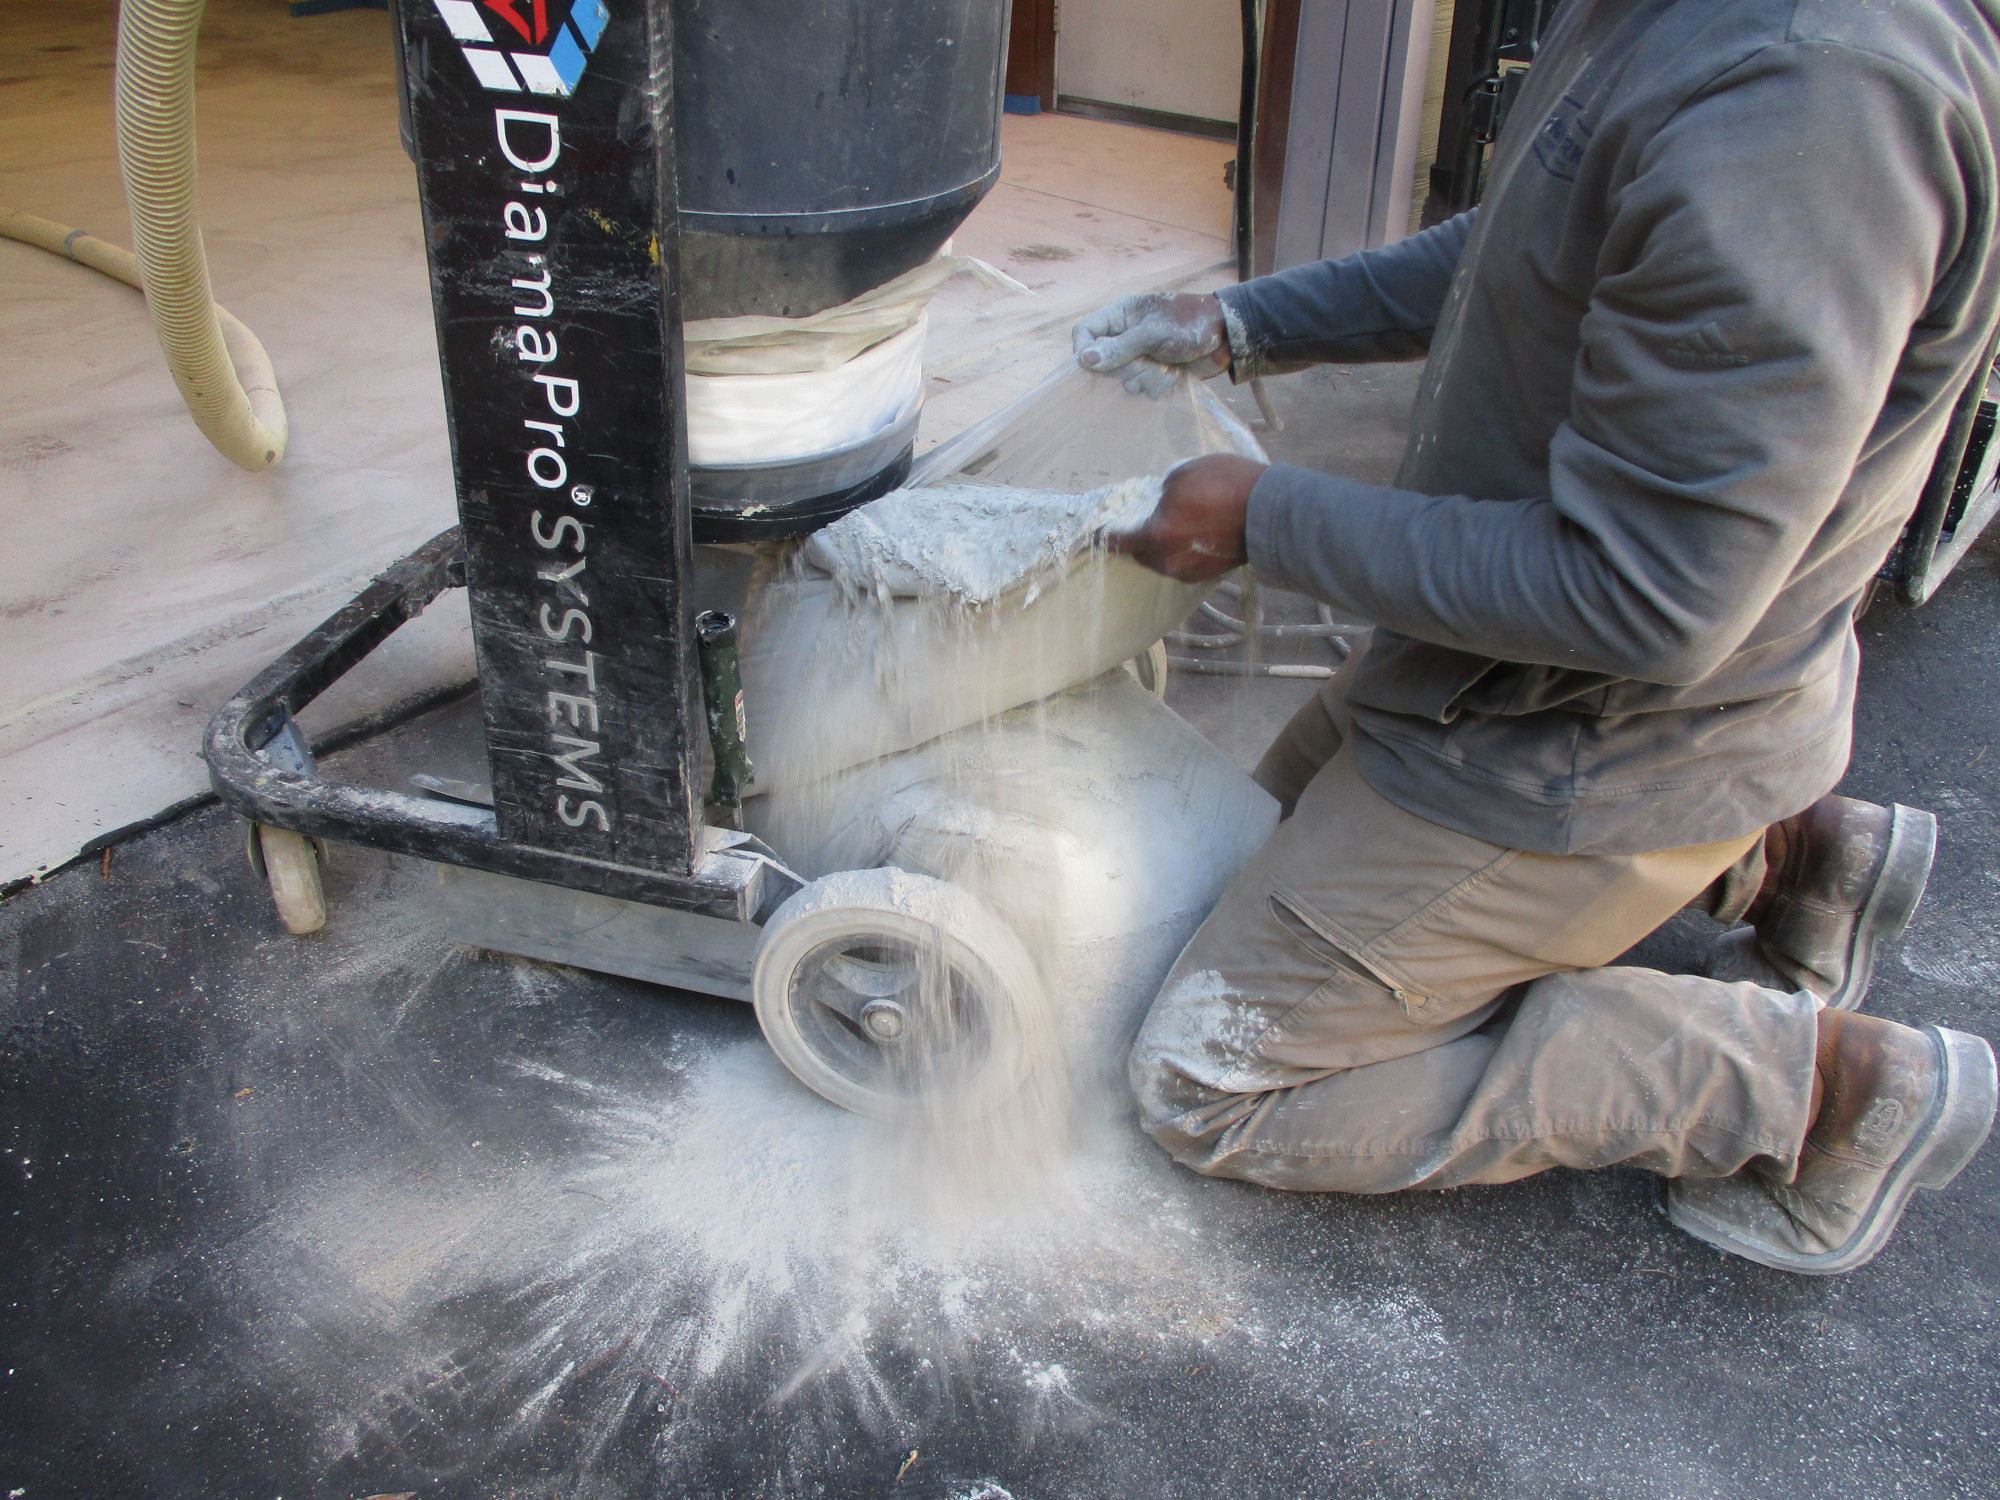
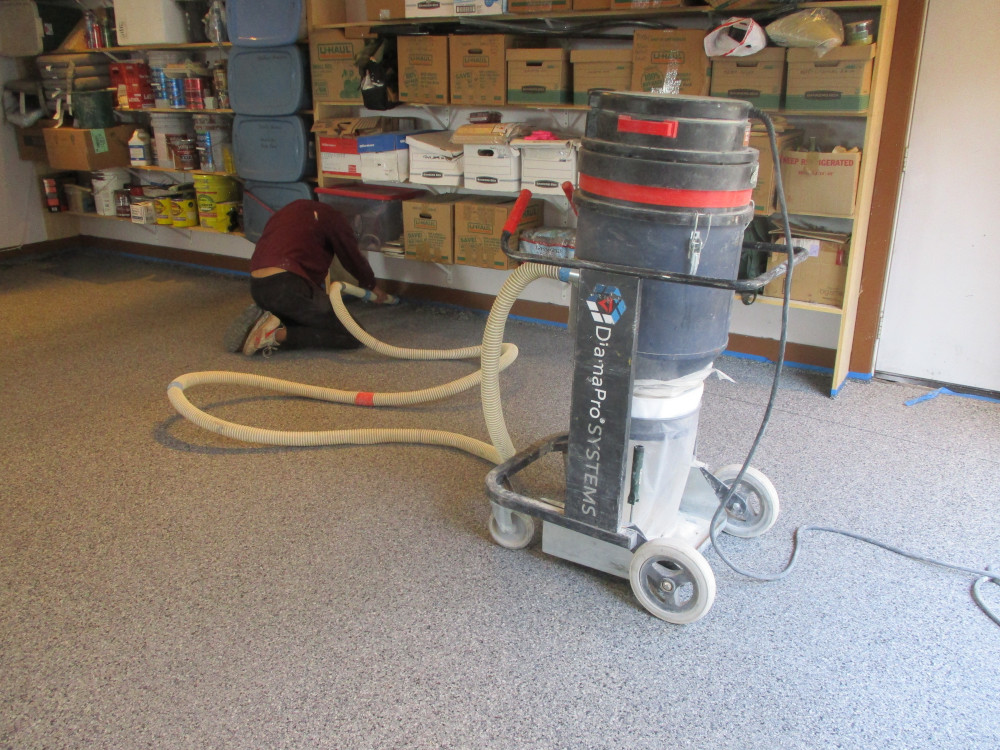
6. VACUUMING OF THE GROUND CONCRETE FLOOR
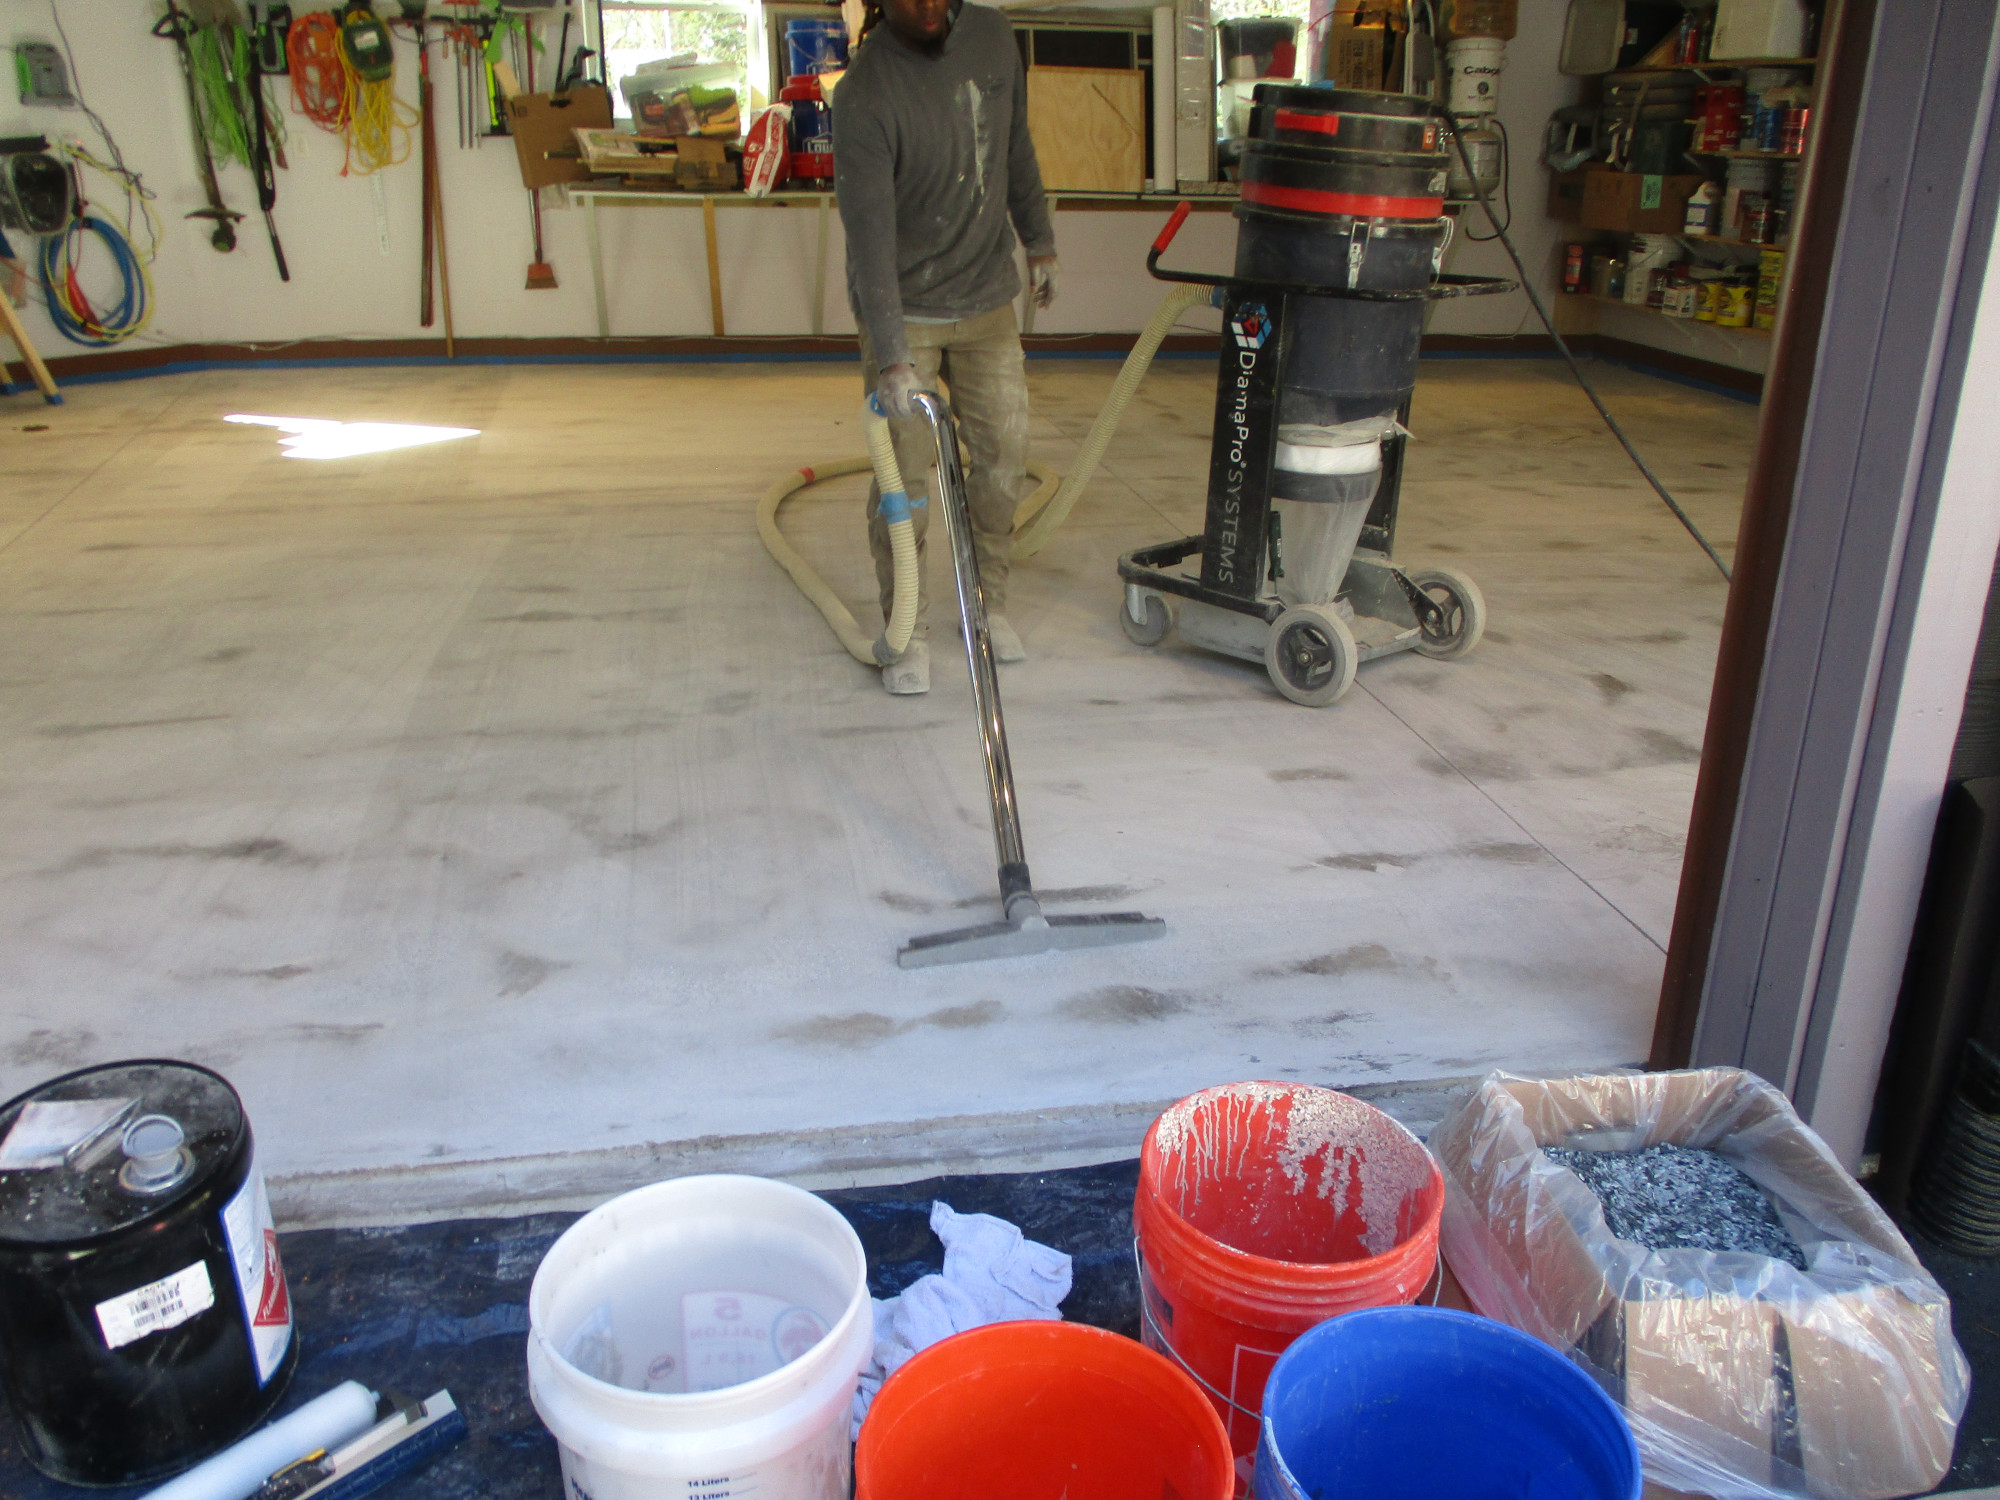
Next, the concrete floor is vacuumed to remove any remaining concrete dust from the diamond grinding process, so that the upcoming concrete liquid stain adheres to the cleaned concrete.
7. PAINTING OF POLYASPARTIC CONCRETE STAIN ON THE CLEANED CONCRETE
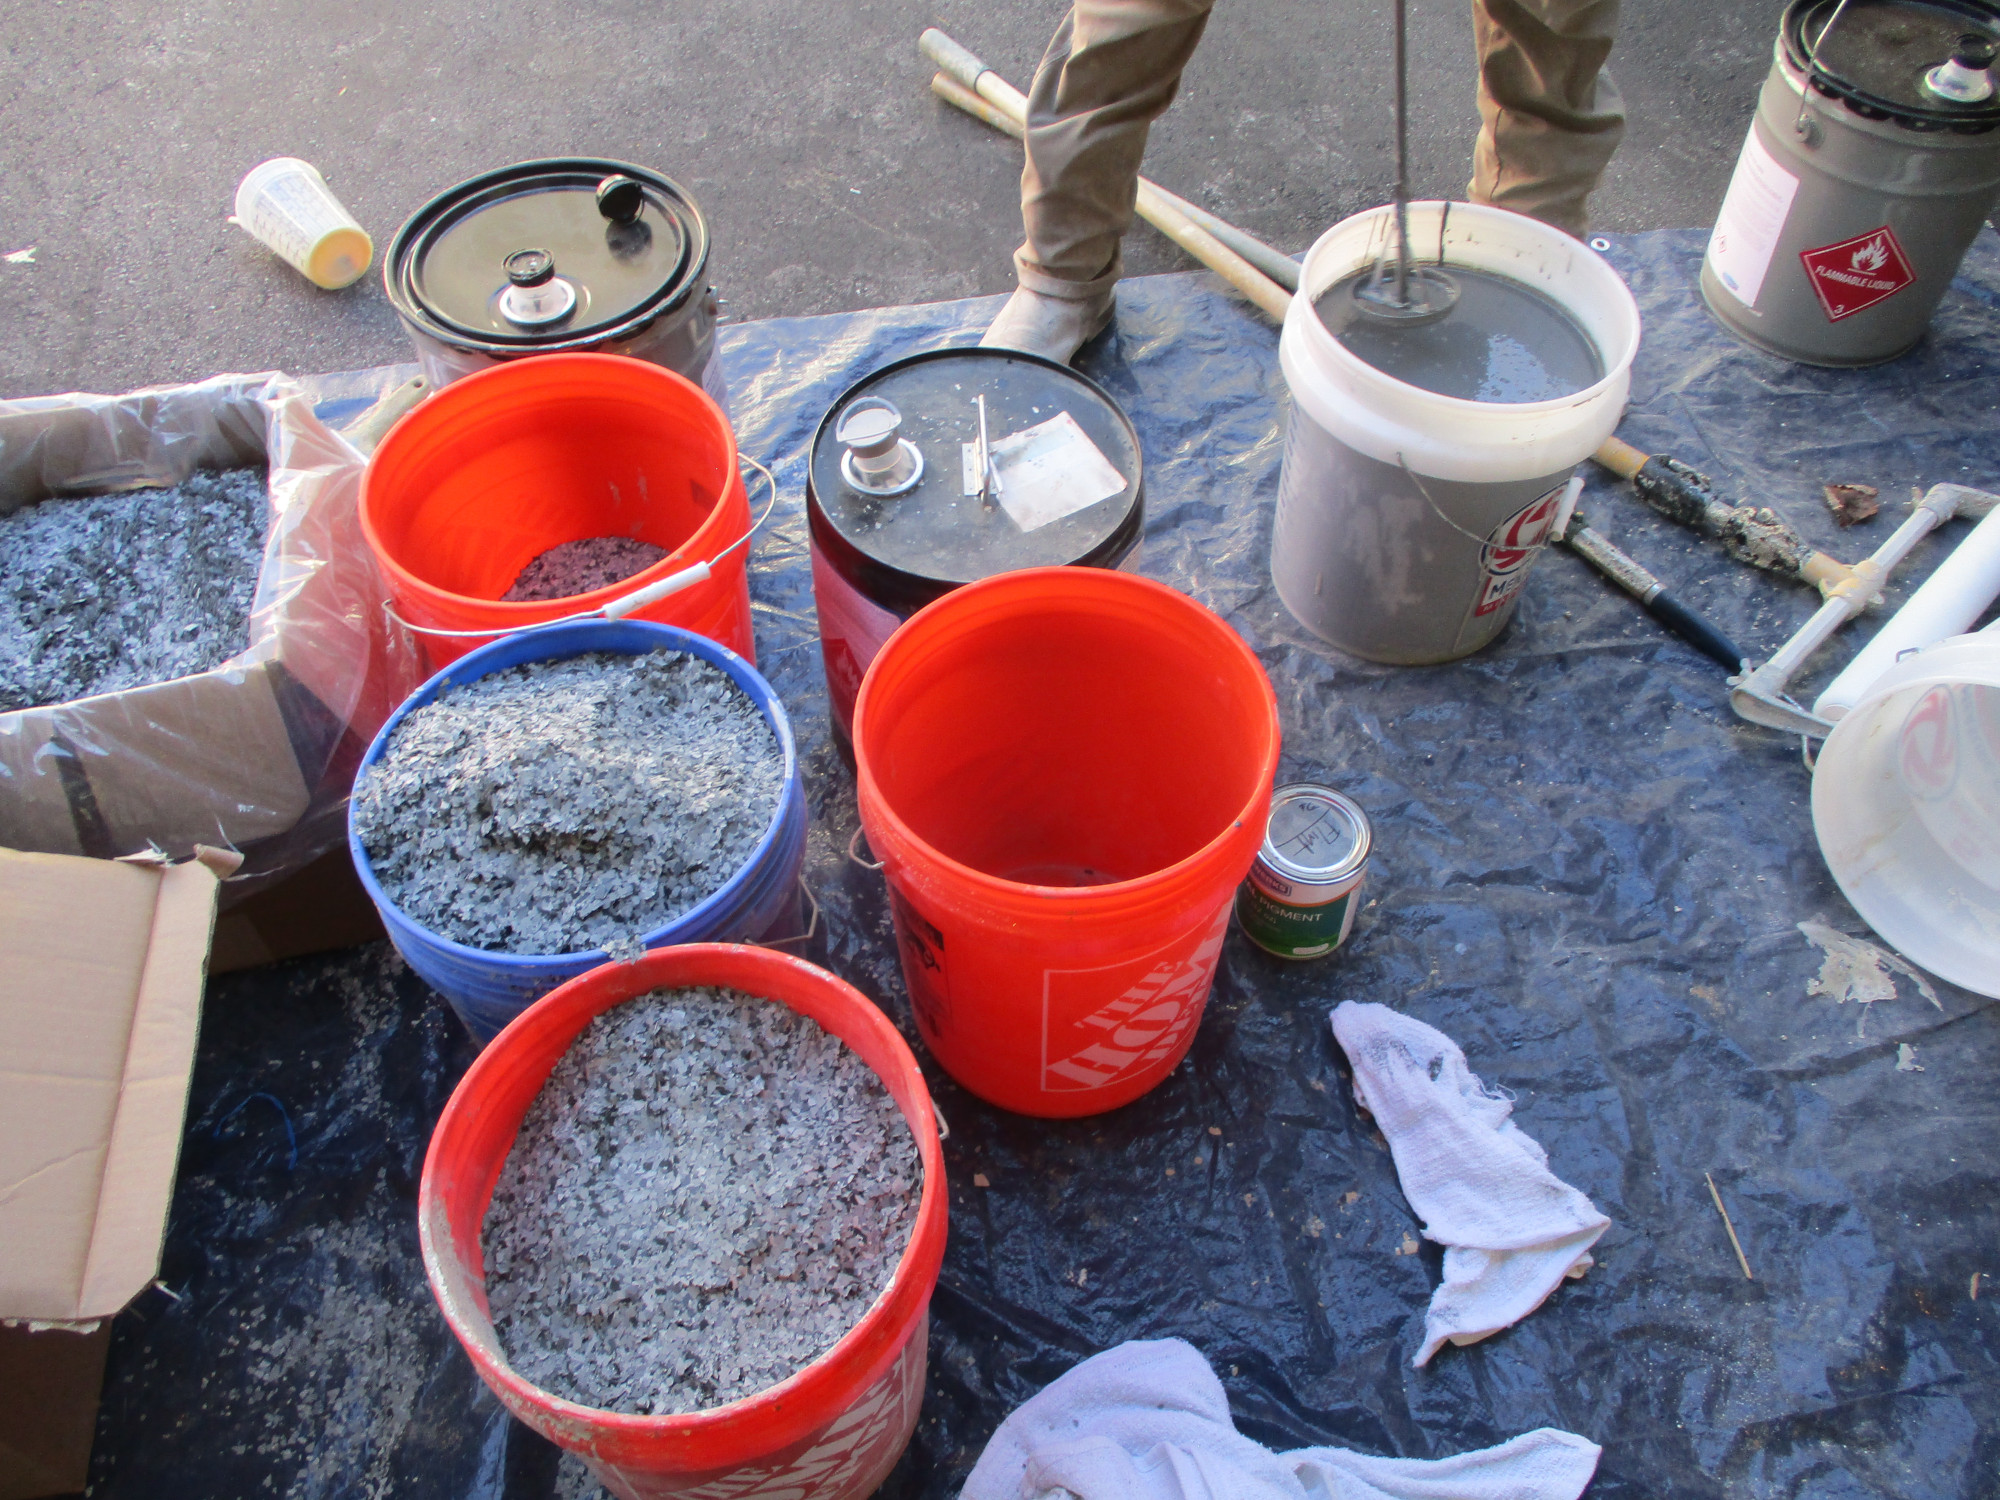
Just outside the garage, workers laid down a tarp to protect the Owner’s driveway. On this tarp, they placed various 5 gallon buckets of chemicals that have to be mixed to result in a long-lasting concrete floor stain resin.
Above, you can see the workers carrying in 5 gallon buckets of mixed concrete stain and pouring it in pools around the garage, then first using a squeegee to distribute this flood coat, then rolling it with a large paint nap roller for final sealing.
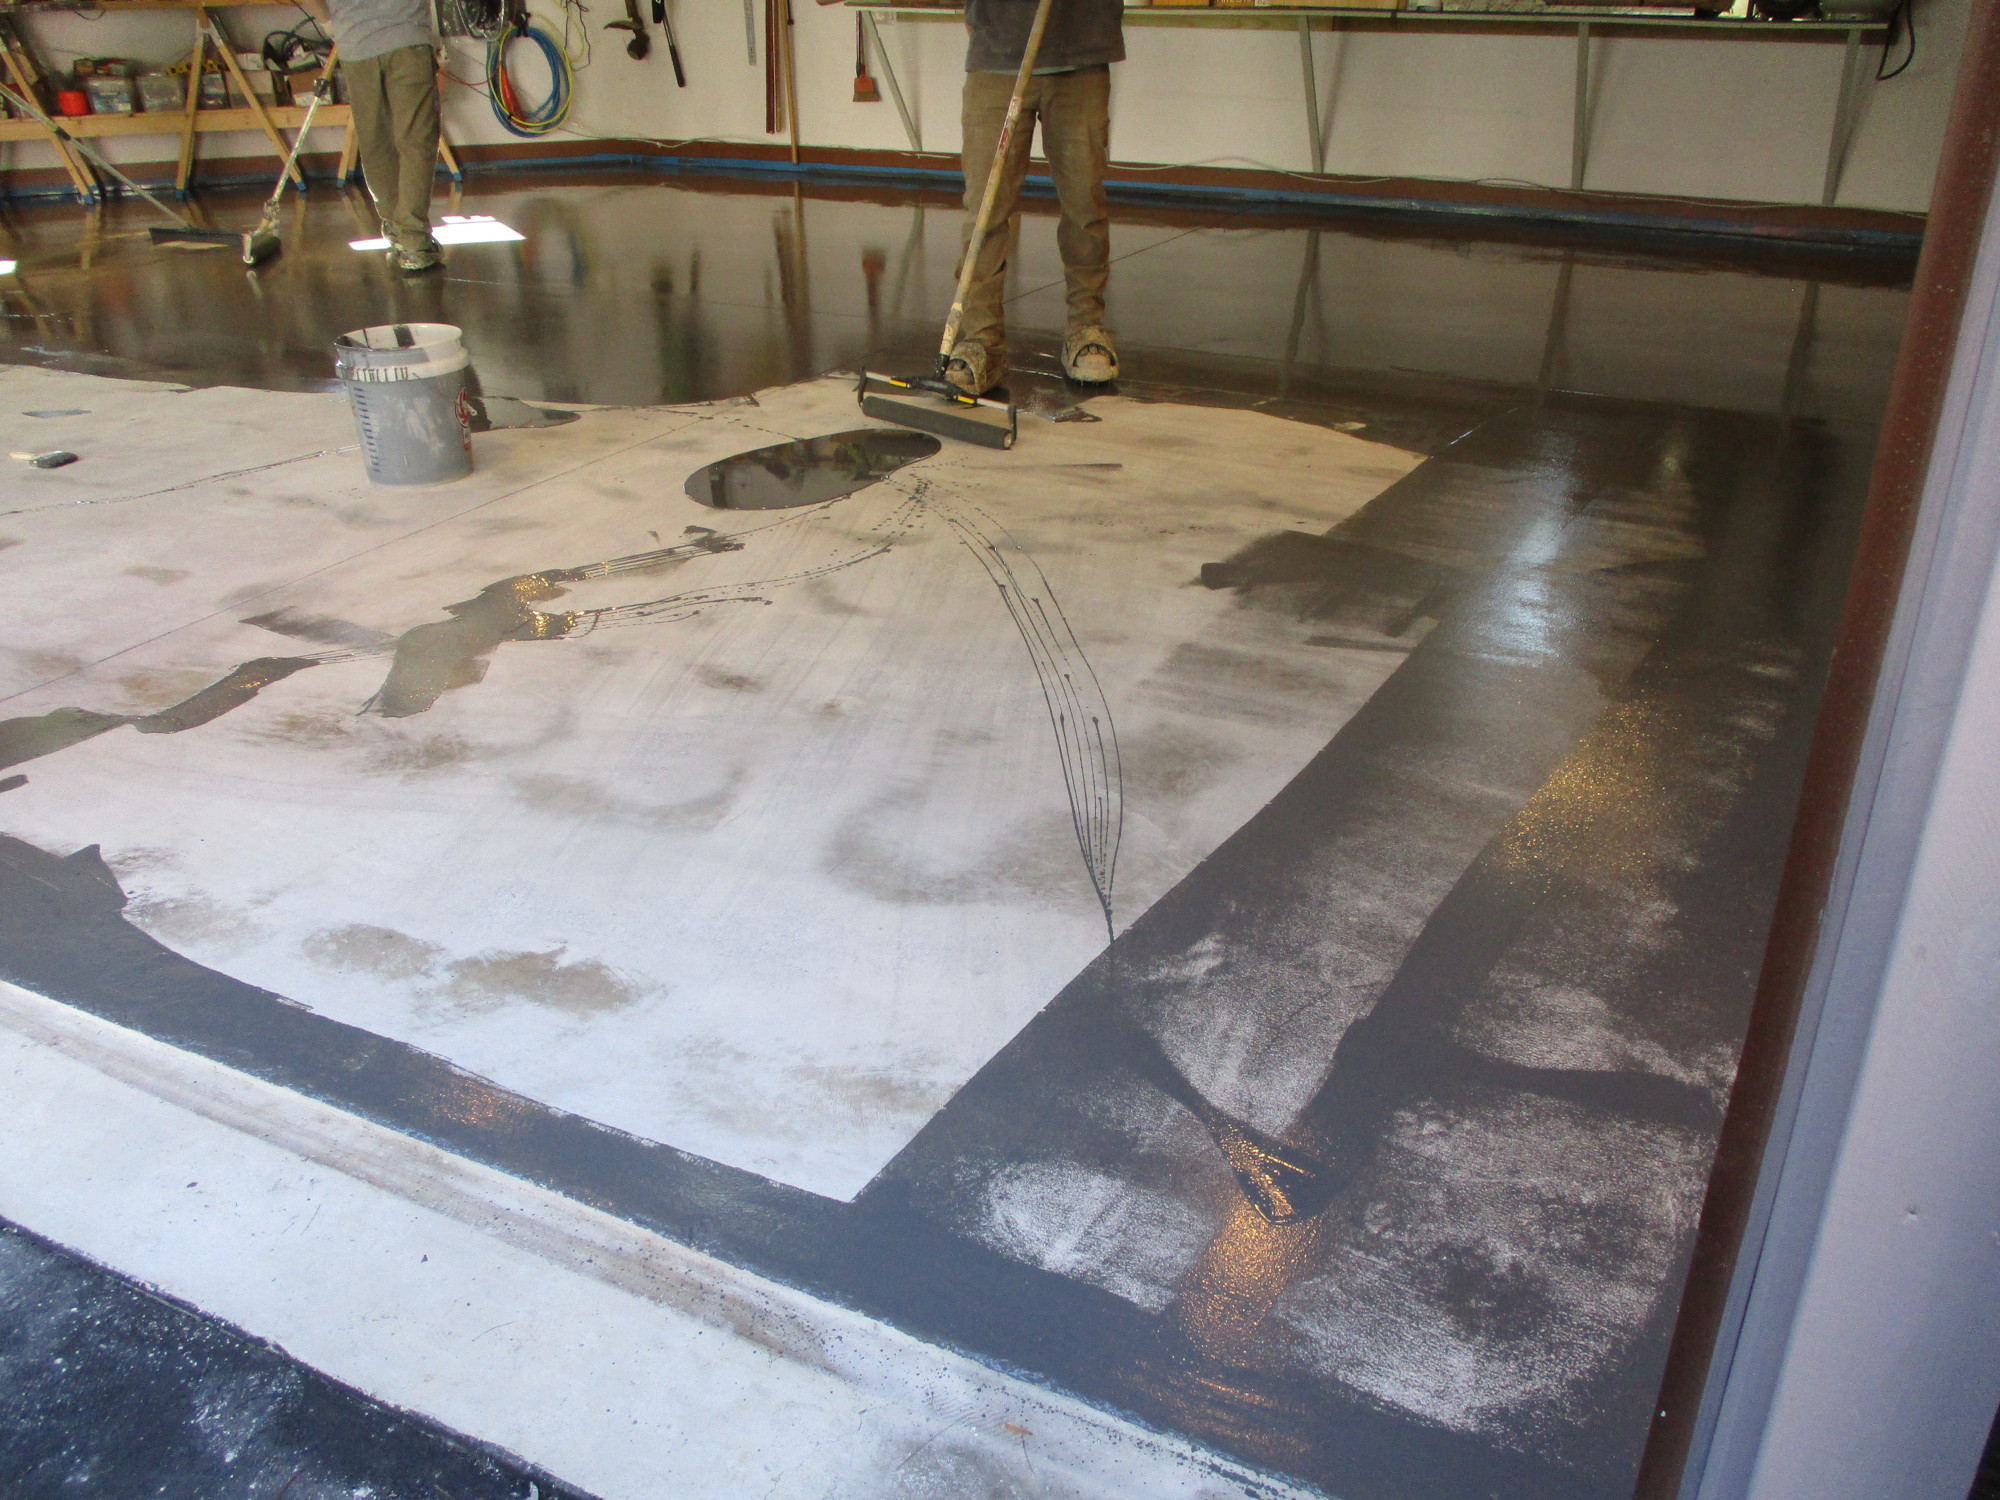
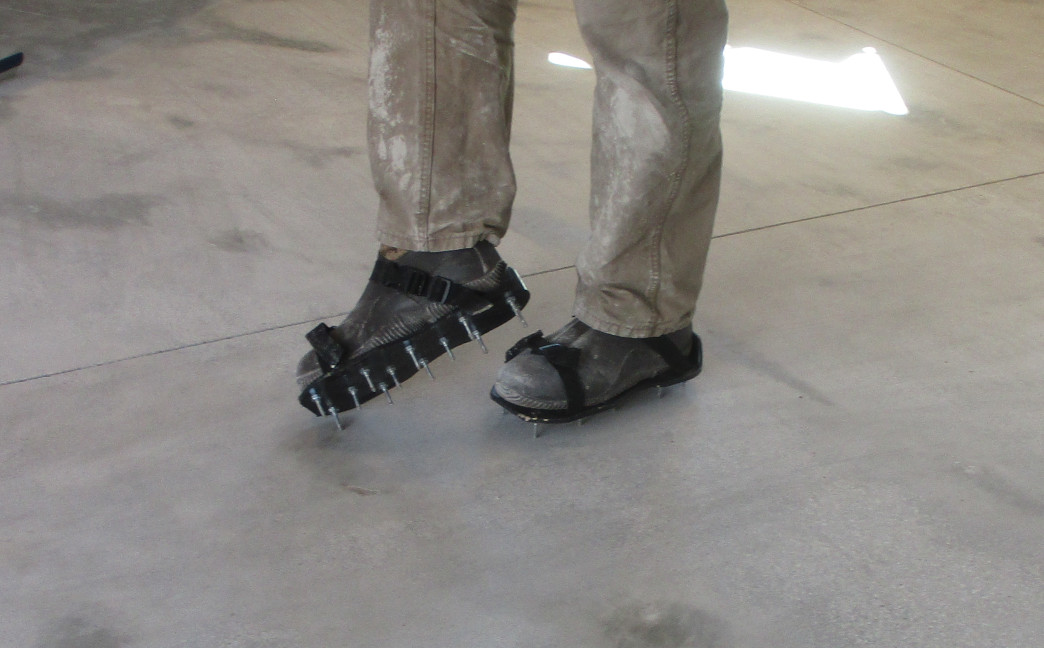
Special shoe bases to walk on resin coating (below). Sort of like industrial golf shoes.

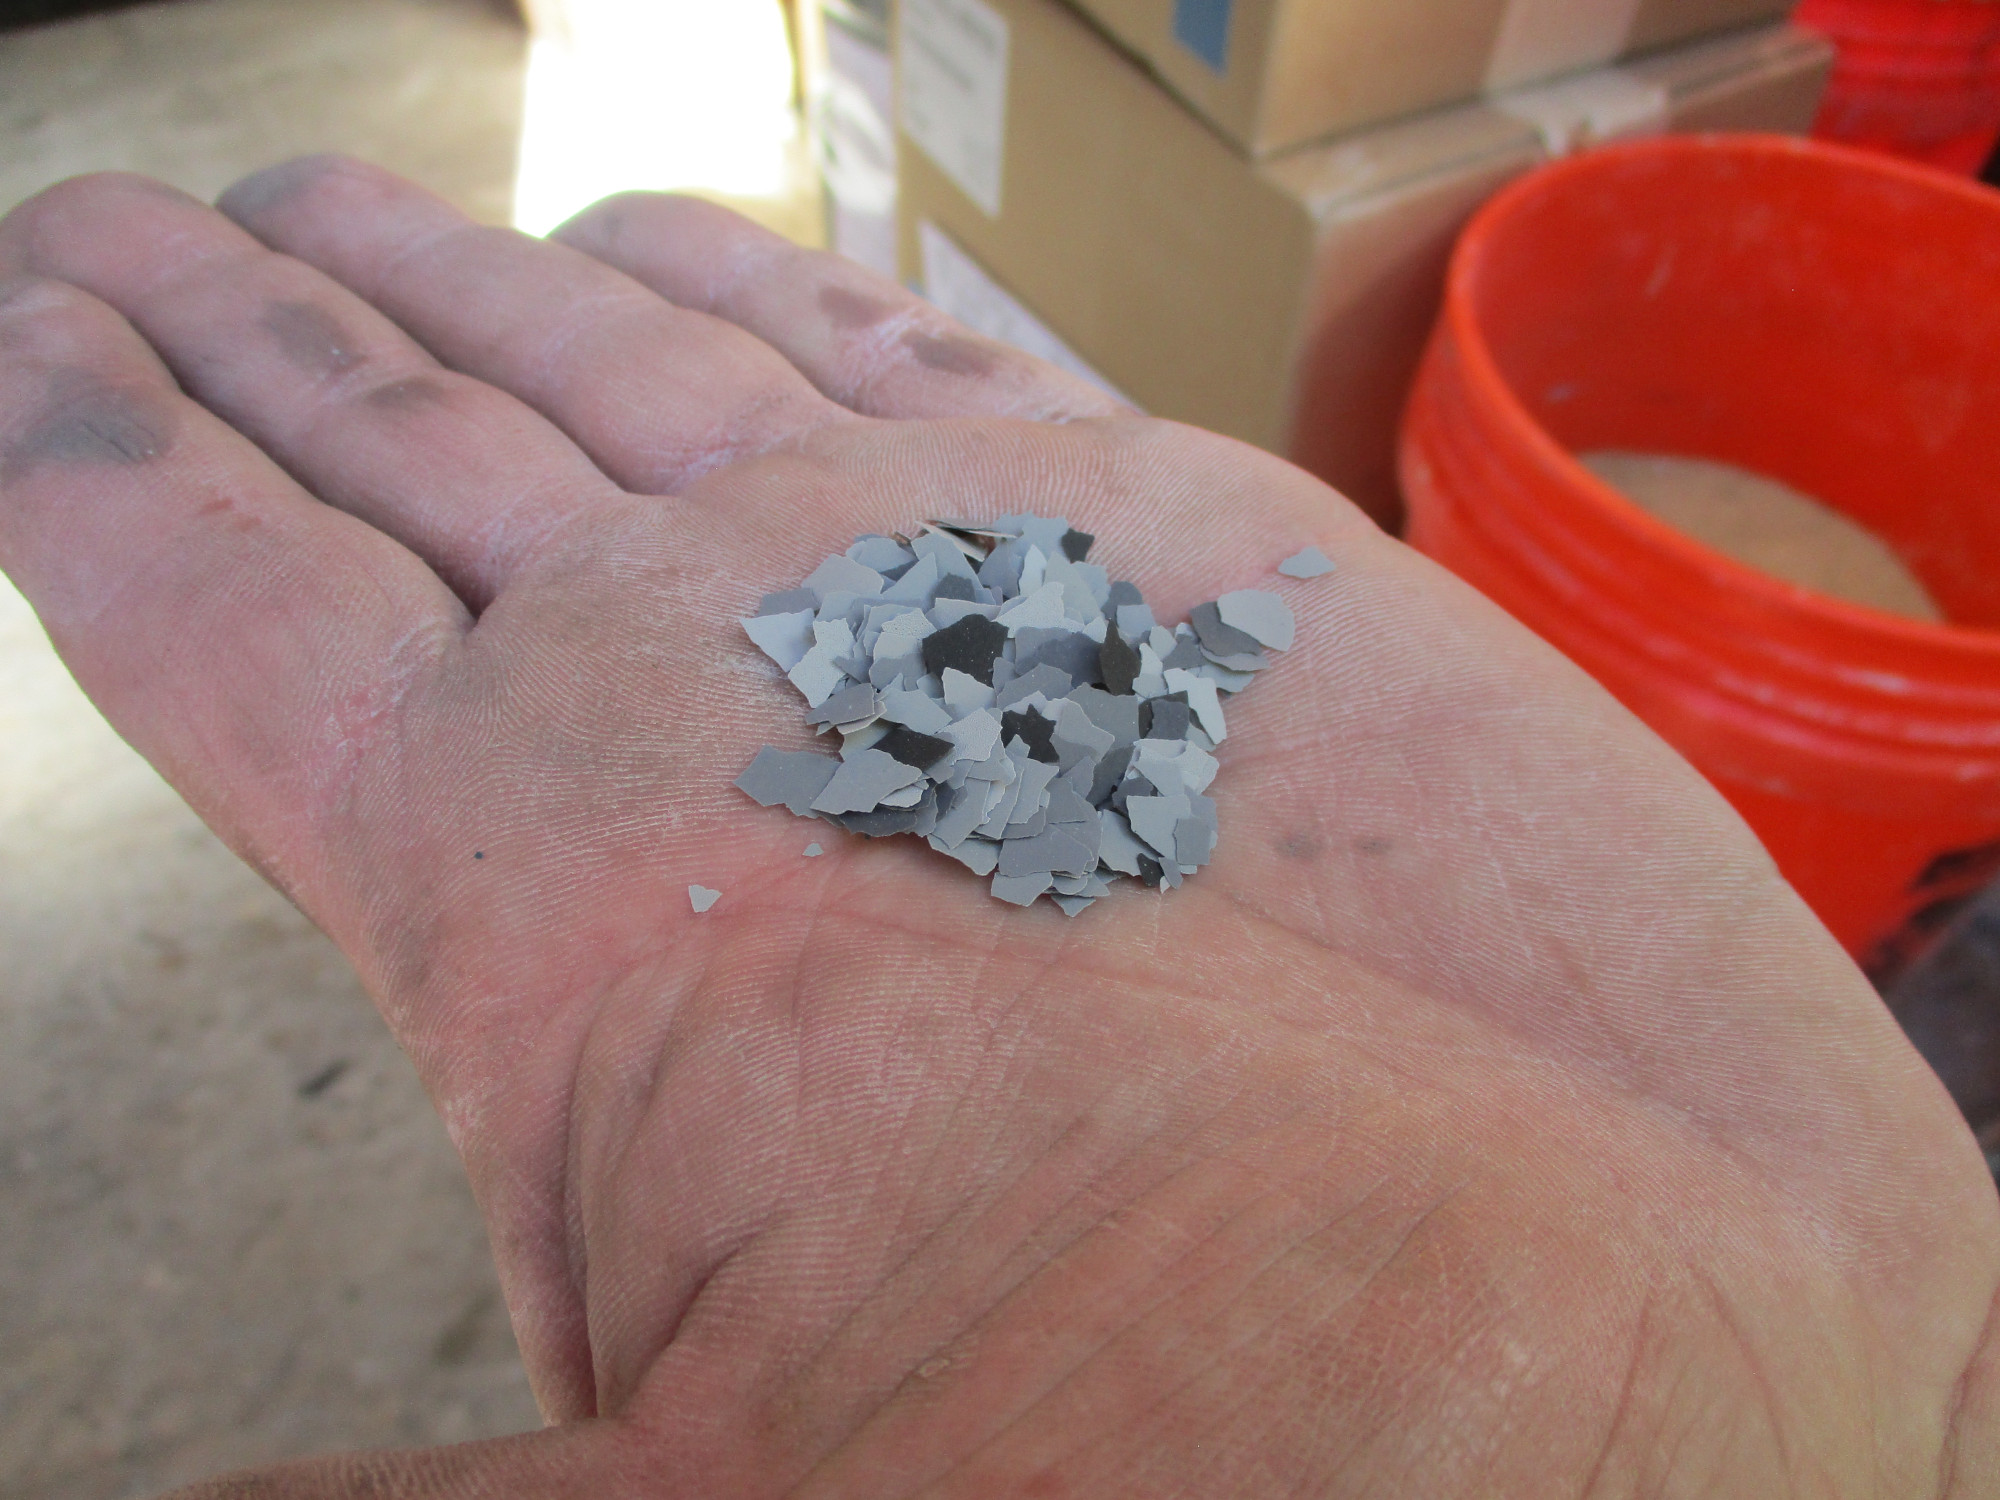
8. INSTALLATION OF 1/4″ EPOXY COLORED DECORATIVE PAINT CHIPS
 While the resin colored surface remains wet, now the workers take 5 gallon buckets filled with multi-colored epoxy flakes and grab handfuls and throw them across the wet surface. In this particular case, the Architect selected the NIGHTFALL medium-dark gray color, which uses a dark gray first resin coat, then the multi-color gray decorative flakes, to hopefully allow the dark gray stain left by the tires of this family’s vehicles to be less noticeable.
9. ALLOW FLAKE CHIPS TO DRY INTO THE CURING RESIN COLOR COAT
Although you can push the system and try to do it all in a single day, the Architect didn’t want to do that. He felt that by allowing the color coat and the color flakes to bond and cure overnight would be a better approach. The installation company agreed.
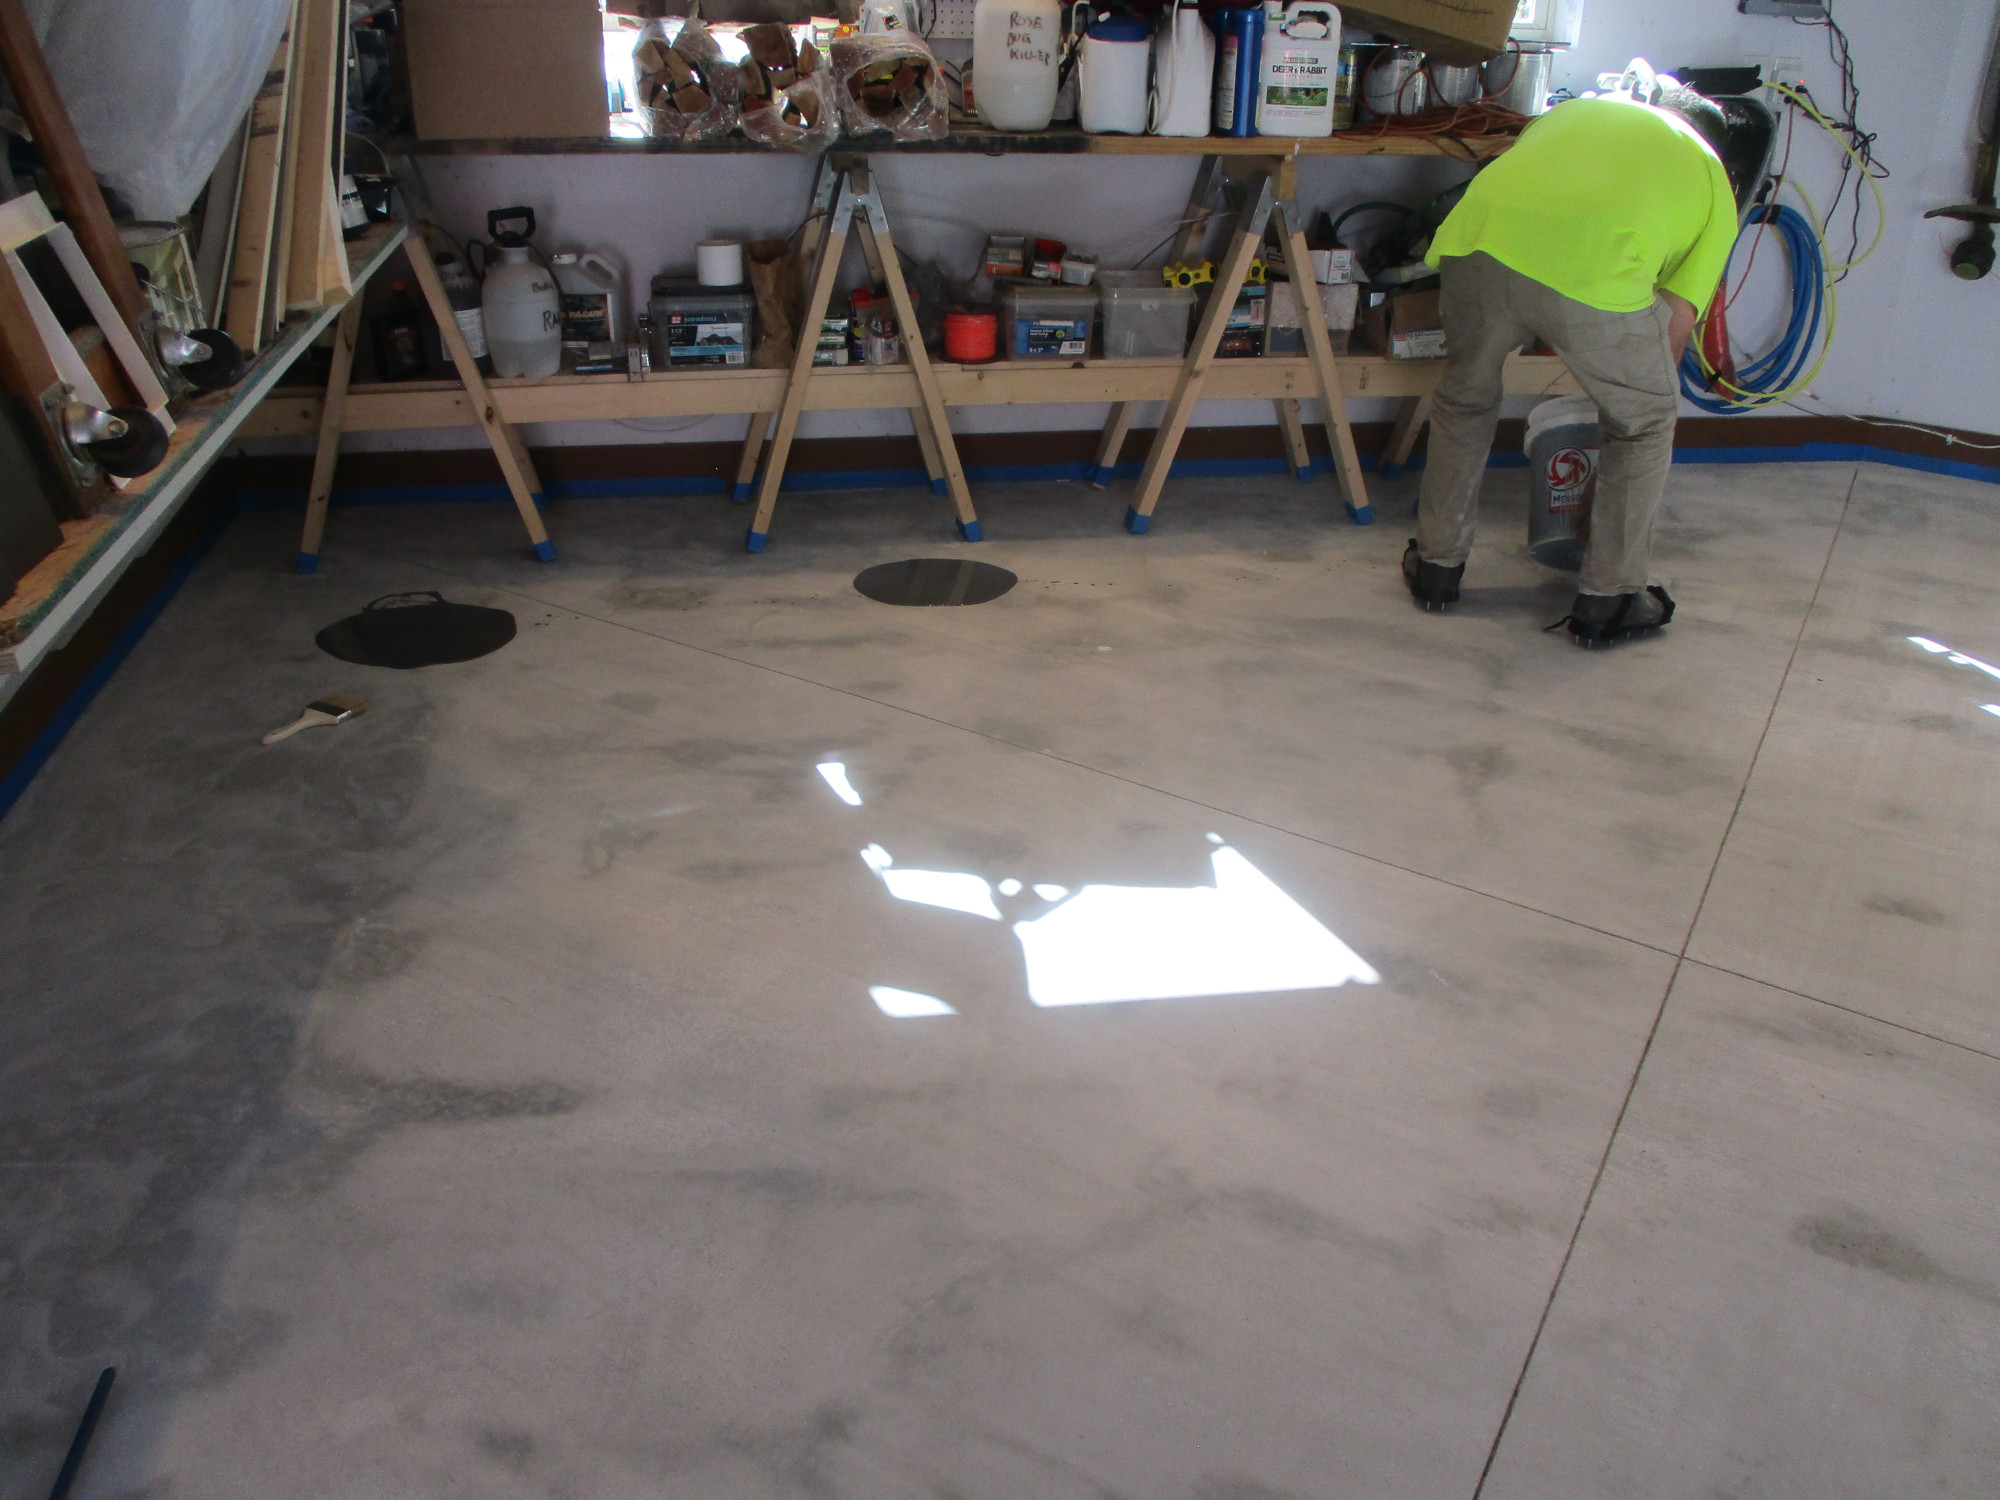
10. NEXT DAY: SCRAPE THE SURFACE OF THE COLOR FLAKES TO REMOVE EXCESS
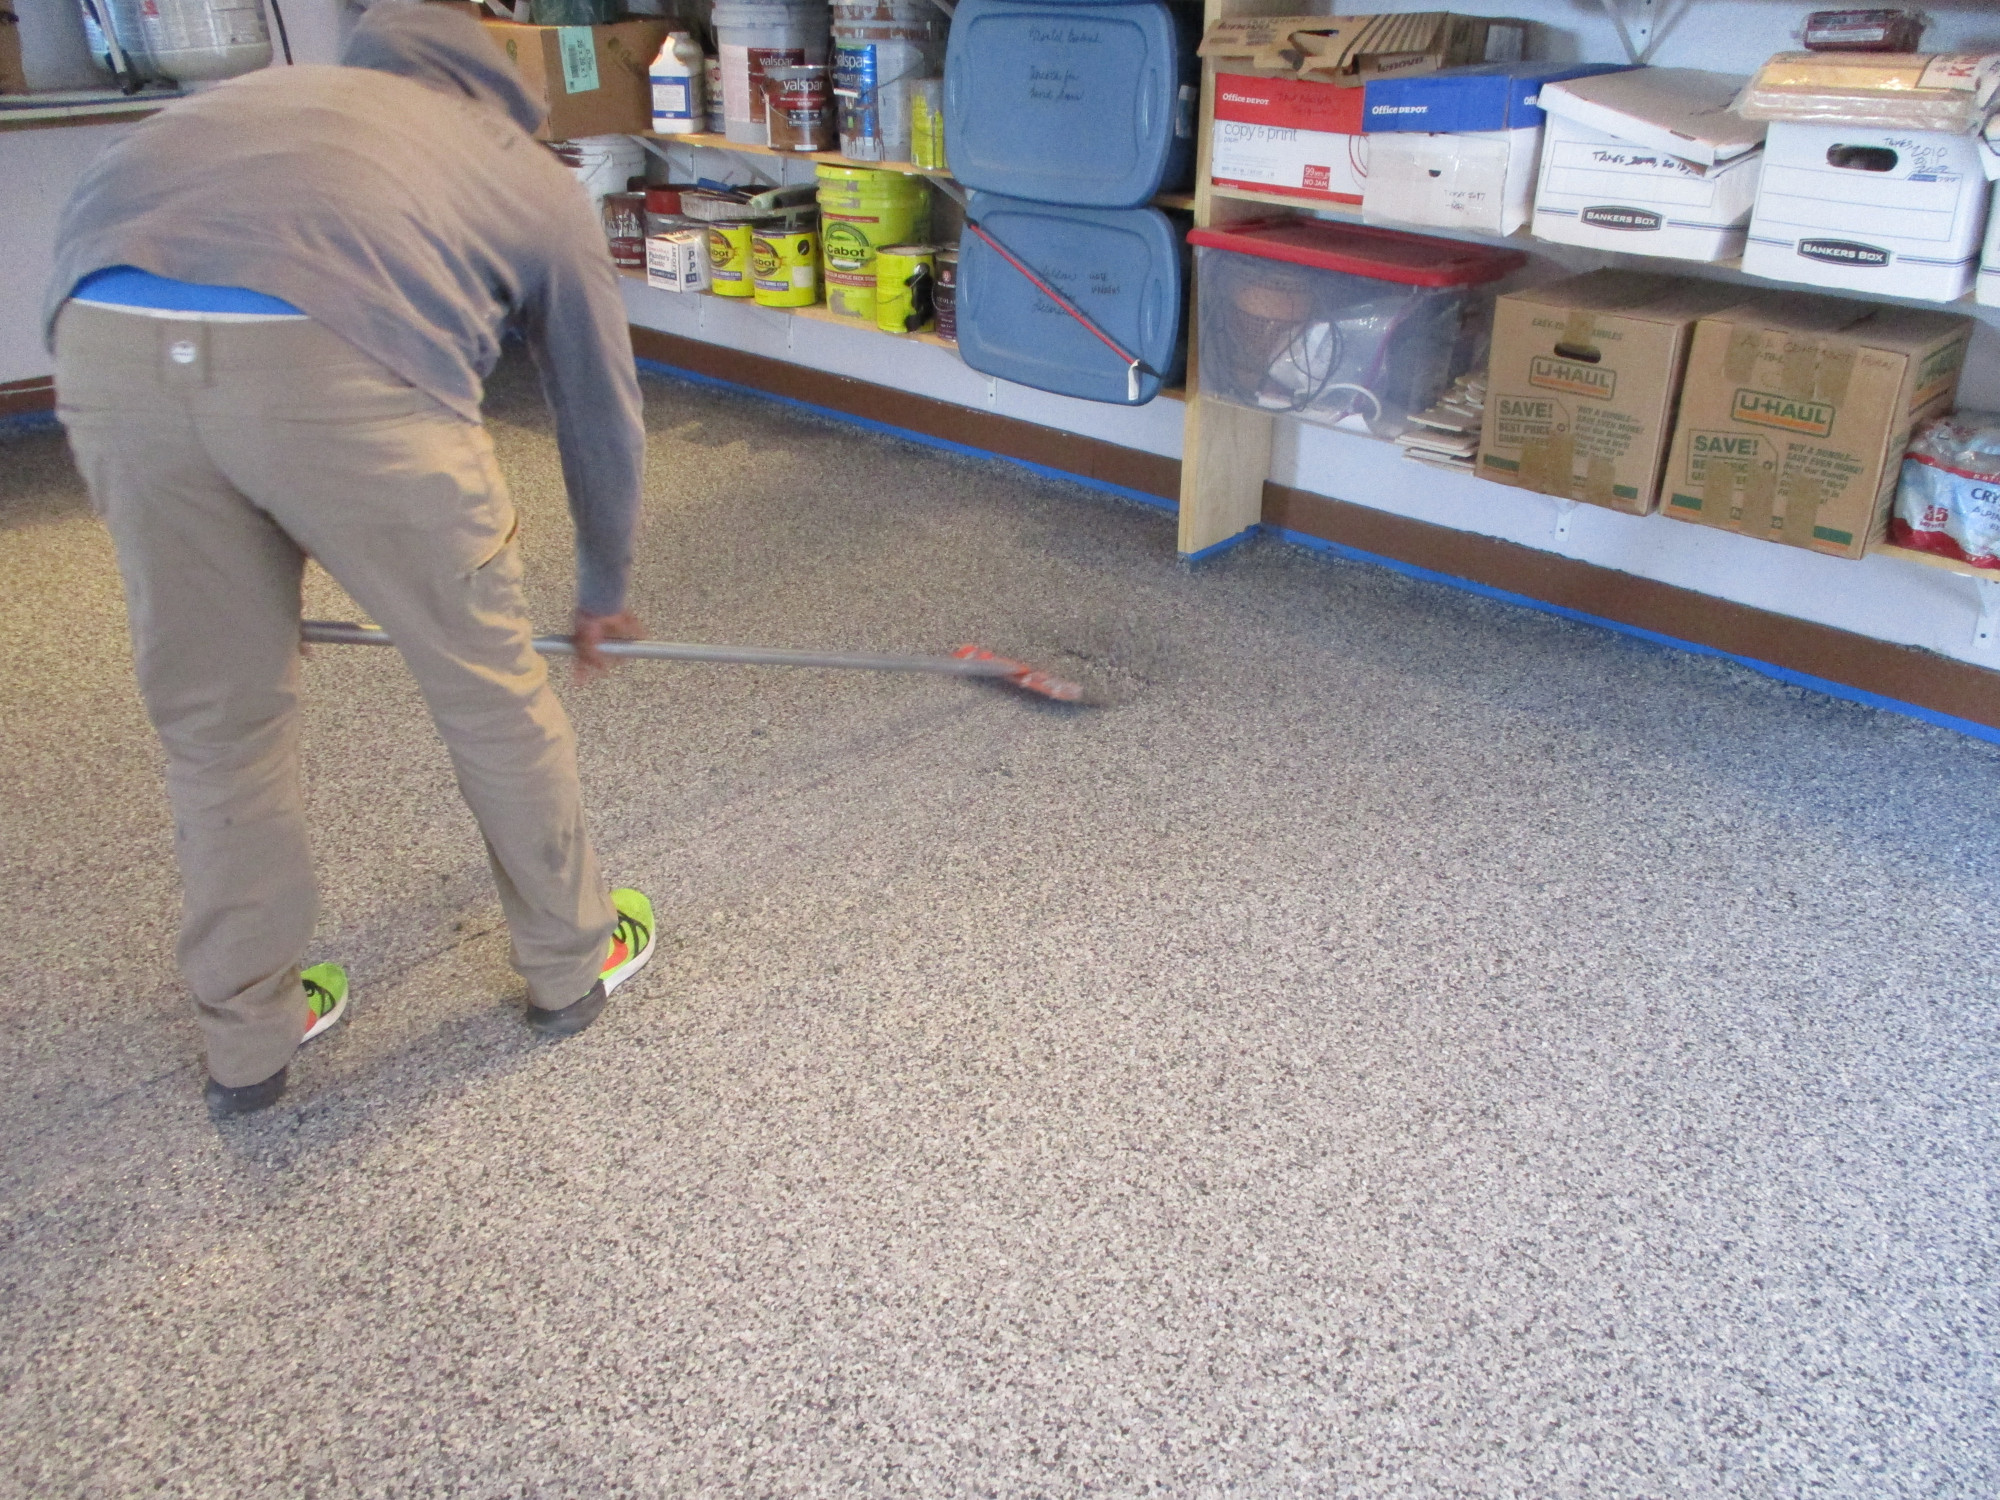
11. VACUUM AND BLOW EXCESS SCRAPED OFF FLAKES & REMOVE PAINTERS TAPE FROM WALL BASE

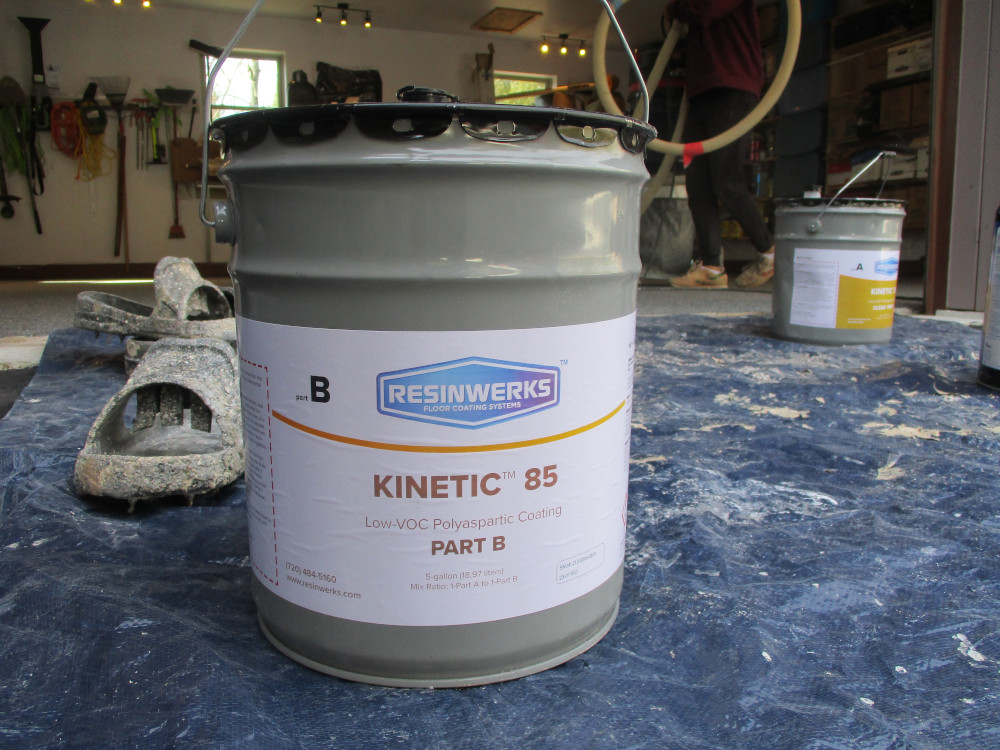
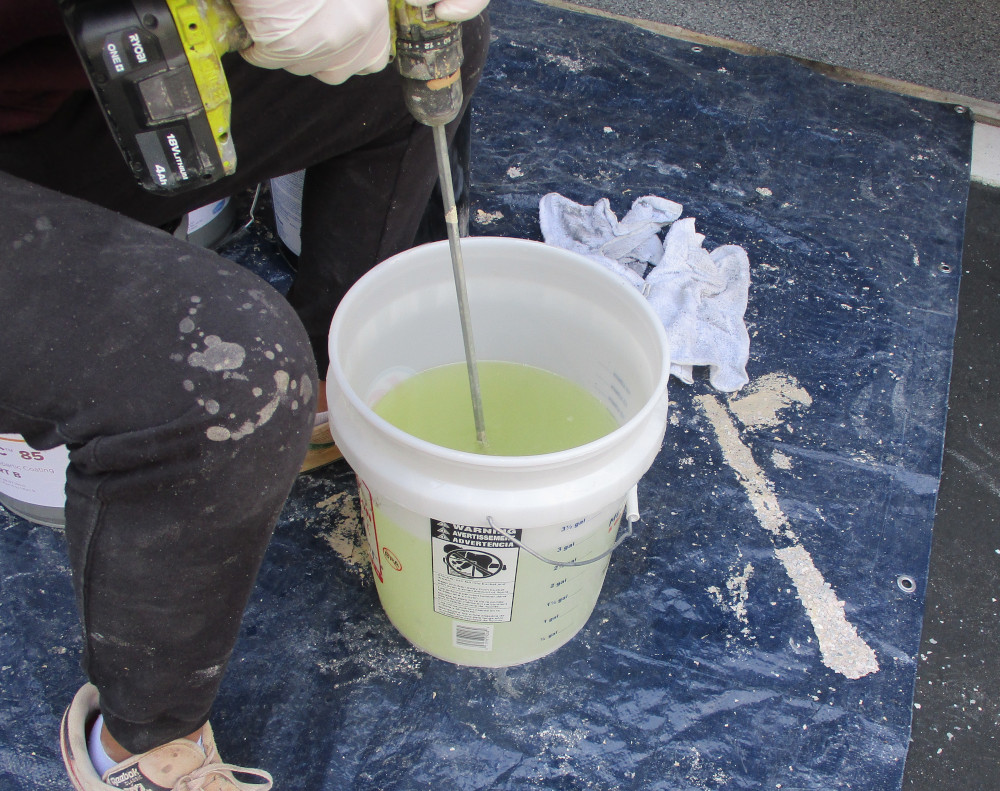
12. MIX CLEAR TOP COAT RESIN
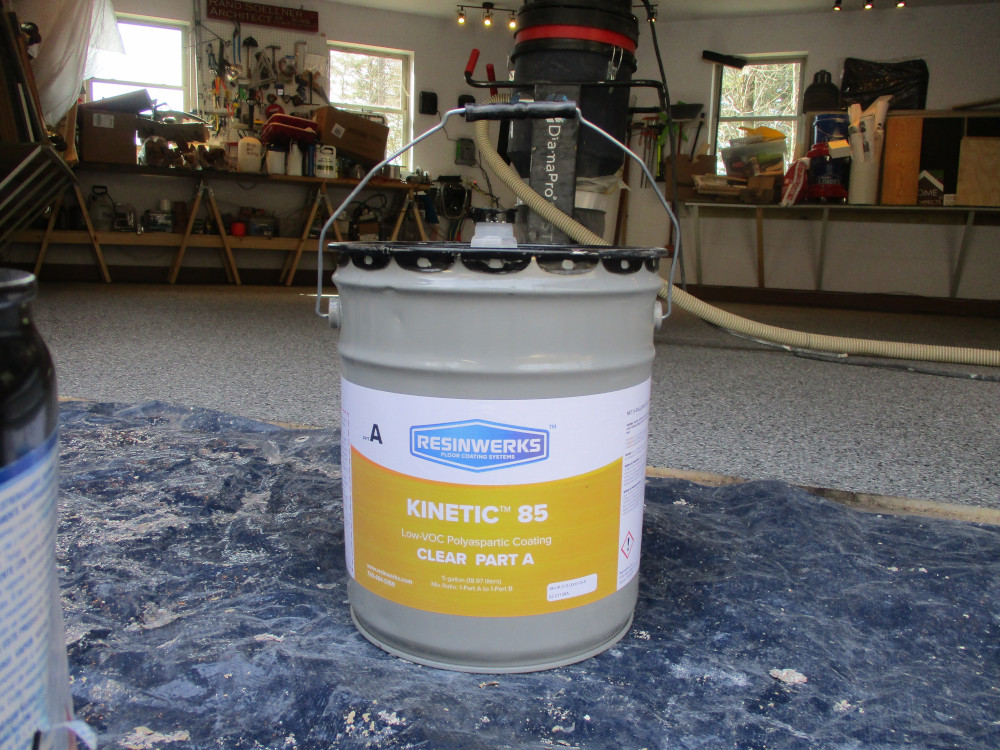
The Resinwerks Kinetic 85 chemicals Part A and Part B are combined in a separate 5 gallon bucket and machine stirred just before coating the waiting cleaned floor. This is a low VOC product according to the manufacturer.
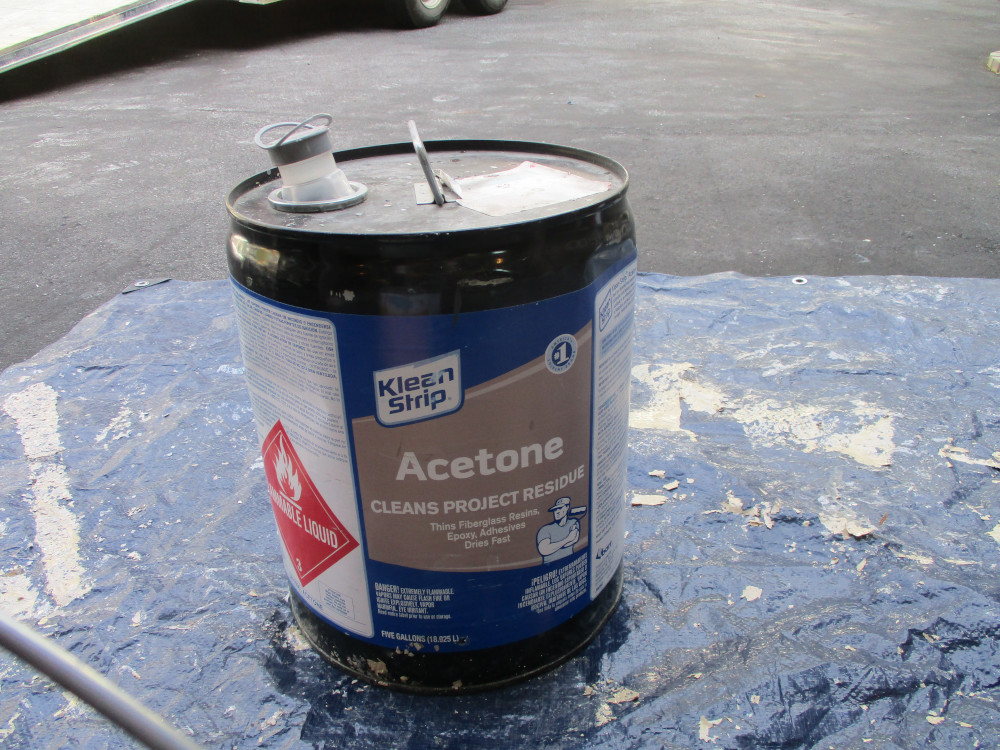
Acetone is used to cut the mix or spot clean areas.

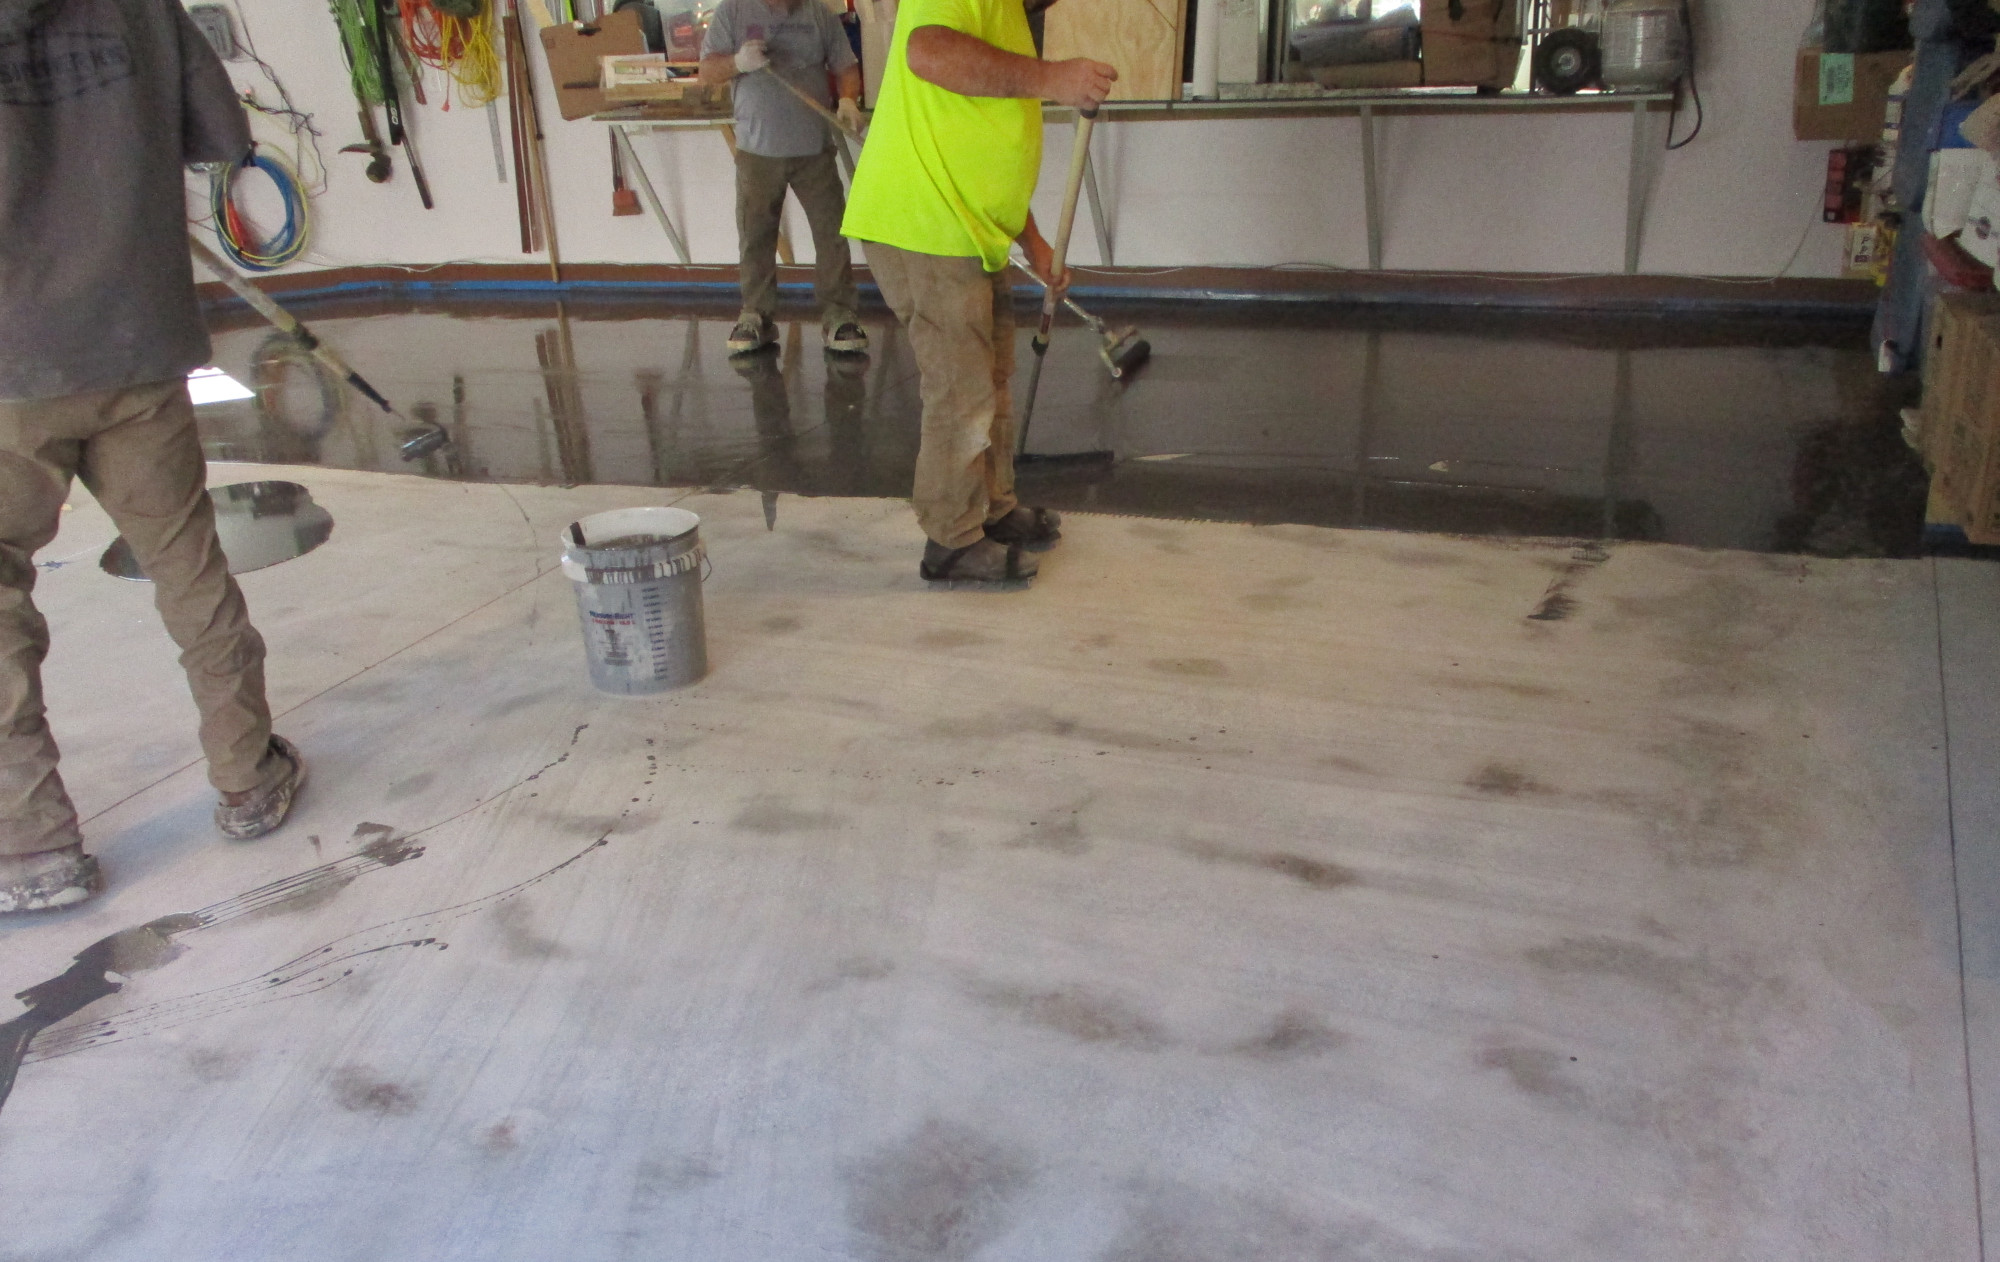
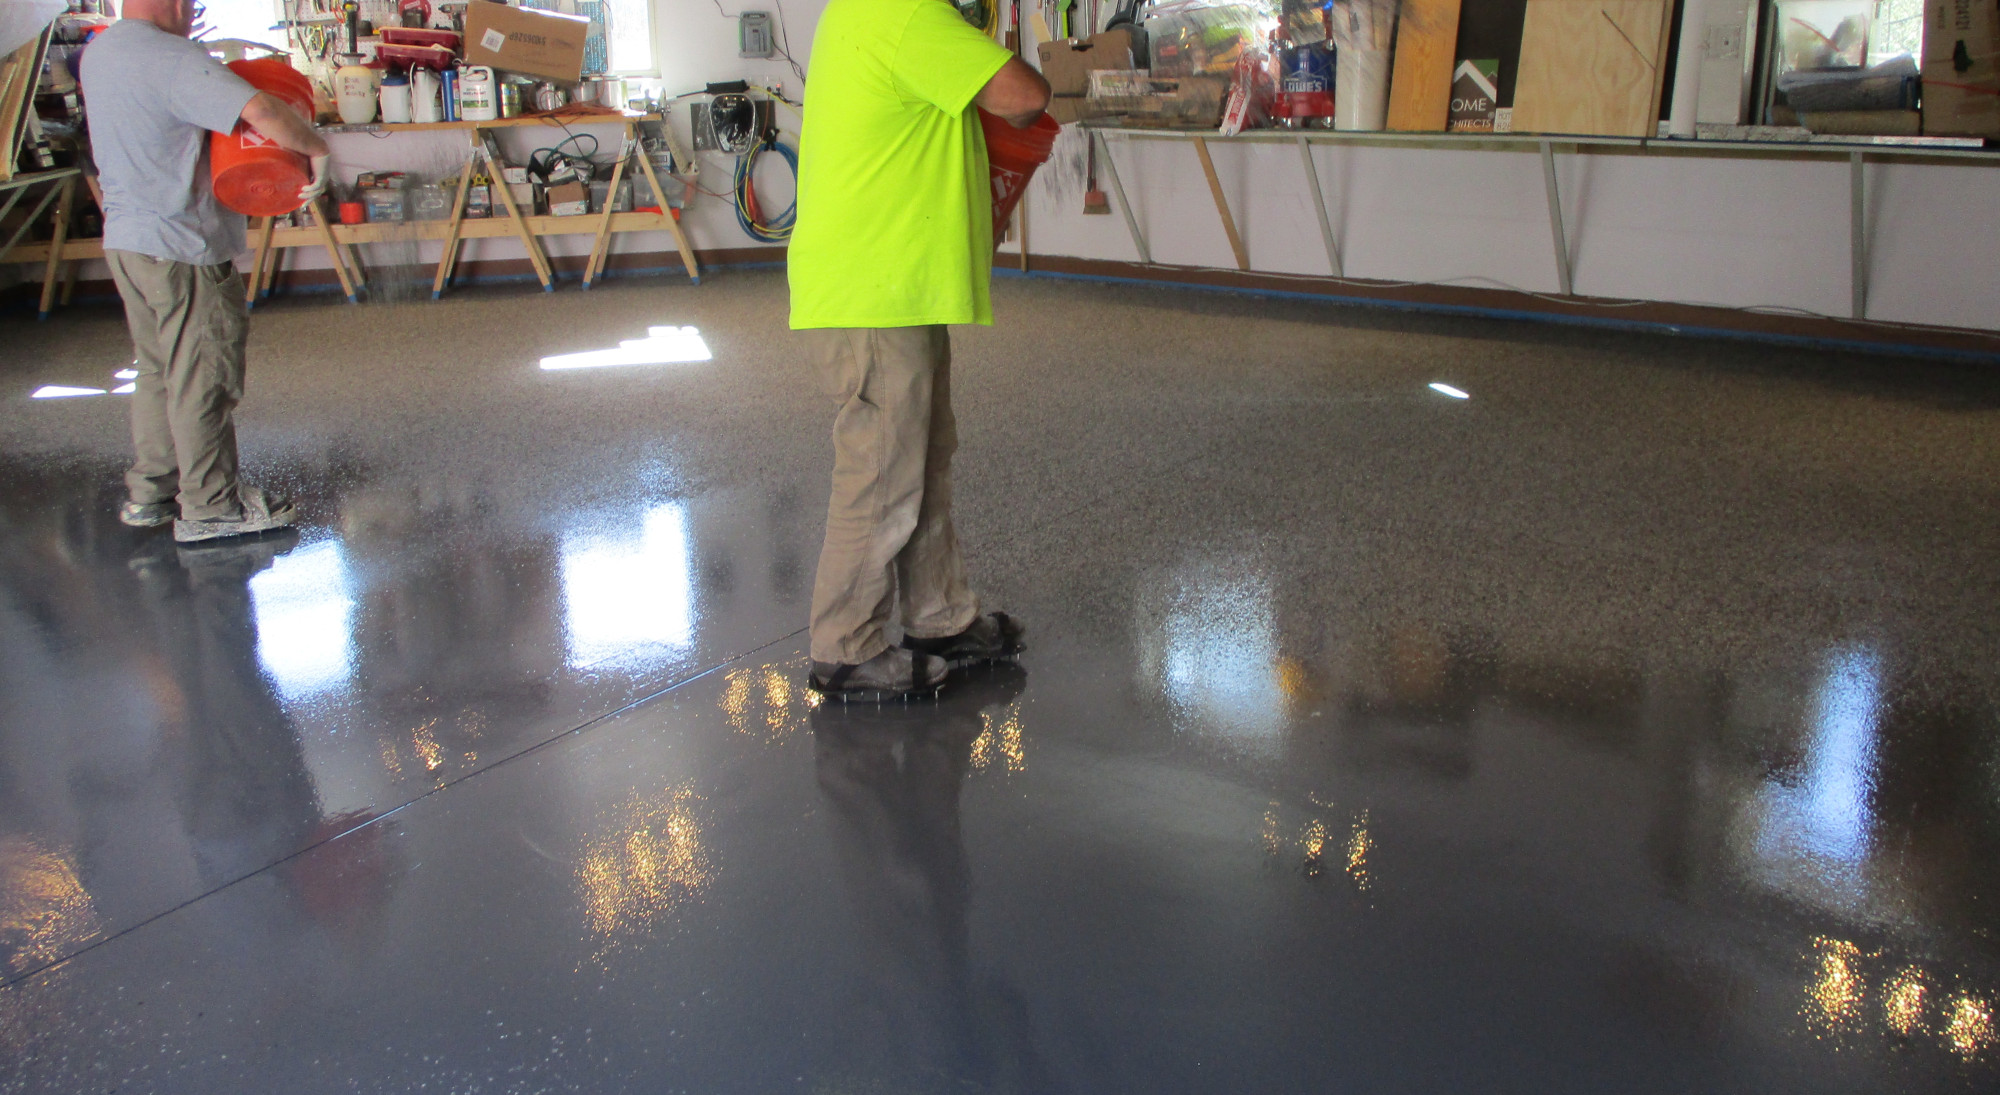
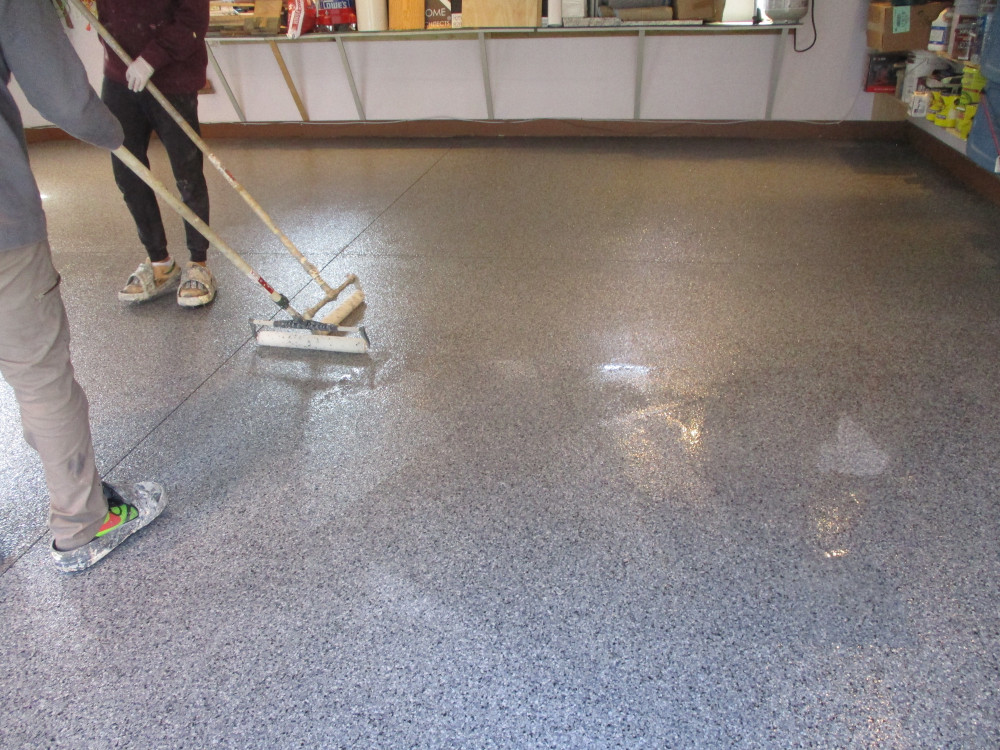
13. INSTALL TOP CLEAR COAT ONTO THE PREPARED GARAGE FLOOR SURFACE
The clear coat polyaspartic chemical is poured into pools around the floor in a given area, then squeegeed over the surface. Then a large nap paint roller rolls over the surface to achieve a uniform coat that completely seals the substrate.
14. ALLOW CLEAR COAT TO CURE
The installer suggests not walking on the surface for about 4 hours+/- and not driving on it for 24 hours or so. The Architect waiting a full 2 days before parking on it.
The result: a beautiful new floor:
SEE SURFACE BELLA IN GREENVILLE, SC FOR YOURS.