Seal Coating Asphalt Driveway is about how homeowners should seal their asphalt driveways after a few years after original paving.
WHAT PRODUCT to use? After researching online, reading testimonials and asking the subcontractor that was going to do the installation, the Architect settled on:
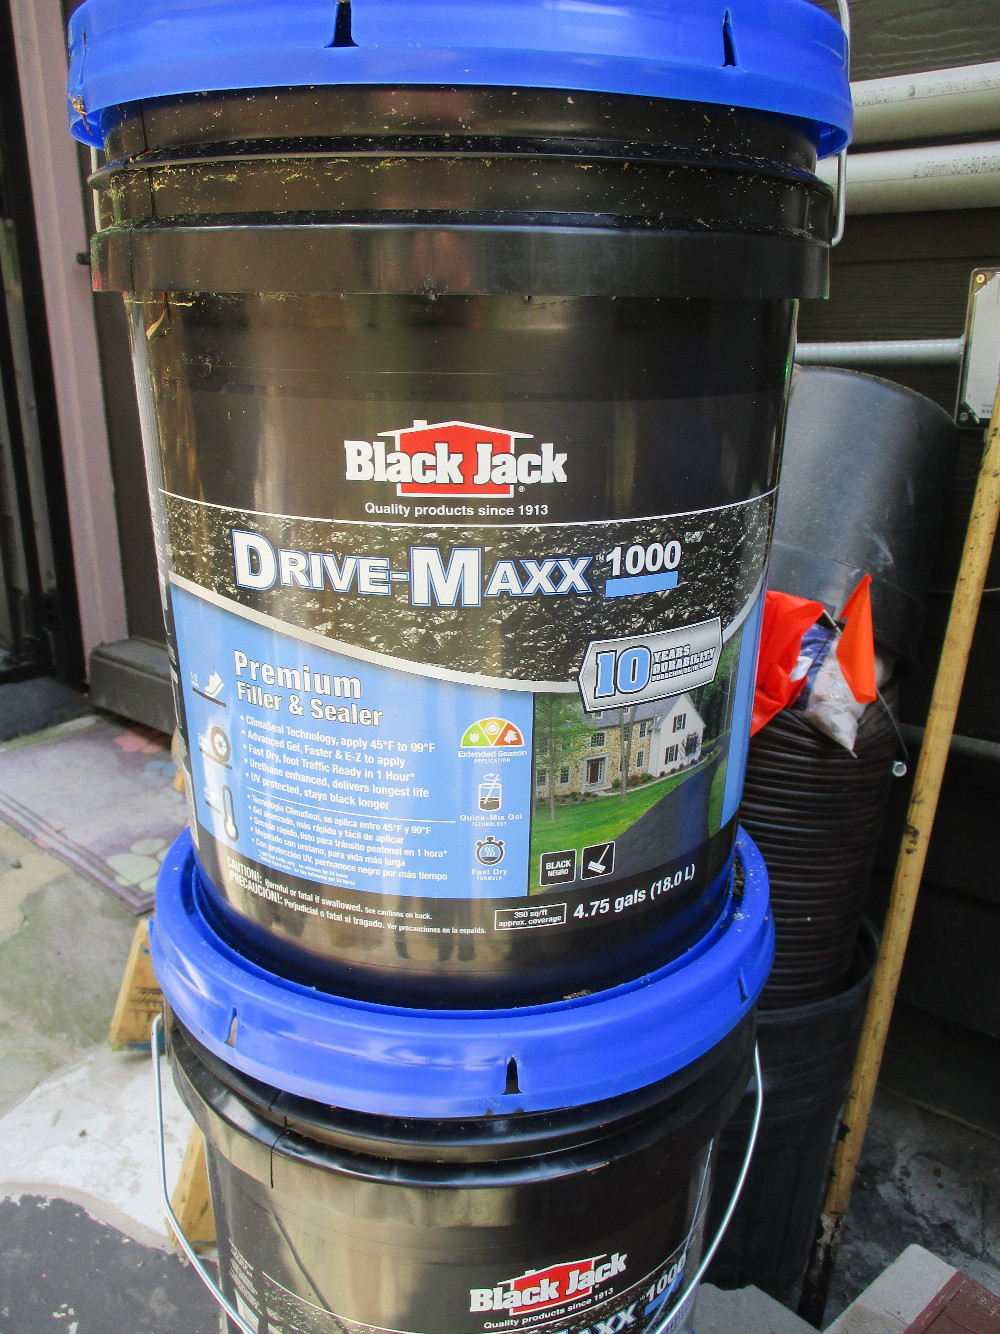
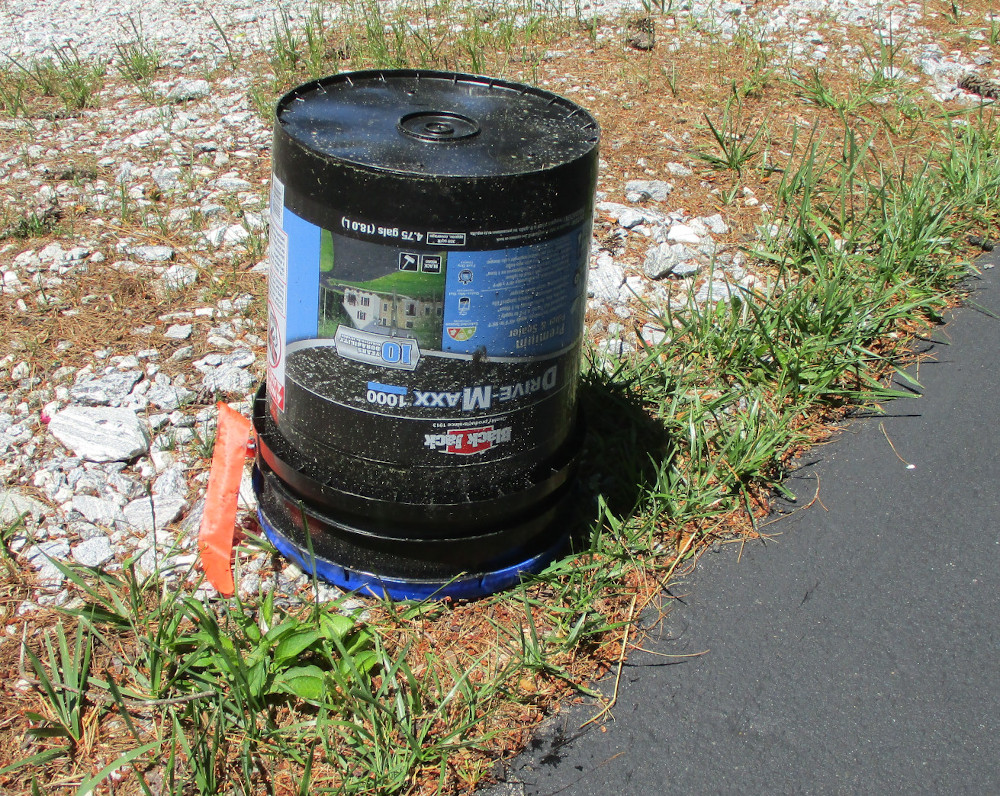
Black Jack Drive-Maxx 1000 “premium filler & sealer – 10 year.”
Which the manufacturer, Gardner-Gibson indicates is supposed to last 10 years.
Whether this is the case in real life or not we will see, at our location.
And WHAT is in this? Manufacturer’s comments:
“Black Jack® Drive-Maxx™ 1000 is the best quality rubberized blacktop filler and sealer designed for asphalt pavements. This product renews the look of old worn driveways, and contains sand particles to fill in small cracks. Drive-Maxx™ 1000 is enhanced with a latex polymer to give maximum performance, unmatched durability and the best looking finish. The combination of Gel and Fast Dry Technology provide a fast and easy installation, plus the ability to open your driveway to foot traffic in just one hour (in good drying conditions). Drive-Maxx™ 1000 with ClimaSeal technology accelerates drying time and also allows for product to cure in cooler temps down to 45°F. Under normal drying conditions, (temperatures above 75°F, clear sunny skies, and humidity below 35%) this driveway sealer can be open to foot traffic in just 1 hour after application. (For vehicle traffic, you must allow 24 hours for product to completely cure.)”
This appears to be a water-based product with a huge glob of white sand in the pail, that must be mixed well, with a drill paddle mixing rod, about every 15 minutes or so. And you must turn the pails upside down the day before application to have some chance of getting all that sand mixed in properly and not stuck at the bottom of the pail.
Architect has seen weight of 41 to 56 pounds per pail. Use the heavier guess to make sure you don’t overload your truck.
Architect does not stand behind manufacturer’s claims.
WHY: because asphalt paving (technically called asphaltic concrete) loses its flexibility over time and starts cracking. Rain, snow and ice get into the cracks, freeze, then push the cracks open wider, gradually creating potholes and destroying the smooth driving surface, until the entire paved area needs to be resurfaced with asphaltic concrete, which is very expensive as compared with simply seal coating about every 5 years or so.
WHEN to seal coat: opinions vary. Except on one issue: the oils in the original asphalt paving need to have leeched out and no longer be present. For this particular driveway, that happened within about a year or so, but the Architect waited nearly 4 years before having this Seal Coat done.
COST and WHERE to buy the Seal Coat material: they are in 4.75 gallon pails and can be had from several different suppliers. For this project, Lowe’s was the most economical source, at a remarkably cheap $27.48/pail (4.75 gallons) before local tax. So if you use your Lowes card and request the 5% discount, it ends up being around $28/pail. Let’s do some math: that’s about $5.90/gallon. Let’s think about that for a minute. Can you even buy water for less than $6/gallon? Much less ANY kind of paint product? Which for all intents and purposes this is? Relatively reasonable latex house paint/stain is around $44/gallon. 4.75 gallons of that would be around $209 before tax. So before we go bad-mouthing the imperfections in the installed product, let’s keep the cost in mind. It’s downright CHEAP. However, the Architect might even go so far as to say Reasonably Economical. Not perfect by any stretch of the imagination. But certain a decent value. If installed properly.
Note: as of today (6-19-2022) product price direct from manufacturer appears to be $44.99 per pail. Which is WAY more than from a big box discount place like Lowes. So shop around. Just make sure it is the product you are looking for. And don’t allow your installers to use previously opened containers. They may have watered the pails down to cheapen their cost of the product. better that you provide the material in unopened containers. And lest you implicitly trust your seal coating installers, the installers for this job bought a cheaper product, then attempted to use it, even after signing a contract for the product specified above. The Owner caught them, then revised the agreement for them to just provide labor and the Owner took his truck and went to Lowes and bought the “good stuff.” Which effectively eliminated the installers ability to use lesser material. You have to watch what’s going on.
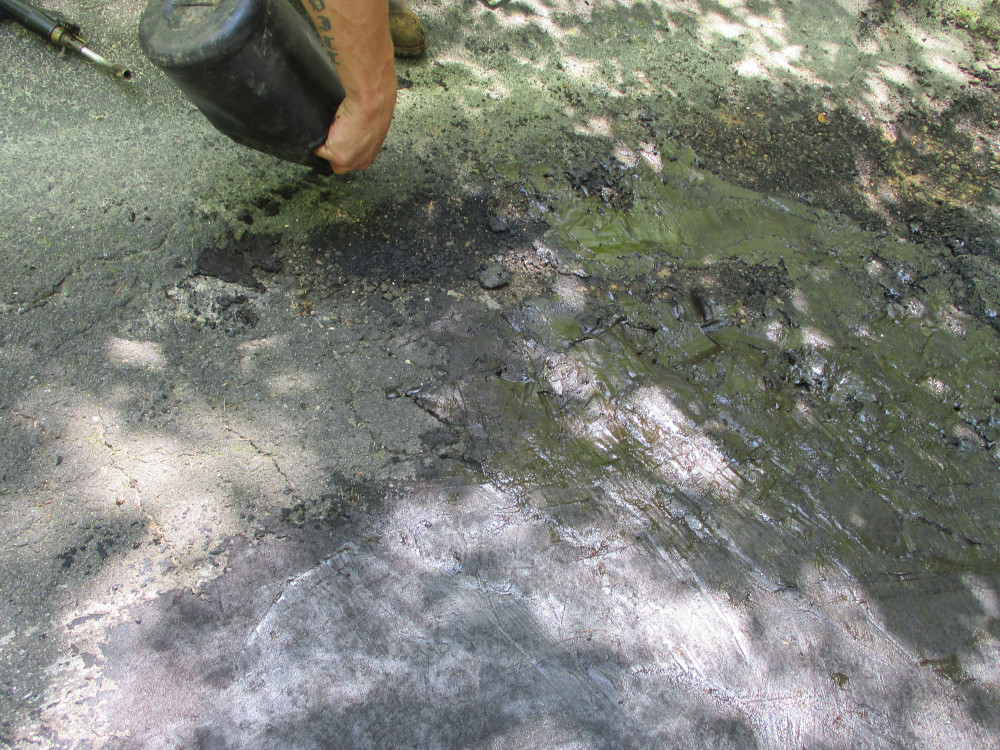
INSTALLATION: the installers said the first coat of this type of sealer should be spread with a squeegee, after the driveway is cleaned. Now, there’s cleaning, then there’s cleaning. The manufacturer appears to suggest pressure-washing the driveway. However, in real life, these particular installers simply used a blower. Their squeegee application varied in terms of coverage and quality of appearance. There were numerous spots about 2 feet square or so that appeared “starved” or otherwise undercoated.
HOW MUCH: manufacturer appears to indicate around 350 square feet per 4.75 gallon pail. This particular large driveway is 8,800 SF. So 8,800/350 = 25.14 pails. The Architect went to Lowes and bought an entire pallet = 27 pails. Even after touch-ups, there are 3 unopened pails left, so the manufacturer’s coverage ratio appears to be correct for fairly new pavement in good condition. Online comments from others indicate perhaps 250 SF/pail for very rough and damaged asphalt driveways. So 27 pails x about $28/pail = about $756 total for the seal coat material +/- which can and will vary as time goes forward (usually more in the future).
EXISTING CONDITION of this particular driveway was very good.

This means that the manufacturer’s projected coverage rate of seal coat = 350 SF/pail was correct. There were several existing cracks about 1/4″ wide and one severely cracked area that had to be patched. Architect questioned the installer’s use of strictly pail-based repair media.
Architect would have preferred to see this area cut out and replaced with cold-based asphaltic concrete aggregate in a clean rectangle, tamped down with a heavy compaction tool (which was not done).
ENVIRONMENTAL CONDITIONS: No rain 48 hours before or 48 hours after installation. The manufacturer might be more permissive than that. However, better safe than sorry.
A BAD THING HAPPENED: about 30 minutes before the installers were completely done, it started raining. Lightly at first, then a downpour. This effectively ruined and washed away all the seal coat material that had been installed in the previous hour or so, which was ALL of the 1000 feet of edge and the entire entry drive (16’x100′) outside the gates.
This was very unfortunate, and the the Architect-Owner spent the next 3 days recoating the entire perimeter and adding a second coat to the entry drive section outside of the gates, and touching up several other areas. A real pain. Architect-Owner used a cheap fabric nap paint roller on a long telescoping handle to apply open areas, and a common 4″ wide paint brush on the perimeter.
CURING TIME: manufacturer indicate an hour for foot traffic, and 24 to 48 hours for vehicle traffic. Owner waited 48 hours for vehicle traffic and was concerned if there would be any hot tire pickup as some of the reviews indicated. But no, this did not happen.
AFTER CONDITION: 7 stars out of 10. No where near perfect, but not bad. The main means of applying just one coat is almost impossible to result in a black carpet level of coating. That requires 2 coats. And if the second coat were to be sprayed, that would just about guarantee a near-perfect near blemish-free installation. But that would typically double your labor cost.
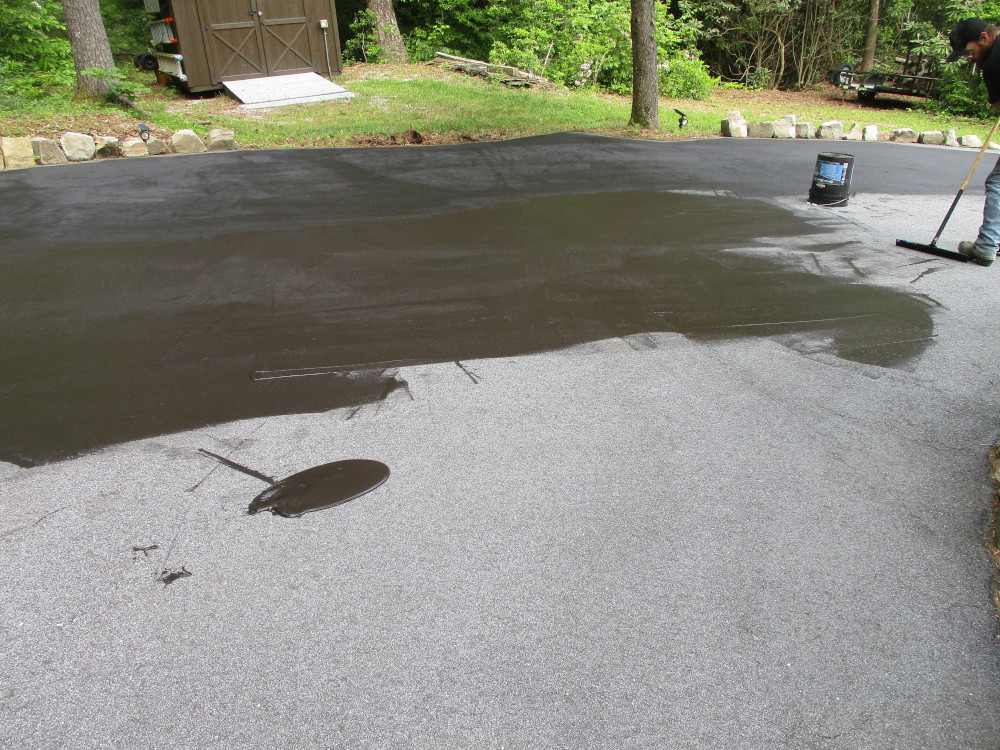
IN PROGRESS WORK:
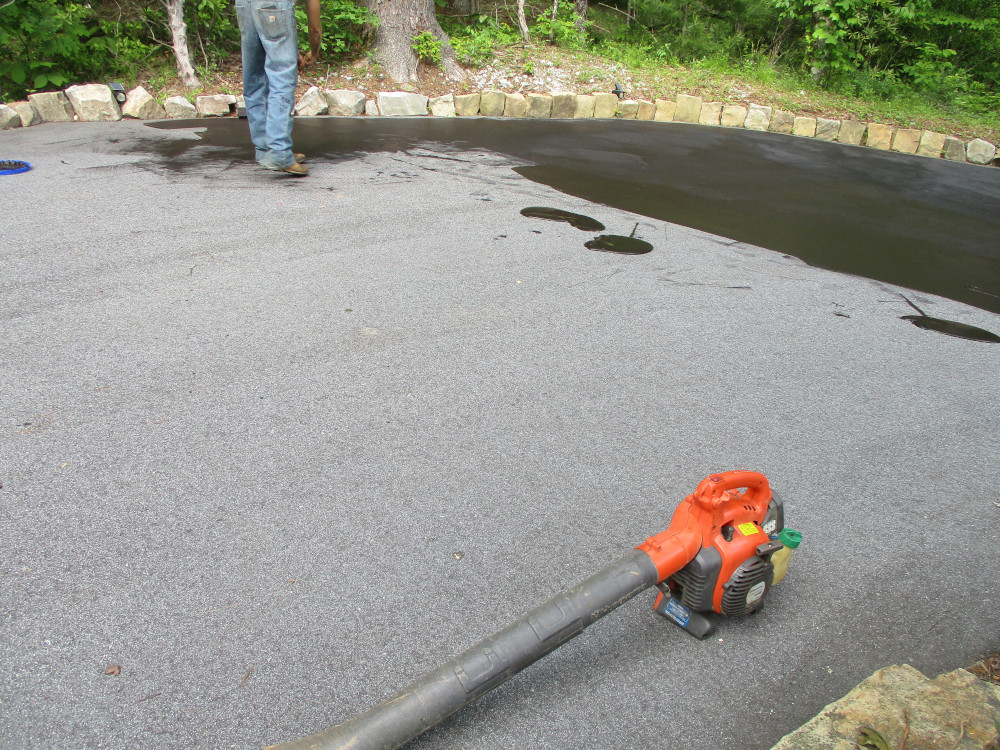
As you can see: squeegee and upside down broom (like a squeegee), mopping around globs of asphaltic seal coat poured a little at a time onto the existing pavement. The installers had to keep blowing off the pavement to clean away new debris falling from the springtime trees.
RESULTS: in general, not horrible. Generally okay. Kind of like someone asking you about food that you are eating that is kind of bland, but not particularly interesting, like ordinary rice.

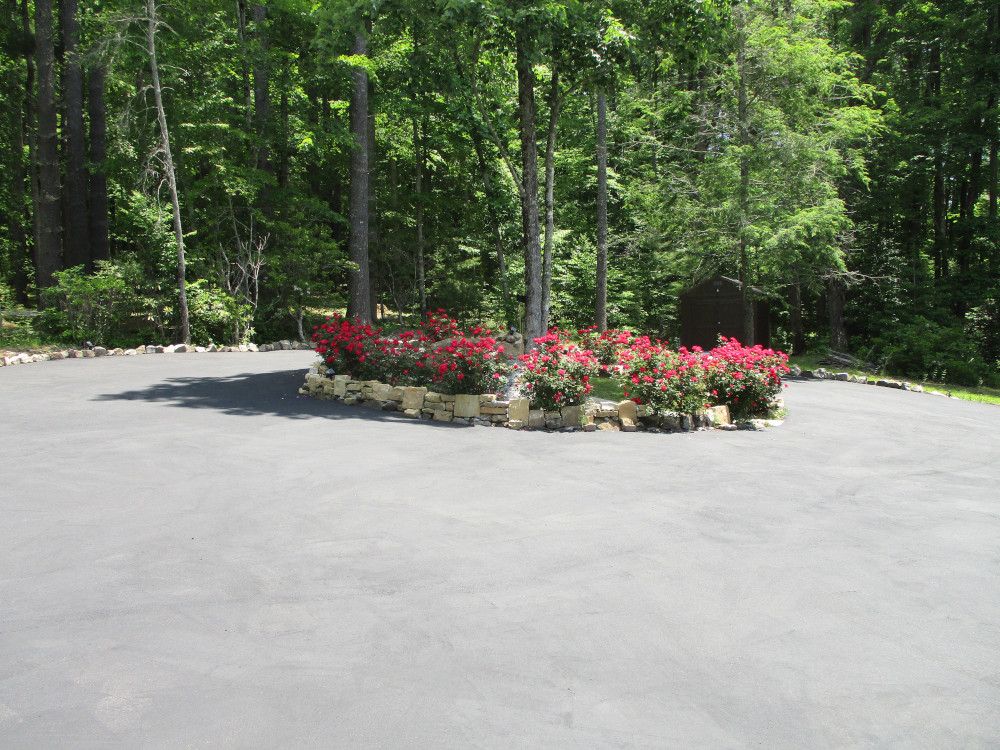
Looks pretty good from a distance, if you don’t focus on specific areas.
However, even after touching up many areas, there remain several spots like these:
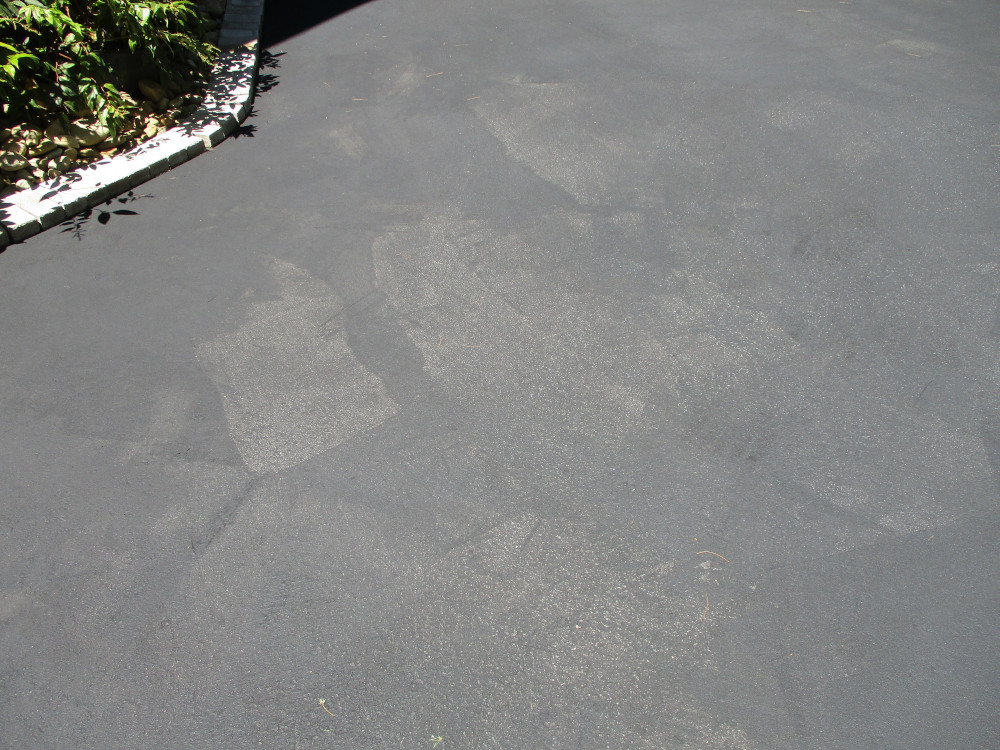
So this is not perfect. But what do you expect for material less than $6/gallon? And labor at around 20-1/2 cents per SF? You don’t eat off it. You drive on it. It would probably look much better if the Owner used another pail or so to do some more touch-ups of areas like this. And of course, a comprehensive 2nd coat would cure 99% of these sorts of areas.
WEARING: not bad. Even after several new rainstorms, after the Owner’s repairs. However, there is what appears to be some wear where the Owner’s F150 goes into and out of the garage on the pavement surface. Like sandpaper has worked on the new coating where the tires move in and out of there, for perhaps 4 feet or so. May want to install a second coat there.
EVALUATION: In general: a reasonably effective coating. Doubt it will last 10 years. Would be happy with 5 years. We’ll see. But even after at least 3 gully-washer rainstorms (after the Owner’s repairs), the product appears to be holding up and remaining bonded. There is a little white sand residue in one low spot where, after a rainstorm, some of the product sand collects a little. So, there is some minor wash-off after the curing takes place. But all in all, the overall surface seems to be bonded and functioning. Certainly better than before. 7 stars out of 10. 4 stars out of 5. And a very good value in terms of cost of product to effectiveness received.
THIN: you HAVE to apply this product in a very thin layer. If you apply it too thick and you do not keep drill-stirring deep into the pail, you will likely have hot tire pickup as some people have experienced. Too thick of an installation will result in a very long curing time, possibly never. So take care to have professionals install this, at least for the first time. Some of the other DIY people’s reviews condemning this product the Architect does Not agree with.
1. Turn pails upside down day before use.
2. Using a drill-stir paddle (long) spend 3 minutes stirring, then a minute every 15 minutes of use.
3. Apply only in a first THIN coat.
4. Come back later and touch-up if you have to/want to.
Do these things and you should have a good install. Not perfect, but reasonably acceptable.