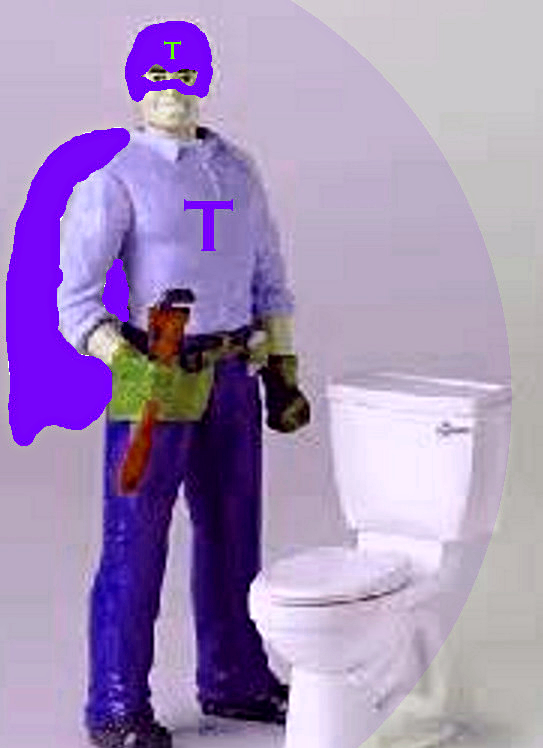
This week, we bring the birth of a new superhero: Toilet Fixer Person. In reality, Toilet Fixer Person is you and me and any of us (men or women), that have to deal with the problematic innards of the porcelain throne that all of us visit several times a day, to do personal business. Oftentimes Architects dwell on the finer points of design. Once in a while people ask us to have articles on day-to-day practical matters. Okay: here you are: how to fix your toilet. Something we all face from time to time. We thought we’d invent a funny little guy: Toilet Fixer Person to help us make the repairs.
Click the image above to see testimonials for the residential architect.
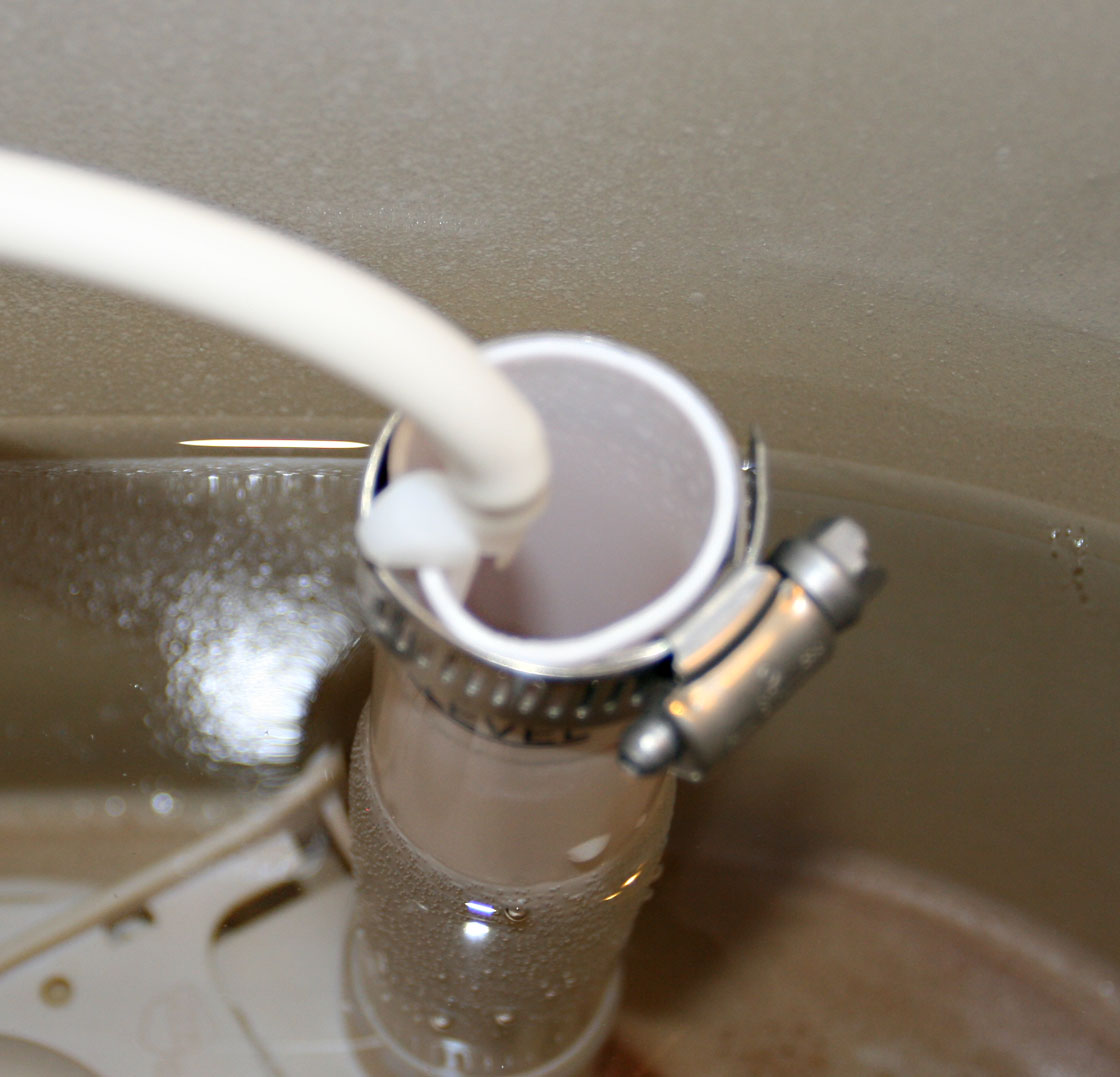
In a previous online article, the HOME ARCHITECTS ® detailed how to secure a pesky toilet fill line that kept pushing itself off the fill pipe. That solution involved a stainless steel hose clamp band with a screw that was tightened with a small wrench. You can see that here: Toilet Tank Fill Line Fix.
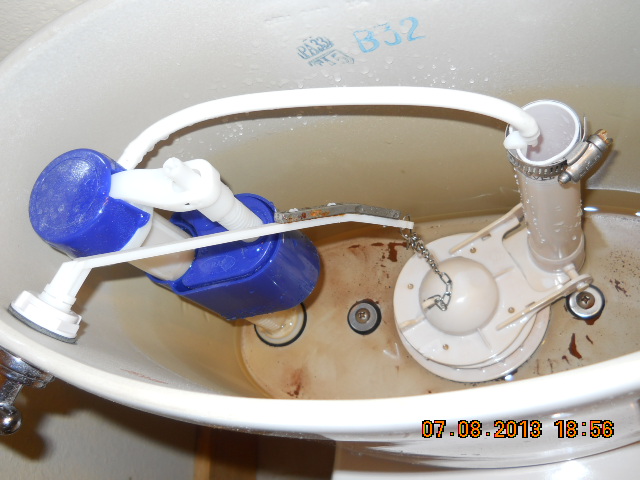
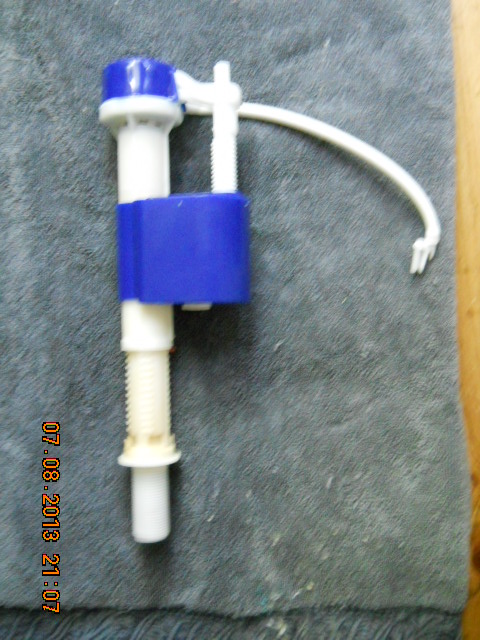
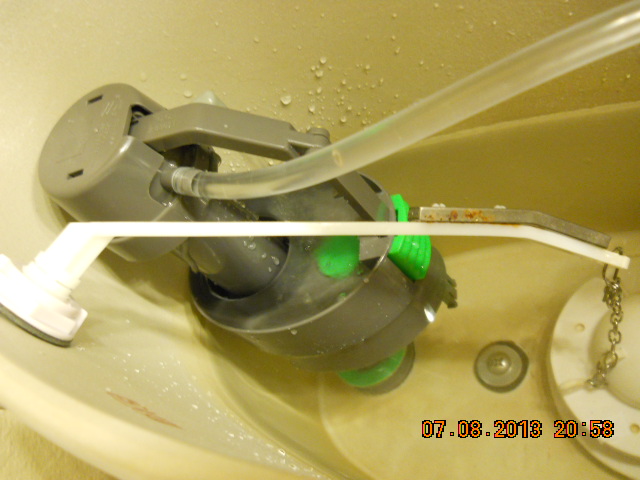
This time, we look at a larger piece of problem hardware that often needs replacing inside your toilet tank: the TOILET FILL VALVE. In this case, we are replacing an “elevator” filler valve. It has a float mechanism that moves up and down the filler valve stalk. FluidMaster makes a model 400A toilet filler valve that will probably work well for most American tanks. We used a no-name filler valve that looked a lot like the FluidMaster unit, for $9.99 from our local lumberyard. Note: the FILL valve is the internal part inside the toilet that is Not connected to the Flush Valve (which is what you push to make the toilet flush).
Step 1. Pull off the toilet tank lid and set it aside, out of the way. Flush the toilet to see if you do need to replace the Fill Valve. You will know that you do, if you see water leaking out of the Fill Valve. Why it’s a good idea to replace a leaky Fill Valve: it wastes water. Not only does this waste precious national resources, it also can cost you money, if you have metered water, or electricity to run a well pump, and to operate a grinder ejection sewer pump on the effluent end of the piping.
Step 2. Turn off the wall or floor mounted water valve that lets water from your household piping into the toilet.
Step 3. Flush the toilet. This will remove most of the water in the tank.
Step 4. Find an old rag or towel and wad it together and place it on the bathroom floor, directly under the toilet Fill Valve stalk where it penetrates the bottom of the toilet tank.
Step 5. Using an old, thick, absorptive rag, wad this up and place into the toilet tank repeatedly, wringing out the water into a nearby sink, until you have removed most of the water from the toilet tank. What you have not removed will likely drain down and out to the other rag/towel you have placed beneath the toilet tank.
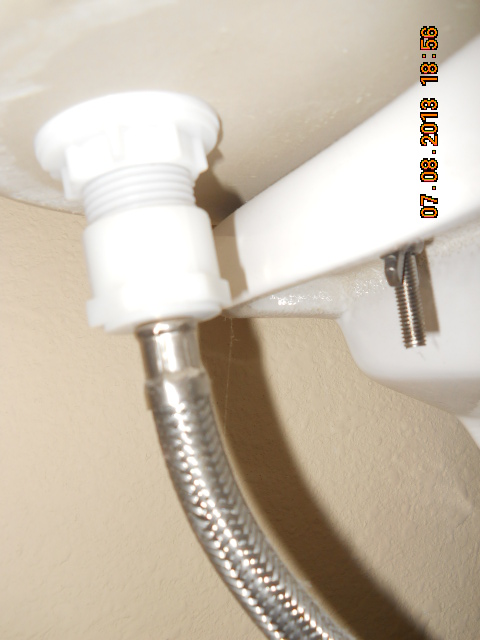
Step 6. Unscrew the exterior water line under the toilet tank. Take note of any washers inside this and make sure that you can remember how it goes together for later.
Step 7. You may need to use a wrench to unscrew the external plastic hub with integral washer from under the toilet tank that holds the Fill Valve in place. BE CAREFUL. The old: “righty=tighty” and “lefty=loosey” usually does NOT apply here. You do not want to crack the porcelain tank bottom with too much pressure. We found that we had to rotate the screw hub to the Right to loosen it. Once you have it loose, use your hand to unscrew it the rest of the way down and off the threaded Fill Valve external shaft. Once again, take note of how it properly goes together, typically with an integral flat side “washer” that puts even pressure to the toilet tank bottom to seal the Fill Valve shaft.
Step 8. Remove the flexible plastic fill line from the toilet fill pipe. See our previous toilet fill line repair article here:
Step 9. Pull the Fill Valve up, pulling the threaded shaft up and out of the hole in the bottom of the toilet tank.
Step 10. Lay the old fill valve on a towel on the floor, next to the new fill valve. Adjust the new fill valve so that its float mechanism is in the approximate same height on the shaft of the new fill valve as the float on the old fill valve. It is much easier to adjust this before you insert the new fill valve into the toilet tank. Refer to the instructions with the new fill valve to understand how to do this. It may take some experimenting to figure this out.
Click the image above to see the Features Available on our houses.
Step 11. Push the new flexible plastic fill line onto the nozzle on the Fill Valve. Also insert the fitting onto the other end of the fill line that allows you to clip it to the fill pipe.
Step 12. Insert the new Fill Valve into the same hole in the toilet tank bottom from which the old fill valve was removed.
Step 13. Rotate the new Fill Valve so that the fill line has the most direct path to the fill pipe, without conflicting with the Flush Valve assembly, which is sure to be next to it.
Step 14. Screw on the new or old threaded hub with integral flat washer from the underneath of the toilet tank, securing the new Fill Valve into place. BE CAREFUL not to over-tighten. You want it tight enough to not allow any water from the tank to leak out, but not so tight that you crack the toilet tank. If in doubt, do NOT use a wrench for this step, which can result it a cracked toilet tank. Rather: use your bare fingers.
Step 15. Screw on the water line threaded cylinder over the end of the shaft under the toilet. Use your hand to tighten this. Make sure the little washer inside the fitting is exactly the way you found it when you unscrewed it earlier.
Step 16. Install the flexible plastic fill line onto the top of the fill pipe, as shown in our previous article: Toilet Tank Fill Line Fix.
Step 17. Take a deep breath.
Step 18. Turn the water valve at the wall or floor and pray that you got everything put together properly.
Step 19. Watch the water fill the tank. You may or may not need to further adjust the float to the desired height (note the previous step 10 in which you were supposed to adjust this before installing, because it’s now hard to get your big fingers in there to adjust it).
Step 20. Flush the toilet. Is everything operating correctly? No leaks? Correct amount of water in the tank/toilet bowl? Note: in today’s water conserving toilets, there will never be enough water to fill the entire bowl, nor does there need to be to effectively operate.
Click the image above to see our Design Philosophy.
Okay, if you have gone through the above, you now qualify as one of the new superheros: you are now a: TOILET FIXER PERSON. Congratulations! You can also watch a video from some handymen going through the above procedures here:
Toilet Fill Valve Replacement Video.
For more useful information about your house, and if you need architectural designs for new houses or renovations, consider contacting: www.HomeArchitects.com Rand@HomeArchitects.com